


Models
>
GBS279PVS02
GBS279PVS02 Whirlpool Wall Oven
Jump to:
Find Part by Name
Keep searches simple, eg. "belt" or "pump".
Diagrams for GBS279PVS02
Viewing 6 of 6


Keep searches simple, eg. "belt" or "pump".

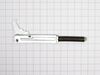
$21.82
This is a screw and it is made for multiple appliances in your home. This model is called a sheet metal screw because it has sharp points, and the threads are closer together. This screw is designed t...
In Stock
Order now and your part arrives by Aug 6

This interior oven door glass panel is the innermost layer of glass that faces the oven cavity when the door is closed. Engineered to withstand high temperatures, it plays a vital role in maintaining ...
In Stock
Order now and your part arrives by Aug 6

$73.24
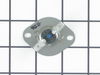
This temperature sensor detects the temperature within the oven cavity.
In Stock
Order now and your part arrives by Aug 6

$60.49
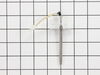
Also known as Thermal cut-off (fuse). This part establishes and maintains the internal temperature of the oven cavity.
In Stock
Order now and your part arrives by Aug 6

$27.83
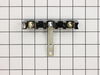
It provides a way of connecting individual electrical wires and offers protection of the device from electrical surges (voltages and/or currents).
In Stock
Order now and your part arrives by Aug 6

$49.29
This is a replacement light bulb to illuminate the inside of your oven. It is 25 watts and 120 volts. Please wear gloves during replacement if your existing bulb is shattered. Consider ordering a spar...
In Stock
Order now and your part arrives by Aug 6


In Stock
Order now and your part arrives by Aug 6

In Stock
Order now and your part arrives by Aug 6

In Stock
Order now and your part arrives by Aug 6

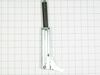
$7.60
Follow appropriate safety practices when installing your range screw. Sold individually.
In Stock
Order now and your part arrives by Aug 6

$207.50
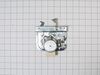
If your oven isn’t broiling like it used to, this broil element could be the fix. It’s mounted at the top of the oven and gives off direct heat for broiling and baking. With two outer coils and three ...
In Stock
Order now and your part arrives by Aug 6
Common Problems and Symptoms for GBS279PVS02
Viewing 9 of 9Little to no heat when baking
Fixed by these parts

How to fix it
Element will not heat
Fixed by these parts
How to fix it
Will Not Start
Fixed by these parts
How to fix it
Oven is too hot
Fixed by these parts
How to fix it
Door won’t open after self cleaning cycle
Fixed by these parts
How to fix it
Oven not heating evenly
Fixed by these parts
How to fix it
Door won’t close
Fixed by these parts

How to fix it
Little to no heat when broiling
Fixed by these parts

How to fix it
Touchpad does not respond
Fixed by these parts
How to fix it


Keep searches simple. Use keywords, e.g. "leaking", "pump", "broken" or "fit".
- Customer:
- Joseph from Worthington, PA
- Parts Used:
- WP9759242
- Difficulty Level:
- Really Easy
- Total Repair Time:
- 15 - 30 mins
- Tools:
- Screw drivers
Self Cleaning blows the thermostat fuse
Something Kitchen Aid wont tell you but running a self clean on this model stove blows the fuse located on the back of the stove.
First I slid the stove out and removed the back of the stove held in place by 8 Phillips screws. The thermostat fuse is located near the top middle on the back of the stove. Remove the 2 screws hold ... Read more ing it in place. Disconnect the wires, plug in the new part. Put it all back together. Job done in less than 30 minutes.
This repair would have cost $164 through A&E factory service.
Read less
Was this instruction helpful to you?
Thank you for voting!
- Customer:
- Evan from Albuquerque, NM
- Parts Used:
- WP4449253
- Difficulty Level:
- Really Easy
- Total Repair Time:
- Less than 15 mins
- Tools:
- Screw drivers
Inner window glass cracked
The first thing I did was to remove the oven door by releasing the two latches on the hinges (by hand). I then raised the door toward the vertical position and lifted up. The hinges slide out of the oven housing. I laid the door, inside face up on my island counter top. This ensures that none of the parts will fall when disassembling
... Read more
the door. Next I unscrewed the screws 4 top and bottom and four on the inside face. This releases the frame from the front housing. Lift the frame off the door, exposing the glass pieces. Lift off the broken inside glass and place the new piece in the glass retaining housing. Replace the outside frame and replace all screws. Take door back over to oven and slide hinge bottoms back into slots on oven. Rotate to horizontal position and flip latches back to locked position. Total time was about 10 minutes mainly because I was curious how the door was constructed and I poked around while it was disassembled.
Read less
Was this instruction helpful to you?
Thank you for voting!
- Customer:
- john from new market, MD
- Parts Used:
- WP9759242
- Difficulty Level:
- Really Easy
- Total Repair Time:
- 15 - 30 mins
- Tools:
- Screw drivers
Power shut down and door lock-up after self-cleaning
My wife used the self cleaning function for the first time after 1.5 years of owning, of course out of warranty. A quick google search identified the problem. Called Kitchenaid, they said of course it can't be that simple, they had never heard of this problem, need to schedule a service call. Googled and found this site, Ordered the part
... Read more
, came in, only took a screwdriver and about 20 minutes, just like all the other posts.
shame on Kitchenaid for not owning up to the problem. I even e-mailed them all the links, they did not acknowledge them.
shame on Kitchenaid for not owning up to the problem. I even e-mailed them all the links, they did not acknowledge them.
Read less
Was this instruction helpful to you?
Thank you for voting!