


Models
>
NV51K7772SG
NV51K7772SG (AA) Samsung Wall Oven
Jump to:
Find Part by Name
Keep searches simple, eg. "belt" or "pump".
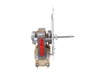
Diagrams for NV51K7772SG
Viewing 1 of 1
Keep searches simple, eg. "belt" or "pump".

In Stock
Order now and your part arrives by Mar 27

The convection fan motor spins the fan blade to circulate hot air through the oven for even heating.
In Stock
Order now and your part arrives by Mar 27

In Stock
Order now and your part arrives by Mar 27

On Order

$148.86
This oven temperature sensor plays a critical role in maintaining consistent cooking performance by monitoring the internal temperature and relaying that data to the control board. By regulating the h...
In Stock
Order now and your part arrives by Mar 27

In Stock
Order now and your part arrives by Mar 27

In Stock
Order now and your part arrives by Mar 27

In Stock
Order now and your part arrives by Mar 27

$175.93
This convection fan motor assembly is designed to circulate hot air evenly throughout the oven cavity, enhancing cooking performance by eliminating hot spots and promoting uniform heat distribution. M...
On Order

In Stock
Order now and your part arrives by Mar 27

In Stock
Order now and your part arrives by Mar 27

$6.51
This convection fan motor cap (part number DG67-00028A) is for ranges. Convection fan motor cap DG67-00028A holds the convection fan motor in place on the fan motor mounting bracket. Unplug the range ...
In Stock
Order now and your part arrives by Mar 27
Questions and Answers
We're sorry, but our Q&A experts are temporarily unavailable.
Please check back later if you still haven't found the answer you need.
Common Problems and Symptoms for NV51K7772SG
Viewing 4 of 4No heat
Fixed by these parts

How to fix it
Doesn’t shut off
Fixed by these parts
How to fix it
Won’t turn on
Fixed by these parts
How to fix it
Oven not heating evenly
Fixed by these parts
How to fix it


Keep searches simple. Use keywords, e.g. "leaking", "pump", "broken" or "fit".
- Customer:
- Sue from De Soto, IL
- Parts Used:
- DG31-00005C, DG96-00110E
- Difficulty Level:
- A Bit Difficult
- Total Repair Time:
- 30 - 60 mins
- Tools:
- Screw drivers, Socket set
Convection oven fans were noisy.
This oven has two fans that counter rotate. One spins clockwise, the other counterclockwise. Because of this, the motors and the fan blades are different. The schematic shows the counter clockwise rotating fan with a right hand threaded shaft/nut on the bottom and the clockwise motor and fan with the left hand nut on the top. My range
... Read more
had the motors in the exact opposite orientation, but the fan blades on the motors as shown on the schematic. The incorrect assembly at the factory (I bought new in the box, so I know this is the first repair) meant that nether fan blade was turning the correct direction. So do yourself a favor, be sure you’re buying the right motor (clockwise or counterclockwise) and be sure you put the right fan blade on the right motor. The Samsung motor ending in F is the counterclockwise motor that has the right hand threaded shaft the clockwise motor with the left hand threaded shaft ends in E.
Read less
Was this instruction helpful to you?
Thank you for voting!
- Customer:
- John from NASHVILLE, TN
- Parts Used:
- DG31-00005C
- Difficulty Level:
- Easy
- Total Repair Time:
- 30 - 60 mins
- Tools:
- Screw drivers, Socket set
Bearing went out on the fan
Slide out the stove. Unplug the electricity. Remove the back panel with a screwdriver. Then go inside the oven and remove the two Philips head screws holding the fan cover. Then remove the nut holding the fan. Note, it is a left handed nut, so turn it right to loosen it. Pull off the fan. Return to the back and remove the nut and two scr
... Read more
ews that hold the fan. The fan slides right out. The only problem I had was that the electrical contacts on the new motor were wider than the original. I had to break the plastic so I could separate the wire leads, so that they would fit the new motor. Works like a charm.
John
John
Read less
Was this instruction helpful to you?
Thank you for voting!
- Customer:
- Raymond from TROY, OH
- Parts Used:
- 3405-001034
- Difficulty Level:
- Easy
- Total Repair Time:
- 1- 2 hours
- Tools:
- Screw drivers
The microwave would not turn on or would run with the door open
Other tools that are usefull long needle nose pliers, long thin blade screw driver and small magnetic flashlight. Place the microwave on a work bench and remove the case it cover 3 sides. Place the microwave on a chair so it can stand with the controls up. You are replacing the lower door microswitch. The switch is located behind the
... Read more
control panel in the lower part of the area. The switch is several inches inside this area and your hands will not fit. Take care when moving wires and a couple of sensors. Use the thin blade screwdriver to release a tab holding the switch in place. Do not break this tab. Take the needle nose pliers and remove the switch. Put the wires on the new switch, open the door a short distance so a door lever moves enough to put the microswitch back into the bracket.
Read less
Was this instruction helpful to you?
Thank you for voting!