


Models
>
B8758B1
B8758B1 Roper Wall Oven
Jump to:
Find Part by Name
Keep searches simple, eg. "belt" or "pump".
Diagrams for B8758B1
Viewing 6 of 6


Keep searches simple, eg. "belt" or "pump".

In Stock
Order now and your part arrives by Jul 31

$7.60
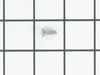
This is a multi-use screw and can be used on a variety of appliances. The measurements of the screw are: 8/18 x 3/8. *Please note: the screw is sold individually. Refer to the manual provided by the m...
In Stock
Order now and your part arrives by Jul 31

$7.60
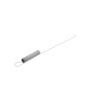
***The manufacturer suggests to replace both springs at the same time.***
In Stock
Order now and your part arrives by Jul 31

In Stock
Order now and your part arrives by Jul 31

In Stock
Order now and your part arrives by Jul 31

In Stock
Order now and your part arrives by Jul 31


Common Problems and Symptoms for B8758B1
Viewing 2 of 2

Keep searches simple. Use keywords, e.g. "leaking", "pump", "broken" or "fit".
- Customer:
- Leslie from Townsend, GA
- Parts Used:
- 279264
- Difficulty Level:
- Easy
- Total Repair Time:
- 1- 2 hours
- Tools:
- Nutdriver, Pliers, Screw drivers
Drum was binding because of worn bearing supporting front of dryer drum
First I unplugged the dryer for safety, then I removed the top of the dryer, then removed the 2 hex head screws holding the font door panel onto the dryer. Then I disconnected the door safety switch. the rest was cake. I removed the old bearing and cut the new bearing and seal to the exact size of the old one. I used contact cement to gl
... Read more
ue the new bearing and seal into place. Reassembly was a breeze. End of job. Success!!!
Read less
Was this instruction helpful to you?
Thank you for voting!
- Customer:
- Mark from Albuquerque, NM
- Parts Used:
- WP330190
- Difficulty Level:
- Really Easy
- Total Repair Time:
- Less than 15 mins
My stove top is 30 years old. I was down to one knob. I looked up the part by brand and age. the pictures were accurate and the size dimensions were perfect.
Pulled off the one remaining knob, installed the new ones. One minute and the stove works perfectly.
Was this instruction helpful to you?
Thank you for voting!
- Customer:
- Patrick from Manor, TX
- Parts Used:
- 279264
- Difficulty Level:
- Easy
- Total Repair Time:
- 1- 2 hours
- Tools:
- Screw drivers, Socket set
Rust marks on clothing
Our dryer was leaving rust marks on our clothes that looked like a brown pencil mark. It turns out that the rear drum seal in our dryer was absorbing gunk over the years and we had to change it. It was a fairly easy fix but did require pulling the dryer almost completely apart. While we had it apart we changed this as well.
Any ... Read more one with a socket stet and screw driver can get it all apart.
On our machine, start by removing the 2 screws that hold the lint filter neck to the top of the machine (under the flap).
Then pry the top of the machine up in the front. It will pop up and you can fold it back.
Then you will need to remove 2 bolts and undo the plug.
From there you can pull the front off and get to the drum.Make sure you note how the belt tensioner comes out (under the drum) and how the belt is routed. It's quite basic.
After you get the drum off, peel the old seal(s) off and put the new seal(s) on as directed.
Pretty easy and our clean clothes stay clean now.
Read less
Was this instruction helpful to you?
Thank you for voting!