



Models
>
LTEL7337D
LTEL7337D (ABDLLGA) LG Wall Oven
Jump to:
Find Part by Name
Keep searches simple, eg. "belt" or "pump".
Diagrams for LTEL7337D
Viewing 1 of 1
Keep searches simple, eg. "belt" or "pump".
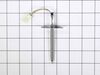
$78.20
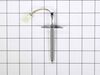
If your appliance isn’t heating or cooling the way it should, this temperature sensor might be the issue. Also known as a thermistor, it helps your appliance stay at the right temperature by working w...
In Stock
Order now and your part arrives by Oct 1
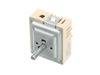
$96.60
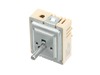
This rotary switch controls burner heat by adjusting power levels as you turn the knob. It’s a durable replacement for ranges with unresponsive or inconsistent burners. Be sure to confirm compatibility before installing.
In Stock
Order now and your part arrives by Oct 1
In Stock
Order now and your part arrives by Oct 1
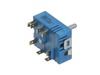
$96.60
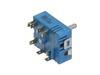
Designed for use in electric ranges, this rotary switch controls the heat level of surface burners by regulating power flow. It allows for smooth temperature adjustments and consistent cooking. If you...
In Stock
Order now and your part arrives by Oct 1
In Stock
Order now and your part arrives by Oct 1
Special Order
Special Order
In Stock
Order now and your part arrives by Oct 1
Special Order
In Stock
Order now and your part arrives by Oct 1
In Stock
Order now and your part arrives by Oct 1
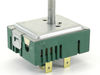
$90.15
This rotary (infinite) switch controls the heat level of a surface burner by regulating the power sent to the heating element. It allows for smooth, precise temperature adjustments during cooking and ...
Special Order
Common Problems and Symptoms for LTEL7337D
Viewing 5 of 5Element will not heat
Fixed by these parts
How to fix it
Little to no heat when baking
Fixed by these parts
How to fix it
Oven not heating evenly
Fixed by these parts
How to fix it
Oven is too hot
Fixed by these parts
How to fix it
Gas igniter glows, but will not light
Fixed by these parts
How to fix it
Keep searches simple. Use keywords, e.g. "leaking", "pump", "broken" or "fit".
- Customer:
- Barry from PIERRE, SD
- Parts Used:
- EAU62343001
- Difficulty Level:
- A Bit Difficult
- Total Repair Time:
- 30 - 60 mins
- Tools:
- Nutdriver, Screw drivers
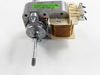
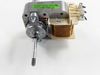
Convection Fan stopped working, would spin but not continuously on its own
Unplugged oven electric and turned gas off. Removed all back covers from the unit. Removed the cover on the inside covering the burner and fan in the back of the convection oven. Removed the nut securing the fan to motor shaft with helper holding the motor. Removed the three electrical wires attached to motor, making note where they go.
... Read more
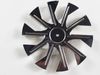
Removed screws mounting the motor to oven. Removed motor cooling fan and shaft spacer from old motor. Fit in same orientation on new motor. Replace all parts in reverse order, restore gas and electric, turn on and test.
Read less
Was this instruction helpful to you?
Thank you for voting!
- Customer:
- Richard from CHESAPEAKE, VA
- Parts Used:
- MEE62385201
- Difficulty Level:
- Easy
- Total Repair Time:
- 30 - 60 mins
- Tools:
- Screw drivers
Hammer 1, Glass range top and heating element 0
Dropped a hammer on the range while removing a ceiling light. Viewed a How-To video on Google. Ordered the needed parts. Followed the steps from the How-To video. Reinstall was a bit tricky by myself - could have used an extra set of hands. I have a few words of caution:
1) Put something between the range top and range - like a ... Read more sheet or drop cloth - to prevent a dropped screw from falling into a crevice in the stove. I dropped a screw and was unable to retrieve it, even with a magnet.
2) Makes sure you remove all bumpers, screws, clips, etc. from the item being replaced and put them on the new item if the new item does not come with replacement bumpers, screws, etc.
1) Put something between the range top and range - like a ... Read more sheet or drop cloth - to prevent a dropped screw from falling into a crevice in the stove. I dropped a screw and was unable to retrieve it, even with a magnet.
2) Makes sure you remove all bumpers, screws, clips, etc. from the item being replaced and put them on the new item if the new item does not come with replacement bumpers, screws, etc.
Read less
Was this instruction helpful to you?
Thank you for voting!
- Customer:
- Glenn from NEWLAND, NC
- Parts Used:
- EBG51439305
- Difficulty Level:
- Easy
- Total Repair Time:
- 1- 2 hours
- Tools:
- Pliers, Screw drivers
LG electric range completely shut down at end of oven cleaning cycle.
Trouble shooting took much longer than repair. Not obvious but a flow diagram in the LG service manual pointed towards a defective bimetal thermostat switch on the range inner back wall. The switch contacts tested bad when cold and this condition locks up the power module board to where it does not supply any DC power to the master contr
... Read more
oller board - thereby shutting down all oven operations. Thermostat is accessed after removal of the back panel via mounting screws plus removal/re-attaching unit spade lugs (needle nose pliers) plus removing/replacing the thermostat via one mounting screw. Phillip screw driver needed for panel access and thermostat disconnect. While I did in the course of troubleshooting, there is no real need to remove the oven top unit. Very inexpensive repair.
Read less
Was this instruction helpful to you?
Thank you for voting!