



Models
>
W214
W214 Jenn-Air Wall Oven
Jump to:
Find Part by Name
Keep searches simple, eg. "belt" or "pump".
Diagrams for W214
Viewing 7 of 7


Keep searches simple, eg. "belt" or "pump".
$19.75
This is a genuine OEM 40-Watt replacement light bulb that is compatible with various types of appliances. It has a frosted glass bulb with a standard metal socket base, making it easy to screw and uns...
In Stock
Order now and your part arrives by Oct 17
$21.82
This is a screw and it is made for multiple appliances in your home. This model is called a sheet metal screw because it has sharp points, and the threads are closer together. This screw is designed t...
In Stock
Order now and your part arrives by Oct 17
$7.60
This is a multi-use screw and can be used on a variety of appliances. The measurements of the screw are: 8/18 x 3/8. *Please note: the screw is sold individually. Refer to the manual provided by the m...
In Stock
Order now and your part arrives by Oct 17
$7.60
Sold individually. Lock washers are used with screws when vibration from an appliance may cause the screw to loosen. Lock washers are also used in the electrical components of an appliance to ensure ...
On Order
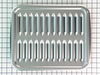
$50.36
This broiler pan and roasting rack set features a two-piece design that allows fat to drain away for cleaner cooking and reduced splatter. Made with a durable, high-heat resistant porcelain finish, it...
In Stock
Order now and your part arrives by Oct 17
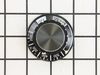
$52.50
This thermostat knob is two inches in diameter. It is a black knob with white numbering indicating the temperature inside the oven as well as the 'off' and 'clean' positions. There is also some chrome...
In Stock
Order now and your part arrives by Oct 17
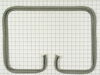
In Stock
Order now and your part arrives by Oct 17
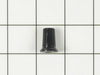
This clock knob is just under an inch long. It is black in color and is made of plastic. There is a chrome disc of decoration on its top.
No Longer Available
This upper selector knob is two inches in diameter. It is primarily black with white lettering denoting the many different functions of the oven: bake, convection, broil, off, and clean. Its center is...
No Longer Available
In Stock
Order now and your part arrives by Oct 17
$113.90
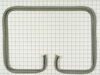
This oven door seal is twenty-one inches wide. This woven style door gasket is gray in color.
In Stock
Order now and your part arrives by Oct 17
$85.74
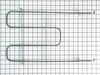
Get that perfect golden finish on your favorite dishes with this broil element, which provides direct heat from above to help brown and crisp food quickly. If your oven isn’t heating properly when bro...
In Stock
Order now and your part arrives by Oct 17
Common Problems and Symptoms for W214
Viewing 5 of 5Little to no heat when broiling
Fixed by these parts
How to fix it
Oven not heating evenly
Fixed by these parts
How to fix it
Element will not heat
Fixed by these parts
How to fix it
Little to no heat when baking
Fixed by these parts
How to fix it
Door won’t close
Fixed by these parts
How to fix it


Keep searches simple. Use keywords, e.g. "leaking", "pump", "broken" or "fit".
- Customer:
- Paul from Mickleton, NJ
- Parts Used:
- WPY702338
- Difficulty Level:
- Easy
- Total Repair Time:
- 15 - 30 mins
- Tools:
- Screw drivers
The oven door seal was ripped and was leaking.
The oven seal replacement was very straight forward. Two screws held the door to the arms coming from the oven. I slid the door up off the arm and moved it to a workbench. This whole process should take about 15 minutes, a little longer if your unit is older and you want to clean as you go. Mine was fairly dirty and I gave it a cleani
... Read more
ng as I removed parts. Unscrew all screws on the outer frame of the door, including two small ones on the side. Remove the outer frame and then the glass front and set them aside. A few more screws to remove the glass from the inner door, and even more on the remaining part of the door. You should also remove the screws holding the tiny brackets as well to release the portion that holds the oven seal in place. This is very straightforward, just keep pulling screws out until you can remove the old seal.
Once the old seal is out, insert the new one using the wire embedded in the seal as your guide...the gap in the seal goes to the bottom. Put everything back together and re-install the door. My door hinges were spring loaded and took a little effort to move them down so the door can be slipped on. This is a two person job since the hinges do not lock in place, they spring right back up flush with the oven and you cannot install the door. Re-install the two set screws holding the door to the hinges and you are done!
With the new seal in place, it felt a little puffy and the door did not seem to close as flush as it used to. This makes sense since the seal is new. I kept the door locked (like you would to use the oven cleaning cycle). I even kept it partially locked during cooking.
Frankly, the hardest part was the cleanup of nasty grease and dirt that built up over the past decade or so.
Best of luck!
Once the old seal is out, insert the new one using the wire embedded in the seal as your guide...the gap in the seal goes to the bottom. Put everything back together and re-install the door. My door hinges were spring loaded and took a little effort to move them down so the door can be slipped on. This is a two person job since the hinges do not lock in place, they spring right back up flush with the oven and you cannot install the door. Re-install the two set screws holding the door to the hinges and you are done!
With the new seal in place, it felt a little puffy and the door did not seem to close as flush as it used to. This makes sense since the seal is new. I kept the door locked (like you would to use the oven cleaning cycle). I even kept it partially locked during cooking.
Frankly, the hardest part was the cleanup of nasty grease and dirt that built up over the past decade or so.
Best of luck!
Read less
Was this instruction helpful to you?
Thank you for voting!
- Customer:
- Rosemary from Pawleys Island, SC
- Parts Used:
- WP701650
- Difficulty Level:
- A Bit Difficult
- Total Repair Time:
- More than 2 hours
- Tools:
- Screw drivers
seal was black and stiff from burned in spilled grease and sauce
Unscrewed and pulled the door off and then took the three layers of the door apart in order to clean off the burned-on goop and remove the old and insert the new seal. The last screw was rusted in and the drill stripped it so that it was impossible to remove. I levered the remaining two layers apart, holding them open with screw drive
... Read more
rs, and inserted the new seal. Had to be careful with the shaping of the metal core of the seal and the distribution of the sealing fabric. Phew! I saved the screws from each layer separately by taping them to the counter in the order of removal. This made reassembly easier. Getting the door back on was a bit difficult and I needed another pair of hands to help me.
Read less
Was this instruction helpful to you?
Thank you for voting!
- Customer:
- David from Durham, NC
- Parts Used:
- WP701650, WP5700M600-60
- Difficulty Level:
- Really Easy
- Total Repair Time:
- 30 - 60 mins
- Tools:
- Screw drivers
Outer glass in the oven door window shattered
1.remove the trim around the door (8 screws)
2.remove over glass panel (part with the handle)
Caution; the springs on the door are exactly set for the weight of the door. When we removed the outer glass panel, I almost killed my wife when the door slammed shut.
3.Remove inner metal cover (6-8 screws).some of these screws ... Read more were baked pretty tight so I used vise grips on their little heads to convince them to get turning.
4. To get the door window out you must also remove the inner enamel baked cover, held on by 5-6 screws from the back. This is also the pieces which holds the door seal in place, so it is a good time to change that as well.
5. After cleaning up all the broken glass from the old window, the new window slides right in - perfect fit!
Reverse the steps to put it all back together.
From the time the glass broke until it was completely repaired took only six days! Pretty amazing for a twenty year old oven.
2.remove over glass panel (part with the handle)
Caution; the springs on the door are exactly set for the weight of the door. When we removed the outer glass panel, I almost killed my wife when the door slammed shut.
3.Remove inner metal cover (6-8 screws).some of these screws ... Read more were baked pretty tight so I used vise grips on their little heads to convince them to get turning.
4. To get the door window out you must also remove the inner enamel baked cover, held on by 5-6 screws from the back. This is also the pieces which holds the door seal in place, so it is a good time to change that as well.
5. After cleaning up all the broken glass from the old window, the new window slides right in - perfect fit!
Reverse the steps to put it all back together.
From the time the glass broke until it was completely repaired took only six days! Pretty amazing for a twenty year old oven.
Read less
Was this instruction helpful to you?
Thank you for voting!