


Models
>
ZET1SM2SS
ZET1SM2SS General Electric Wall Oven
Jump to:
Find Part by Name
Keep searches simple, eg. "belt" or "pump".
Diagrams for ZET1SM2SS
Viewing 5 of 5


Keep searches simple, eg. "belt" or "pump".

In Stock
Order now and your part arrives by Jul 30

In Stock
Order now and your part arrives by Jul 30

$60.49
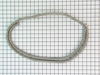
This oven door gasket helps seal in heat, ensuring even cooking and better energy efficiency. Made from durable rubber and fiberglass, it fits securely around the oven opening and is easy to install w...
In Stock
Order now and your part arrives by Jul 30

$155.32
The GE Oven Door Window Pack Assembly is a genuine OEM part that fits select GE ranges and ovens. It includes a heat-resistant inner glass panel, frame, and seals, providing insulation and clear visib...
In Stock
Order now and your part arrives by Jul 30

$15.26
This part is a replacement screw for your oven. It is made of black metal and is sold individually. This screw is approximately 1/4 inch in diameter and about 1/2 inch in length. It is designed to con...
In Stock
Order now and your part arrives by Jul 30

On Order

In Stock
Order now and your part arrives by Jul 30

Special Order

In Stock
Order now and your part arrives by Jul 30

On Order

Special Order

In Stock
Order now and your part arrives by Jul 30
Common Problems and Symptoms for ZET1SM2SS
Viewing 5 of 5Little to no heat when baking
Fixed by these parts
How to fix it
Oven not heating evenly
Fixed by these parts
How to fix it
Oven is too hot
Fixed by these parts
How to fix it
Element will not heat
Fixed by these parts
How to fix it
Will Not Start
Fixed by these parts
How to fix it


Keep searches simple. Use keywords, e.g. "leaking", "pump", "broken" or "fit".
- Customer:
- Sean from Highlands Ranch, CO
- Parts Used:
- WB23T10015
- Difficulty Level:
- Really Easy
- Total Repair Time:
- 15 - 30 mins
- Tools:
- Nutdriver, Screw drivers
Oven was not coming up to temperature
I had to remove the oven from the wall because the sensor plug connction is behind the unit. Two screws hold the sensor inside the oven and then I disconnected the lead and pulled the sensor out from the front. I installed the new sensor, tightened the two screws holding it in and connected the lead. Then reinstalled the oven into the wal
... Read more
l. Overall, a very easy repair once you get the oven out.
Read less
Was this instruction helpful to you?
Thank you for voting!
- Customer:
- Brian from Fairfield, CA
- Parts Used:
- WB23T10015
- Difficulty Level:
- Easy
- Total Repair Time:
- 15 - 30 mins
- Tools:
- Screw drivers
Actual temperature did not match set temp
Removed the oven door for easy acces to oven. Unscrewed (philips screwdriver) the screw holding temp sensor in place. Gently pulled the wiring until quick connector was located. Pushed down on locking level on quick connect while holding other end of wiring (so wiring would not fall back behind oven). Connected the new sensor and scre
... Read more
wed back in place. Reinstalled oven door. Tested temperature settings by turning on oven and comparing with a separate oven thermometer.
Read less
Was this instruction helpful to you?
Thank you for voting!
- Customer:
- George from Fiskdale, MA
- Parts Used:
- WB23T10015
- Difficulty Level:
- A Bit Difficult
- Total Repair Time:
- 30 - 60 mins
- Tools:
- Nutdriver, Screw drivers
F2 error code
After reviewing the potential causes for the error code, I decided I'd try to change out the temp sensor. Using the ohmeter, I saw the difference immediately between the old and new sensor. The sensor is accessed from the back of the stove, and must be slide out to gain access to the rear panel. Since the stove I have is a built in, re
... Read more
moving the stove and the access panel was the hardest part of this repair. Resetting the glass control panel was also a bit tricky to calibrate the touch sensitive buttons. Good luck.
Read less
Was this instruction helpful to you?
Thank you for voting!