


Models
>
JRS04GT1BB
JRS04GT1BB General Electric Wall Oven
Jump to:
Find Part by Name
Keep searches simple, eg. "belt" or "pump".
Diagrams for JRS04GT1BB
Viewing 3 of 3


Keep searches simple, eg. "belt" or "pump".

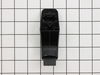
This authentic OEM part is an end cap for the door handle on your oven. It is black in color, made of plastic, can be used on either the left or right-hand side of the handle, and is sold individually...
No Longer Available

In Stock
Order now and your part arrives by Jul 23

In Stock
Order now and your part arrives by Jul 23

In Stock
Order now and your part arrives by Jul 23

$43.92
This is a broiler pan for your range. It catches drippings from the cookware, when broiling in the oven. This assembly includes the grill/grate and the bottom pan. These parts are made of porcelain. T...
In Stock
Order now and your part arrives by Jul 23

In Stock
Order now and your part arrives by Jul 23

This door seal goes around the oven body to help seal in the heat of the oven.
No Longer Available

Special Order


Special Order

Common Problems and Symptoms for JRS04GT1BB
Viewing 6 of 6Little to no heat when baking
Fixed by these parts

How to fix it
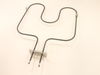
Element will not heat
Fixed by these parts
How to fix it
Little to no heat when broiling
Fixed by these parts
How to fix it
Oven not heating evenly
Fixed by these parts
How to fix it
Door won’t close
Fixed by these parts
How to fix it
Oven is too hot
Fixed by these parts
How to fix it

Keep searches simple. Use keywords, e.g. "leaking", "pump", "broken" or "fit".
- Customer:
- Carl from Wynnewood, PA
- Parts Used:
- WB44K5013
- Difficulty Level:
- Really Easy
- Total Repair Time:
- Less than 15 mins
- Tools:
- Nutdriver
bake element shorted out, sparking like a sparkler
first, made sure circuit breaker was off
second, used nut driver to remove 2 screws on old element, pulled it from the back of the oven
third, removed 2 wires from old element (spade connectors)
fourth, connected new element and pushed back into oven.
fifth, reinstalled 2 screws securing new element
this was ... Read more all done by my 15 yr old son under my supervision.
Read less
Was this instruction helpful to you?
Thank you for voting!
- Customer:
- Dianne from Rockville, MD
- Parts Used:
- WB44K5009
- Difficulty Level:
- Easy
- Total Repair Time:
- Less than 15 mins
- Tools:
- Nutdriver
The broiler element caught fire and burned out while I was broiling a steak.
First I removed the two screws that hold the element in place. I then pulled the element out about 3 inches, but I had not turned off the power.
So, I shorted out one of the wires. Then I turned off the power but was afraid to go any farther.
An appliance repairman was at my house that day fixing my dryer seal. He was able to pu ... Read more ll the wires through the insulation successfully and install the broiler element. He did not charge me any extra for this little extra job. But I learned my lesson. Cut the power before you begin! He told me that I could have wound up with a much bigger repair if the short had been in the wire that is connected to the control panel of the oven. I was very lucky!
Read less
Was this instruction helpful to you?
Thank you for voting!
- Customer:
- eric from washington, DC
- Parts Used:
- WB32K5050
- Difficulty Level:
- Really Easy
- Total Repair Time:
- Less than 15 mins
- Tools:
- Screw drivers
oven door seal was old and falling apart
at first thought the seal would just slide out and the same for the replacement. when I realized that this was not the case and began to wonder what....? I saw the screws at top and bottom, took them off and voila the inner shell moved forward enough to take out the old, slide in the new, push in, replace the screws and back to a happy w
... Read more
ife with an oven that can bake correctly again
Read less
Was this instruction helpful to you?
Thank you for voting!