


Models
>
CE35111AAV
CE35111AAV Crosley Wall Oven
Jump to:
Find Part by Name
Keep searches simple, eg. "belt" or "pump".
Diagrams for CE35111AAV
Viewing 6 of 6


 Diagram and Parts List for Crosley Wall Oven")
Keep searches simple, eg. "belt" or "pump".

$19.75
This is a genuine OEM 40-Watt replacement light bulb that is compatible with various types of appliances. It has a frosted glass bulb with a standard metal socket base, making it easy to screw and uns...
In Stock
Order now and your part arrives by Aug 2

$42.85
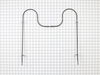
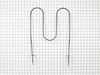
If your oven is not coming up to temperature, has inconsistent or fluctuating temperatures, or just will not heat at all, there may be an issue with the bake element. This part is found at the bottom ...
In Stock
Order now and your part arrives by Aug 2
 – Part Number: W11665456")
$24.00
This part includes one range leveling leg, sourced directly from the original manufacturer. The leveling leg is what supports the range and ensures it is sitting level, stable, and at the proper heigh...
In Stock
Order now and your part arrives by Aug 2

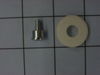
$21.82
This is a screw and it is made for multiple appliances in your home. This model is called a sheet metal screw because it has sharp points, and the threads are closer together. This screw is designed t...
In Stock
Order now and your part arrives by Aug 2

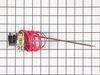
$27.83
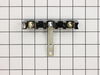
It provides a way of connecting individual electrical wires and offers protection of the device from electrical surges (voltages and/or currents).
In Stock
Order now and your part arrives by Aug 2

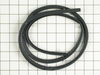
$54.12
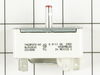
This door seal is fifty-three inches long. It is all black in color and is made of rubber. There are metallic clips sticking out of this seal at various points. These clips help to secure the seal to range doors.
In Stock
Order now and your part arrives by Aug 2

In Stock
Order now and your part arrives by Aug 2

In Stock
Order now and your part arrives by Aug 2

This wheel and shaft is used to open and close the bottom storage drawer of a range/stove.
No Longer Available

In Stock
Order now and your part arrives by Aug 2

In Stock
Order now and your part arrives by Aug 2

$22.91
This knob is two inches in diameter. It is white in color and it has a gray indicator triangle. This knob is made entirely of plastic and it will accept a 'D' shaped shaft.
Special Order
Common Problems and Symptoms for CE35111AAV
Viewing 8 of 8Little to no heat when baking
Fixed by these parts
How to fix it
Element will not heat
Fixed by these parts
How to fix it
Oven not heating evenly
Fixed by these parts
How to fix it
Little to no heat when broiling
Fixed by these parts
How to fix it
Will Not Start
Fixed by these parts
How to fix it
Oven is too hot
Fixed by these parts
How to fix it
Door won’t close
Fixed by these parts
How to fix it
Touchpad does not respond
Fixed by these parts
How to fix it


")


Keep searches simple. Use keywords, e.g. "leaking", "pump", "broken" or "fit".
- Customer:
- Heather from Huntsville, AL
- Parts Used:
- WP74010750
- Difficulty Level:
- Really Easy
- Total Repair Time:
- 15 - 30 mins
- Tools:
- Screw drivers
The element broke in two pieces after food dried on it.
First, I unplugged the oven. Then, I removed the two screws that hold the element in place. After that, I gently pulled the element toward the front of the oven until the wires were exposed. I disconnected the wires from the old element, removed the old element and then attached the wires to the new baking element. I gently pushed the
... Read more
new element back into the screw holes and screwed the new element in place. When I plugged the oven back into the wall I heard a pop and thought I'd blown up the oven! Turns out the breaker popped...after fixing the breaker, I turned the oven on and the element worked just fine. I highly recommend PartSelect.com for their fast shipping and great products. I will be ordering from them again for future appliance parts.
Read less
Was this instruction helpful to you?
Thank you for voting!
- Customer:
- Dennis from Hagerstown, MD
- Parts Used:
- 7403P239-60
- Difficulty Level:
- Really Easy
- Total Repair Time:
- Less than 15 mins
- Tools:
- Screw drivers
The Burner was getting too hot and you could not regular the tempature
Moved the Appliance out unplugged it and removed the backing plate then Remove the Knob and unscrew the infinite switch then marking the 5 wires to know where the go on the new switch, removing and replaced it with the new one
Was this instruction helpful to you?
Thank you for voting!
- Customer:
- alexander from Birmingham, AL
- Parts Used:
- WP74010750
- Difficulty Level:
- Easy
- Total Repair Time:
- Less than 15 mins
- Tools:
- Screw drivers
bake element burned out.
First, I shut off power to stove(a must).
Removed two screws that hold element in place.
Gentley pulled element toward door opening.
Once wire is expose, hold back of element and pull gentley to seperate element from wire slot.
Connect new element to wire and replace screws.
Removed two screws that hold element in place.
Gentley pulled element toward door opening.
Once wire is expose, hold back of element and pull gentley to seperate element from wire slot.
Connect new element to wire and replace screws.
Was this instruction helpful to you?
Thank you for voting!