



Models
>
AOES3030SS-P113237NSS
AOES3030SS-P113237NSS Amana Wall Oven
Jump to:
Find Part by Name
Keep searches simple, eg. "belt" or "pump".
Diagrams for AOES3030SS-P113237NSS
Viewing 6 of 6


Keep searches simple, eg. "belt" or "pump".
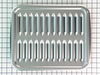
$50.36
This broiler pan and roasting rack set features a two-piece design that allows fat to drain away for cleaner cooking and reduced splatter. Made with a durable, high-heat resistant porcelain finish, it...
In Stock
Order now and your part arrives by Oct 19
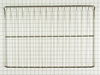
$54.95
This is an authentic OEM replacement part. This wire oven rack is used un ranges, microwave oven combs, and wall ovens. This wire rack is made of metal, and it is chrome in color. It is approximately ...
On Order
In Stock
Order now and your part arrives by Oct 19
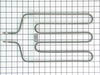
$78.71
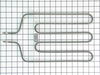
This broil element is a high-heat replacement component designed to provide radiant top-down cooking heat. It is commonly replaced when broiling performance is uneven or the element no longer heats. A...
On Order
In Stock
Order now and your part arrives by Oct 19
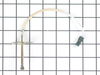
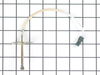
This is a genuine OEM replacement part. Temperature sensors work to determine the internal cooking temperature of your wall oven or range. When you are getting a F3 error code on your range or wall ov...
No Longer Available
$21.82
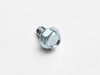
This is a genuine OEM replacement part. This screw is commonly used in the assembly of ranges, refrigerators, cooktops, air conditioners, wall ovens, dryers, microwave oven combos, microwaves, and was...
Special Order

Common Problems and Symptoms for AOES3030SS-P113237NSS
Viewing 3 of 3Little to no heat when broiling
Fixed by these parts
How to fix it
Element will not heat
Fixed by these parts
How to fix it
Little to no heat when baking
Fixed by these parts
How to fix it

Keep searches simple. Use keywords, e.g. "leaking", "pump", "broken" or "fit".
- Customer:
- Suzanne from Acton, MA
- Parts Used:
- WP31968201
- Difficulty Level:
- Really Easy
- Total Repair Time:
- Less than 15 mins
- Tools:
- Screw drivers
F1 F2 & F3 error codes
This is a very easy repair as the sensor had 2 screws and slid out of the back of the inside of the oven just enough to hook up the new one. I never had to back the oven out of the wall. It is a 5 minute repair. Ok I did use my son's head lamp from scouts for better light as you have to kill the power to the oven, so no oven light. And yo
... Read more
u can't hold a flashlight and do this alone.
However, I ordered the part before I took the old part out. Don't do that. There are 2 froms of Temp sensors that you can order one male and one female. I did not know that and just ordered what looked to be the right part. It turned out that I needed the female sensor. When I called the folks at part select they were terrific! They sent out the new part the next day and a UPS form via email to send the other part back.
I don't know what a service call would have been but this was very easy. I will go here first for appliance parts. Women can fix stuff too!
However, I ordered the part before I took the old part out. Don't do that. There are 2 froms of Temp sensors that you can order one male and one female. I did not know that and just ordered what looked to be the right part. It turned out that I needed the female sensor. When I called the folks at part select they were terrific! They sent out the new part the next day and a UPS form via email to send the other part back.
I don't know what a service call would have been but this was very easy. I will go here first for appliance parts. Women can fix stuff too!
Read less
Was this instruction helpful to you?
Thank you for voting!
- Customer:
- Raymond from BLOOMINGTON, MN
- Parts Used:
- 4396923
- Difficulty Level:
- Very Easy
- Total Repair Time:
- Less than 15 mins
Purchased home but stove had no broiler pan.
Purchased 2 piece broiler pan from this site
Was this instruction helpful to you?
Thank you for voting!
- Customer:
- Frederick from Snow Hill, MD
- Parts Used:
- WP77001099
- Difficulty Level:
- Really Easy
- Total Repair Time:
- 15 - 30 mins
- Tools:
- Pliers, Screw drivers
Broil element broken
First, turn off power to oven. There are six Phillips head screws on the pan above the element and 2 securing the element to the pan. Remove all screws and pull unit toward you, then slide off electrical wires from the element. To remove the element from the pan use the pliers to bend back metal hooks. Place new element under hooks, b
... Read more
ending the metal to hold element in place and replace 2 screws securing the element to the pan. Join wires to element and push unit with wiring back into oven wall. Replace 6 screws holding pan to top of oven, turn on power, and voila!
Read less
Was this instruction helpful to you?
Thank you for voting!