



Models
>
AOCD2770E-P1132359NE
AOCD2770E-P1132359NE Amana Wall Oven
Jump to:
Find Part by Name
Keep searches simple, eg. "belt" or "pump".
Diagrams for AOCD2770E-P1132359NE
Viewing 5 of 5


Keep searches simple, eg. "belt" or "pump".
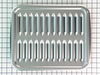
$50.36
This broiler pan and roasting rack set features a two-piece design that allows fat to drain away for cleaner cooking and reduced splatter. Made with a durable, high-heat resistant porcelain finish, it...
In Stock
Order now and your part arrives by Oct 16
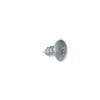
$7.60
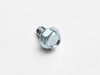
This is a multi-use frame screw that fits a variety of power tools and equipment. Follow installation instructions and safety practices provided in the manual by the manufacturer.
Special Order
In Stock
Order now and your part arrives by Oct 16
Special Order
In Stock
Order now and your part arrives by Oct 16
$21.82
This is a genuine OEM replacement part. This screw is commonly used in the assembly of ranges, refrigerators, cooktops, air conditioners, wall ovens, dryers, microwave oven combos, microwaves, and was...
Special Order


Keep searches simple. Use keywords, e.g. "leaking", "pump", "broken" or "fit".
- Customer:
- Raymond from BLOOMINGTON, MN
- Parts Used:
- 4396923
- Difficulty Level:
- Very Easy
- Total Repair Time:
- Less than 15 mins
Purchased home but stove had no broiler pan.
Purchased 2 piece broiler pan from this site
Was this instruction helpful to you?
Thank you for voting!
- Customer:
- Freddie from Lowell, OR
- Parts Used:
- WP77001245
- Difficulty Level:
- Easy
- Total Repair Time:
- 15 - 30 mins
- Tools:
- Pliers, Screw drivers
Door on range would not close for self cleaning
First turn off power to stove with breaker or unplug it. Then remove three screws under the front of cook top, and lifted up cook top from the front. Then brace it up with a stick about 20 inches long so you can work. Now locate the latch at the front of range. Next get some paper and labeled where each wire is connected by color. Remove
... Read more
wires from old part, next take out two screws by the front of part. Remove a clip on left side of part that is holding the wires. Take old part out and replace with new part, put back the two screws in front of part. Next put the wires back on using the list you made. Then replace clip to hold wires. Now turn power back on,or plug it back in. Reset clock and your done.
Read less
Was this instruction helpful to you?
Thank you for voting!
- Customer:
- Jeff from Wrightstown, WI
- Parts Used:
- WP77001245
- Difficulty Level:
- Really Easy
- Total Repair Time:
- 15 - 30 mins
- Tools:
- Screw drivers
Autolatch assembly did not work
The repairman that had come had stated that this part is no longer made, but I was able to locate one through PartSelect and was able to replace it with minimal effort.
I removed the three screws that held down the stove glass top surface and had a person hold the stove top up while I removed the two screws which held the autol ... Read more atch assembly in place. I then swapped the leads from the failed assembly to the new one and replaced the screws which were removed. New assembly tested out fine and oven was able to self-clean again.
I removed the three screws that held down the stove glass top surface and had a person hold the stove top up while I removed the two screws which held the autol ... Read more atch assembly in place. I then swapped the leads from the failed assembly to the new one and replaced the screws which were removed. New assembly tested out fine and oven was able to self-clean again.
Read less
Was this instruction helpful to you?
Thank you for voting!