


Models
>
A59F-5TXWM-R
A59F-5TXWM-R Admiral Wall Oven
Jump to:
Find Part by Name
Keep searches simple, eg. "belt" or "pump".
Diagrams for A59F-5TXWM-R
Viewing 4 of 4


.gif "MICROWAVE Diagram and Parts List for Admiral Wall Oven")
Keep searches simple, eg. "belt" or "pump".

$27.83
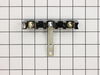
It provides a way of connecting individual electrical wires and offers protection of the device from electrical surges (voltages and/or currents).
In Stock
Order now and your part arrives by Jul 26

$7.60
This is a multi-use frame screw that fits a variety of power tools and equipment. Follow installation instructions and safety practices provided in the manual by the manufacturer.
In Stock
Order now and your part arrives by Jul 26

In Stock
Order now and your part arrives by Jul 26

On Order

In Stock
Order now and your part arrives by Jul 26

Special Order

This clip helps to hold the exterior glass in place. Order quantity required.
No Longer Available

In Stock
Order now and your part arrives by Jul 26

Special Order


In Stock
Order now and your part arrives by Jul 26
Common Problems and Symptoms for A59F-5TXWM-R
Viewing 5 of 5Will Not Start
Fixed by these parts
How to fix it
Element will not heat
Fixed by these parts
How to fix it
Little to no heat when baking
Fixed by these parts
How to fix it
Touchpad does not respond
Fixed by these parts
How to fix it
Oven not heating evenly
Fixed by these parts
How to fix it

Keep searches simple. Use keywords, e.g. "leaking", "pump", "broken" or "fit".
- Customer:
- Joseph from Decatur, GA
- Parts Used:
- WPW10245259
- Difficulty Level:
- Easy
- Total Repair Time:
- 30 - 60 mins
- Tools:
- Nutdriver, Screw drivers, Socket set, Wrench set
Burned terminal block and filter board
Removed and replaced above named parts, rewired.Be sure to tighten all nuts that secure wires. I believe this is what caused the problem.
Was this instruction helpful to you?
Thank you for voting!
- Customer:
- David from Wayne, NJ
- Parts Used:
- 7902P097-60, 3804F051-80
- Difficulty Level:
- Easy
- Total Repair Time:
- 30 - 60 mins
- Tools:
- Screw drivers
Inner Oven Glass broken
I removed two retainer screws which released the outside panel.
Next I removed 2 screws which hold the middle glass pane from one of its retainer brackets.
The was another panel with 4 screws to remove before reaching the final glass inner assembly.
Once that panel was reoved with the broken glass it was time to put the rep ... Read more acement glass assembly back together.
Read less
Was this instruction helpful to you?
Thank you for voting!
- Customer:
- Jared from UNION GROVE, AL
- Parts Used:
- WPW10245259
- Difficulty Level:
- Really Easy
- Total Repair Time:
- 30 - 60 mins
- Tools:
- Pliers, Screw drivers, Socket set
The oven and ranges would not heat up and an F9 error was displaying on the Oven Screen.
So, the F9 error indicates a electrical power issue. First I pulled the oven out and verified I had 240 volts at my outlet.
Then I removed the fire panel over the terminal block and the issue was apparent. The nuts on the terminal block were corroded. This had cause the resistance in the connection to raise and burn up the ... Read more wire to my oven plug at the terminal block.
I removed the whole back panel and everything else seemed OK visually.
1. I go new connectors for the oven plug, stripped the wires, and crimped on the new connectors.
2. The terminal block DOES NOT come with the nuts to connect the wire to the terminal block. Mine were so corroded they had to be replaced. So I went and purchased the correct ones and installed the terminal block and reconnected all the wires.
3. I applied some dielectric grease to the connections through out the process of reinstalling to prevent it from happening in the future.
Read less
Was this instruction helpful to you?
Thank you for voting!