



Models
>
P10D23
P10D23 Magic Chef Trash Compactor
Jump to:
Find Part by Name
Keep searches simple, eg. "belt" or "pump".
Keep searches simple, eg. "belt" or "pump".
In Stock
Order now and your part arrives by Oct 16
In Stock
Order now and your part arrives by Oct 16
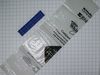
Plastic compactor bags. 50% post-consumer recycled plastic 3 millimeters thick to protect from tearing. Slip-N-Grip design prevents the bag from slipping into the compactor. Fits 15" rectangular compactors.
In Stock
Order now and your part arrives by Oct 16
$72.17
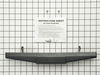
This is a genuine OEM replacement part. This foot pedal is designed for use with trash compactors. This foot pedal is located at the bottom of the appliance, it is attached to the footplate. This foot...
In Stock
Order now and your part arrives by Oct 16
$27.83
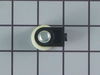
This is an OEM part sourced directly from the manufacturer. This wheel assembly kit is for use with trash compactors. The kit included two wheel bearings. These bearings allow the container drawer to ...
In Stock
Order now and your part arrives by Oct 16
On Order
$20.72
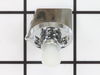
This replacement knob and safety key is designed for trash compactors, providing both convenient operation and added protection. It functions as the start control, allowing you to easily activate the ...
In Stock
Order now and your part arrives by Oct 16
In Stock
Order now and your part arrives by Oct 16
In Stock
Order now and your part arrives by Oct 16
In Stock
Order now and your part arrives by Oct 16
$78.91
This is an OEM part sourced directly from the manufacturer. This latch assembly is designed for use with trash compactors. This latch holds the container drawer closed when the trash compactor is oper...
On Order

Common Problems and Symptoms for P10D23
Viewing 5 of 5Drawer is hard to open and or close
Fixed by these parts
How to fix it
Won’t start
Fixed by these parts
How to fix it
Doesn’t stop at end of compacting cycle
Fixed by these parts
How to fix it
Light not working
Fixed by these parts
How to fix it
Won’t stay on
Fixed by these parts
How to fix it
Keep searches simple. Use keywords, e.g. "leaking", "pump", "broken" or "fit".
- Customer:
- Ron from El Paso, TX
- Parts Used:
- 776594
- Difficulty Level:
- Really Easy
- Total Repair Time:
- Less than 15 mins
- Tools:
- Pliers
Old Plastic Compactor Key Became Brittle and Broke
Original key part number was 776586 as found underneath the the rim of the broken key. It's known as a compactor key, or a key-knob, but in layman's terms, I would call it the "off-on-start" knob. The replacement part number was 386676, and fits perfectly.
The original key had become old and brittle, and eventually just broke a ... Read more part. This was a 30+ year old Whirlpool Trash Compactor key. I just picked out the bits of the old broken key with needle-nose pliers and then easily inserted the new key into the opening.
Note, this literally works just like a key you would insert into any lock. It doesn't require pushing to "snap" into place, but once inserted and turned to the "ON" position, locks into place. No forcing is required at all.
The new key looks exactly like the original and is working very smoothly.
The original key had become old and brittle, and eventually just broke a ... Read more part. This was a 30+ year old Whirlpool Trash Compactor key. I just picked out the bits of the old broken key with needle-nose pliers and then easily inserted the new key into the opening.
Note, this literally works just like a key you would insert into any lock. It doesn't require pushing to "snap" into place, but once inserted and turned to the "ON" position, locks into place. No forcing is required at all.
The new key looks exactly like the original and is working very smoothly.
Read less
Was this instruction helpful to you?
Thank you for voting!
- Customer:
- Ryan from Delta, CO
- Parts Used:
- 675382
- Difficulty Level:
- Easy
- Total Repair Time:
- Less than 15 mins
- Tools:
- Screw drivers
Trash compactor would not start
Remove two screws from panel above trash bin. Remove panel and remove wires from rotary switch. Remove lock ring from switch. Install in reverse order.
Was this instruction helpful to you?
Thank you for voting!
- Customer:
- Preston from Memphis, TN
- Parts Used:
- 882657
- Difficulty Level:
- Easy
- Total Repair Time:
- 15 - 30 mins
- Tools:
- Screw drivers
To replace old pedal where screw hole was stripped
Had to remove entire drawer from unit to more easily access pedal placement. Removed old pedal. Screwed new pedal in place. Replaced drawer unit. Done.
Was this instruction helpful to you?
Thank you for voting!