


Models
>
ME21A706BQN
ME21A706BQN (AC) Samsung Microwave
Jump to:
Find Part by Name
Keep searches simple, eg. "belt" or "pump".
Diagrams for ME21A706BQN
Viewing 1 of 1
Keep searches simple, eg. "belt" or "pump".

In Stock
Order now and your part arrives by Apr 9

$106.16
If you discover that the glass cooking tray in your microwave is damaged, you may have to replace it to operate the microwave properly. The glass cooking tray connects to the turntable of the microwav...
In Stock
Order now and your part arrives by Apr 9

In Stock
Order now and your part arrives by Apr 9

In Stock
Order now and your part arrives by Apr 9

In Stock
Order now and your part arrives by Apr 9

In Stock
Order now and your part arrives by Apr 9

$31.05
This part is the replacement flat bolt for your microwave. It is a Phillips-head screw, which is approximately 4 inches long. The main reason to replace this bolt is if your current bolt is stripped, ...
In Stock
Order now and your part arrives by Apr 9

In Stock
Order now and your part arrives by Apr 9

In Stock
Order now and your part arrives by Apr 9

In Stock
Order now and your part arrives by Apr 9

In Stock
Order now and your part arrives by Apr 9

Special Order
Questions and Answers
We're sorry, but our Q&A experts are temporarily unavailable.
Please check back later if you still haven't found the answer you need.
Common Problems and Symptoms for ME21A706BQN
Viewing 5 of 5No heat
Fixed by these parts


How to fix it
Won’t turn on
Fixed by these parts
How to fix it
Doesn’t shut off
Fixed by these parts
How to fix it
Door not closing properly
Fixed by these parts
How to fix it
Tray won’t turn
Fixed by these parts

How to fix it

Keep searches simple. Use keywords, e.g. "leaking", "pump", "broken" or "fit".
- Customer:
- Ted from Hudson, NH
- Parts Used:
- DE91-70063D
- Difficulty Level:
- Easy
- Total Repair Time:
- 30 - 60 mins
- Tools:
- Pliers, Screw drivers
Buzzing noise, no heating of food
Removed control panel, discharged HV capacitor. Removed old diode, tested to confirm failure. Replaced part. Other than the removal of the panel swapping the part was almost as easy as replacing a light bulb.
Was this instruction helpful to you?
Thank you for voting!
- Customer:
- Bob from WILTON, CT
- Parts Used:
- DG47-00010B
- Difficulty Level:
- Easy
- Total Repair Time:
- 30 - 60 mins
- Tools:
- Screw drivers
Touchpad for oven wasn't working, but top gas burners were.
I initially thought I needed a new touch control panel but after a bit of research on the web and numerous videos and articles on replacing the control panel, I found an obscure video and forum where they mentioned that this thermostat fuse has been known to overheat and shut down the oven (touch controls) for safety reason. By the way,
... Read more
my unit is 3 years old and the warranty expired one month ago! I took the top off, found the fuse and tested it with a Multi-meter (again, thanks to some very helpful youtube videos out there). Dead. I figured it was worth a try and ordered the $20 part as opposed to the much more expensive control.
> remove all of the gas burners on the stove (a total of about a dozen screws)
> then remove the top back vent and the screws that hold the top metal piece in place
> you will see the thermostat fuse towards the back in the middle.
> loosen one screw and replace
> put back together in reverse order.
*** You do NOT have to remove the front piece as some videos and articles mention.
The total time should be about 20 minutes. With a little patience and pre-homework, it's easy and you'll save a couple hundred in labor costs.
Good Luck.
Read less
Was this instruction helpful to you?
Thank you for voting!
- Customer:
- Lynn from LOUISVILLE, KY
- Parts Used:
- DE66-90106B, DE66-00168B, 3405-001033, 3405-001034
- Difficulty Level:
- Really Easy
- Total Repair Time:
- 15 - 30 mins
- Tools:
- Screw drivers
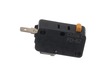
Microwave would not start when door closed. Sometimes you could push in or jiggle door and it would work for awhile and then it woud stop again. I knew it eas a door switch issue but wasn't certain which of the 3 or the body latch itself.
I removed the body latch assembly and found the bottom micro switch (NC) terminal burnt and loose. I replaced and working perfectly fine now. Easy diagnose and easy repair.
Was this instruction helpful to you?
Thank you for voting!