



Models
>
BRS70HRBNA00
BRS70HRBNA00 Whirlpool Refrigerator
Jump to:
Find Part by Name
Keep searches simple, eg. "belt" or "pump".
Diagrams for BRS70HRBNA00
Viewing 12 of 12


Keep searches simple, eg. "belt" or "pump".
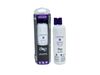
Transform your daily hydration routine with the EDR1RXD1 water filter. It delivers pure, refreshing water for your family, enhancing the taste of your drinks and meals. Quick to install and long-lasti...
In Stock
Order now and your part arrives by Oct 22
In Stock
Order now and your part arrives by Oct 22
In Stock
Order now and your part arrives by Oct 22
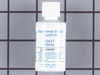
This 18 ml bottle of white appliance touch-up paint is used to cover scratches or marks on your appliance. The white touch-up paint can be used on refrigerators, microwaves, ranges, clothes dryers, an...
No Longer Available
$28.91
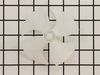
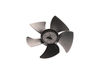
If your refrigerator or freezer is too warm, or making noises, you may need to replace the fan blade. The fan blade attaches to the evaporator motor, which is in the freezer section, to help circulate...
In Stock
Order now and your part arrives by Oct 22
In Stock
Order now and your part arrives by Oct 22
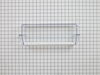
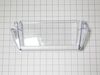
This door bin is clear with a white trim across the top. This part measures approximately 18 inches wide by 3-1/2 inches high by 6 inches deep. Sold individually.
In Stock
Order now and your part arrives by Oct 22
$13.07
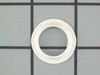
This part is a replacement refrigerator drive shaft seal for your refrigerator. The drive shaft seal protects the auger motor from water and condensation that may leak down the drive shaft from the ic...
In Stock
Order now and your part arrives by Oct 22
In Stock
Order now and your part arrives by Oct 22
In Stock
Order now and your part arrives by Oct 22
In Stock
Order now and your part arrives by Oct 22
In Stock
Order now and your part arrives by Oct 22
Common Problems and Symptoms for BRS70HRBNA00
Viewing 15 of 15Light not working
Fixed by these parts
How to fix it
Ice maker won’t dispense ice
Fixed by these parts
How to fix it
Noisy
Fixed by these parts
How to fix it
Ice maker not making ice
Fixed by these parts
How to fix it
Leaking
Fixed by these parts

How to fix it
Door won’t open or close
Fixed by these parts
How to fix it
Fridge too warm
Fixed by these parts
How to fix it
Not dispensing water
Fixed by these parts
How to fix it
Fridge too cold
Fixed by these parts
How to fix it
Door latch failure
Fixed by these parts
How to fix it
Ice maker dispenses too little ice
Fixed by these parts
How to fix it
Too warm
Fixed by these parts
How to fix it
Freezer not defrosting
Fixed by these parts
How to fix it
Clicking sound
Fixed by these parts
How to fix it
Freezer section too warm
Fixed by these parts
How to fix it




Keep searches simple. Use keywords, e.g. "leaking", "pump", "broken" or "fit".
- Customer:
- Clint from Rayville, MO
- Parts Used:
- W11384469
- Difficulty Level:
- Really Easy
- Total Repair Time:
- Less than 15 mins
- Tools:
- Screw drivers
Lights inside refrigerator not working
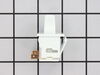
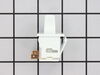
I used a flat-head screwdriver to pop out the old light rocker switch. Then, I unplugged the wires, plugged them into the new light rocker switch, and then popped the new switch into the hole. That's it! Lights began working again.
Was this instruction helpful to you?
Thank you for voting!
The bin coupler broke in half
When I inspected the ice bin I noticed the bin coupler was in half. So I ordered the part. I removed the screw that held in the old part. I saved the two washers. Simply following the diagram on the website made reassembly a piece of cake. It is obvious which piece is the coupling as only it can fit the other coupling. I put the screw bac
... Read more
k in and it was done.
Read less
Was this instruction helpful to you?
Thank you for voting!
- Customer:
- James Richard from St. Cloud, MN
- Parts Used:
- W11384469
- Difficulty Level:
- Easy
- Total Repair Time:
- Less than 15 mins
- Tools:
- Socket set
Light Switch broke
An easy job for smaller hands. Removed the two bolts holding the light cover. Removed two electrical connections from the old switch by pinching the retaining clip,removed the switch, snapped in the new one and re-attached the connectors. Your online illustrations helped me to know that the plastic housing for the light switch would only
... Read more
swing down so far and was not intended to be removed. Saved me from breaking that plastic cover's tabs. This home repair saved me more than 5 times the cost of hiring a professional to do it. Very happy homeowner.
Read less
Was this instruction helpful to you?
Thank you for voting!