



Models
>
WRSF5536RW00
WRSF5536RW00 Whirlpool Refrigerator
Jump to:
Find Part by Name
Keep searches simple, eg. "belt" or "pump".
Diagrams for WRSF5536RW00
Viewing 11 of 11


Keep searches simple, eg. "belt" or "pump".
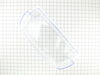
$36.42
The gallon door bin attaches to the inside of the refrigerator door and is typically used to hold jars and bottles within easy reach. These bins are clear, as the white version has been discontinued b...
In Stock
Order now and your part arrives by Oct 22
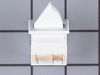
$31.05
This part includes one authentically sourced 3-pin rocker switch for a refrigerator. It is responsible for turning the light on inside the fridge when the door is open. It is commonly replaced because...
In Stock
Order now and your part arrives by Oct 22
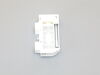
$80.95
This OEM ice maker assembly fits select Whirlpool, Maytag, and KitchenAid refrigerators. It includes the ice mold and control unit, and automatically produces and ejects ice into the bin. Ideal for re...
In Stock
Order now and your part arrives by Oct 22
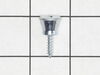
$11.98
This authentic OEM part is a mounting screw for the door handle on your refrigerator. If the door handle is loose or you are having issues opening or closing the door, a new mounting screw may solve t...
In Stock
Order now and your part arrives by Oct 22
$28.91
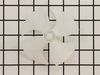
If your refrigerator or freezer is too warm, or making noises, you may need to replace the fan blade. The fan blade attaches to the evaporator motor, which is in the freezer section, to help circulate...
In Stock
Order now and your part arrives by Oct 22
In Stock
Order now and your part arrives by Oct 22
In Stock
Order now and your part arrives by Oct 22
In Stock
Order now and your part arrives by Oct 22
In Stock
Order now and your part arrives by Oct 22
$95.07
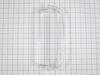
Keep your refrigerator organized with this replacement door shelf bin, made of sturdy plastic and designed to hold everyday items like jars, bottles, and condiments. It mounts directly onto brackets i...
In Stock
Order now and your part arrives by Oct 22
$83.10
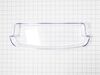
Keep your refrigerator organized and functional with this durable door shelf bin, also known as a door guard. It attaches easily to the interior of the refrigerator door and provides a stable space fo...
In Stock
Order now and your part arrives by Oct 22
In Stock
Order now and your part arrives by Oct 22
Common Problems and Symptoms for WRSF5536RW00
Viewing 13 of 13Light not working
Fixed by these parts
How to fix it
Ice maker not making ice
Fixed by these parts
How to fix it
Ice maker won’t dispense ice
Fixed by these parts
How to fix it
Door won’t open or close
Fixed by these parts
How to fix it
Noisy
Fixed by these parts
How to fix it
Fridge too warm
Fixed by these parts
How to fix it
Leaking
Fixed by these parts

How to fix it
Too warm
Fixed by these parts
How to fix it
Freezer section too warm
Fixed by these parts
How to fix it
Not dispensing water
Fixed by these parts
How to fix it
Fridge too cold
Fixed by these parts
How to fix it
Frost buildup
Fixed by these parts
How to fix it
Clicking sound
Fixed by these parts
How to fix it


Keep searches simple. Use keywords, e.g. "leaking", "pump", "broken" or "fit".
- Customer:
- Kevin from Beckley, WV
- Parts Used:
- W11396033
- Difficulty Level:
- Really Easy
- Total Repair Time:
- Less than 15 mins
- Tools:
- Screw drivers
while closing the door, the light switch fouled, resulting in the switch breaking
I used a flat screwdriver and released the lock tab on the bottom of the light switch, and pried the switch out, being careful to not damage the plastic around the mounting place of the switch, unplugged wiring from old switch, plugged in the new one and pushed the new switch into place. Job finished light switch now working.
Was this instruction helpful to you?
Thank you for voting!
- Customer:
- patrick from fairfax, VA
- Parts Used:
- WP2220458
- Difficulty Level:
- Really Easy
- Total Repair Time:
- Less than 15 mins
- Tools:
- Socket set
ice maker gear broken
I removed the ice bucket,the gear is located under the ice bucket and engages when ice bucket sits on it and turns the tray for ice to fall in the shute,2 screws to remove and the gear comes off and I put the new one on and put the screws back,very easy to do, total time 5 minutes,repair man wanted to charge $114 for the part and $100 for
... Read more
labor,I did it all for $25 thru this site,I love this site,it gsaved me alot of money,thanks partselect.,
Read less
Was this instruction helpful to you?
Thank you for voting!
- Customer:
- James from NEW LONDON, NH
- Parts Used:
- W10873791
- Difficulty Level:
- Easy
- Total Repair Time:
- 15 - 30 mins
- Tools:
- Nutdriver, Screw drivers
Ice maker has stopped making ice and made a loud banging sound
I turned the water and electricity off for the refrigerator.
(not sure if this is necessary but is safer)
Remove the ice bucket.
Cover the Ice auger with a hand towel to catch any screws which my get dropped.
Remove four Philips screws holding plastic cover to inside of the door. there are no clip/snaps to worry about ... Read more but on/off switch needs to be un plugged. Remove cover.
Remove two nut head screws holding old ice maker.
Remove wiring harness from ice maker and lift ice maker up and out. There are two tabs on the door.
Unplug the wiring harness from the ice maker..
Installation: Press the wiring harness into clips on the new ice maker. Install ice maker onto door insuring it is over the tabs on door and the holes for nut screws line up. Plugging the wiring harness in and install two screws.
Plug on/off wiring onto switch and press plastic cover onto inside of door. Take care that it fits inside of rubber door seal. Install four philips screws.
Remove hand towel and install ice bucket making sure the ice maker is switched on. Close door.
Turn on water and electricity.
This took me 25 min. and I am sure would go faster if I had had instructions.
My refrigerator took awhile before it started to make cubes but has been working like new ever since.
This task is easy go for it.
(not sure if this is necessary but is safer)
Remove the ice bucket.
Cover the Ice auger with a hand towel to catch any screws which my get dropped.
Remove four Philips screws holding plastic cover to inside of the door. there are no clip/snaps to worry about ... Read more but on/off switch needs to be un plugged. Remove cover.
Remove two nut head screws holding old ice maker.
Remove wiring harness from ice maker and lift ice maker up and out. There are two tabs on the door.
Unplug the wiring harness from the ice maker..
Installation: Press the wiring harness into clips on the new ice maker. Install ice maker onto door insuring it is over the tabs on door and the holes for nut screws line up. Plugging the wiring harness in and install two screws.
Plug on/off wiring onto switch and press plastic cover onto inside of door. Take care that it fits inside of rubber door seal. Install four philips screws.
Remove hand towel and install ice bucket making sure the ice maker is switched on. Close door.
Turn on water and electricity.
This took me 25 min. and I am sure would go faster if I had had instructions.
My refrigerator took awhile before it started to make cubes but has been working like new ever since.
This task is easy go for it.
Read less
Was this instruction helpful to you?
Thank you for voting!