



Models
>
WRF540CWHZ06
WRF540CWHZ06 Whirlpool Refrigerator
Jump to:
Find Part by Name
Keep searches simple, eg. "belt" or "pump".
Keep searches simple, eg. "belt" or "pump".

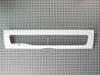
This genuine OEM part is a door cover for your refrigerator pantry drawer. It helps to maintain the proper temperature and humidity in the drawer by providing a seal when closed. Other names for this ...
In Stock
Order now and your part arrives by Oct 22

$155.73
The door gasket is used to provide an airtight seal when your fridge door is closed. The gasket is a genuine OEM part that is gray in color and has magnets on all sides to help seal the door. Signs th...
In Stock
Order now and your part arrives by Oct 22
This 18 ml bottle of white appliance touch-up paint is used to cover scratches or marks on your appliance. The white touch-up paint can be used on refrigerators, microwaves, ranges, clothes dryers, an...
No Longer Available
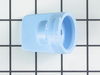
Need to keep your fridge’s water and ice working while the filter is out? This bypass cap lets water flow to the dispenser and ice maker without a filter. It’s easy to install and fits Whirlpool, Mayt...
In Stock
Order now and your part arrives by Oct 22

$94.16
If your freezer door isn’t sealing like it used to, this gray gasket might be the fix. It wraps around the door to keep cold air in and warm air out—helping your fridge stay cool and efficient. A worn...
In Stock
Order now and your part arrives by Oct 22
$20.72
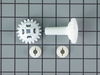
These parts will attach to your drawer rail and are used to help the drawer glide smoothly.
In Stock
Order now and your part arrives by Oct 22
$41.78
This Refrigerator Ice Maker Installation Kit connects the house water supply, to the refrigerator for ice maker and water dispenser operation. This kit includes 15-ft of copper tubing, (1) saddle valv...
In Stock
Order now and your part arrives by Oct 22

Special Order
Common Problems and Symptoms for WRF540CWHZ06
Viewing 12 of 12Door won’t open or close
Fixed by these parts

How to fix it
Door Sweating
Fixed by these parts

How to fix it
Not dispensing water
Fixed by these parts
How to fix it
Leaking
Fixed by these parts
How to fix it
Frost buildup
Fixed by these parts
How to fix it
Fridge too cold
Fixed by these parts
How to fix it
Ice maker not making ice
Fixed by these parts
How to fix it
Fridge too warm
Fixed by these parts
How to fix it
Freezer not defrosting
Fixed by these parts
How to fix it
Fridge and Freezer are too warm
Fixed by these parts
How to fix it
Ice maker dispenses too little ice
Fixed by these parts
How to fix it
Noisy
Fixed by these parts
How to fix it
Keep searches simple. Use keywords, e.g. "leaking", "pump", "broken" or "fit".
- Customer:
- Joel from DELRAY BEACH, FL
- Parts Used:
- W10830162
- Difficulty Level:
- Very Easy
- Total Repair Time:
- Less than 15 mins
Door gasket wasnt sealing anymore and had some minor cracks
First, I removed the old door gasket by pulling it out of the channel it was mounted in, noting the orientation of the gasket. Then, it was a simple matter of lining the new gasket up with the channel and pressing it into the groove. Very easy repair, and the door seals great!
Was this instruction helpful to you?
Thank you for voting!
- Customer:
- Stanley from Gurley, AL
- Parts Used:
- W10827015
- Difficulty Level:
- Really Easy
- Total Repair Time:
- Less than 15 mins
Wife dropped a gallon of milk on the lid and cracked the see through panel
Pushed the hinge pins aside and removed the old lid.. Reversed the process to install the new lid
Was this instruction helpful to you?
Thank you for voting!
- Customer:
- Mike from LUDINGTON, MI
- Parts Used:
- W10830162
- Difficulty Level:
- Really Easy
- Total Repair Time:
- 30 - 60 mins
Original right hand French door gasket tearing along left hand side (where doors meet)
Really was very easy to do.
I read how others completed the replacement & followed instructions that came with the replacement gasket. Original gasket (new in 2008) was at first stubborn to remove but once I got it started was easy to complete removal.
The new gasket arrived folded in half. I followed the instructions to elimi ... Read more nate the bends and a few crinkles with heat by laying the gasket in direct sunlight until it was warmed and pliable. I cleaned the gasket areas and then massaged the warmed gasket until it was smooth & fully shaped. It was then very easily to install.
So glad I decided to order this original part form this site and install myself. Saved a lot of money plus enjoyed satisfaction of doing this myself
Read less
Was this instruction helpful to you?
Thank you for voting!