


Models
>
7ET18PKXDN00
7ET18PKXDN00 Whirlpool Refrigerator
Jump to:
Find Part by Name
Keep searches simple, eg. "belt" or "pump".
Diagrams for 7ET18PKXDN00
Viewing 5 of 5


Manuals & Guides for 7ET18PKXDN00
Click to downloadKeep searches simple, eg. "belt" or "pump".

$118.12
Replacing a broken crisper drawer in your refrigerator is a simple repair that does not require any tools. Simply remove any items from the damaged drawer, and remove the drawer from the fridge. The w...
In Stock
Order now and your part arrives by Jul 31

In Stock
Order now and your part arrives by Jul 31

$51.43
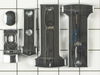
This kit includes both upper and lower door handle end caps for both freezer and fresh food door handles. This is only available in chrome. All other colors are discontinued. Handle is NOT included....
In Stock
Order now and your part arrives by Jul 31

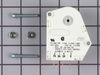
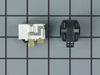
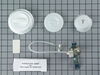
This clip-on thermostat will sense the temperature increase in the evaporator during the defrost cycle and will cycle the defrost heater off after the ice or frost is melted.
In Stock
Order now and your part arrives by Jul 31

In Stock
Order now and your part arrives by Jul 31

This part goes in the center of the crisper shelf and acts as a support.
In Stock
Order now and your part arrives by Jul 31

$24.15
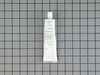
This 18 ml bottle of white appliance touch-up paint is used to cover scratches or marks on your appliance. The white touch-up paint can be used on refrigerators, microwaves, ranges, clothes dryers, an...
In Stock
Order now and your part arrives by Jul 31

$13.07
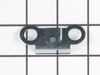
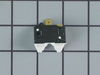
This hinge bracket, also known as a door stop, is attached to the bottom of the door and is used to limit how far the door swings out to protect the refrigerator itself, and any surrounding cabinets f...
In Stock
Order now and your part arrives by Jul 31

In Stock
Order now and your part arrives by Jul 31

$120.09
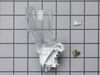
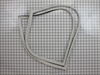
This is a replacement crisper drawer for your refrigerator. It is made of clear plastic and is sold individually. The crisper drawer slides in and out of the refrigerator, and is used to store items. ...
In Stock
Order now and your part arrives by Jul 31

In Stock
Order now and your part arrives by Jul 31

$57.30
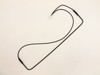
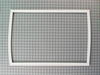
Also known as door retainer bar. End caps are not included. White in color. Part needs to be cut to proper length.
In Stock
Order now and your part arrives by Jul 31
Common Problems and Symptoms for 7ET18PKXDN00
Viewing 17 of 17Light not working
Fixed by these parts
How to fix it
Fridge too warm
Fixed by these parts

How to fix it
Door won’t open or close
Fixed by these parts

How to fix it
Leaking
Fixed by these parts
How to fix it
Freezer not defrosting
Fixed by these parts
How to fix it
Noisy
Fixed by these parts

How to fix it
Freezer section too warm
Fixed by these parts
How to fix it
Will Not Start
Fixed by these parts
How to fix it
Frost buildup
Fixed by these parts
How to fix it
Fridge and Freezer are too warm
Fixed by these parts
How to fix it
Fridge too cold
Fixed by these parts
How to fix it
Freezer too cold
Fixed by these parts
How to fix it
Fridge runs too long
Fixed by these parts
How to fix it
Door Sweating
Fixed by these parts
How to fix it
Clicking sound
Fixed by these parts
How to fix it
Too warm
Fixed by these parts
How to fix it
Ice maker not making ice
Fixed by these parts
How to fix it


Keep searches simple. Use keywords, e.g. "leaking", "pump", "broken" or "fit".
- Customer:
- Clint from Rayville, MO
- Parts Used:
- W11384469
- Difficulty Level:
- Really Easy
- Total Repair Time:
- Less than 15 mins
- Tools:
- Screw drivers
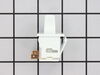
Lights inside refrigerator not working
I used a flat-head screwdriver to pop out the old light rocker switch. Then, I unplugged the wires, plugged them into the new light rocker switch, and then popped the new switch into the hole. That's it! Lights began working again.
Was this instruction helpful to you?
Thank you for voting!
- Customer:
- Edwin from Maplewood, NJ
- Parts Used:
- WP4387503
- Difficulty Level:
- Really Easy
- Total Repair Time:
- Less than 15 mins
- Tools:
- Nutdriver
water dripping inside fridge due to drain hole being frozen over wiith ice.
first I diagnosed the problem with the whirlpool do-it-yourself repair manual, which was very easy to understand. as per the repair manual, "this part located on the evaporator or the back of the liner is used during the defrost cycle. This bimetal senses the temperature from the evaporator. When the temperature reaches 50-70 degrees (F)
... Read more
the defrost bimetal turnd the defrost heater off. " then I emptied the freezer. removed the the back panel to expose the evaporator. I looked for the bimetal defrost thermostat clipped on the evaporator. tested the bi-metal defrost thermostat, as per the manual, " the ohmmeter should show ZERO resistance (continuity). if not, the bimetal is bad and needs replacing." NOTE: the bimetal must be cold. it is also tested with the bimetal warm/hot, by running it under hot water. i used a styrofoam cup with hot water & dipped the bimetal in. as per the manual, " the ohmmeter should show an open circuit. if not, the bimetal is bad and needs replacing. then got online found partselect.com. ordered the part, recieved it in less than 2 days. within minutes after recieving the part, I removed the bimetal defrost thermostat and spliced in the new one. thanks to partselect.com my fridge is back up and running properly again. prior to installing the new bimetal, i tested it, as descibed above, you can hear & feel the bimetal open/close when it gets hot/cold.
Read less
Was this instruction helpful to you?
Thank you for voting!
- Customer:
- JR from Portland, OR
- Parts Used:
- WP2218127K, WP2163835
- Difficulty Level:
- Really Easy
- Total Repair Time:
- Less than 15 mins
Missing center track for crisper drawers
Remove the glass shelf and the support frame. Bend the front clip on the track back far enough to fit into slot on frame. Insert the back end of the track into the opening at the back of the frame. Press the front end of the track into the retainer slot in the frame. Reinstall the frame and glass shelf. Done.
Was this instruction helpful to you?
Thank you for voting!