Transform your daily hydration routine with the EDR1RXD1 water filter. It delivers pure, refreshing water for your family, enhancing the taste of your drinks and meals. Quick to install and long-lasti...
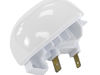
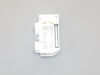
The capacitor, also known as a run capacitor, is a component in your fridge that allows the compressor to cycle on and off to maintain a constant temperature. If your fridge and freezer are too warm i...
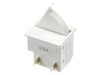
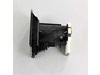
This part includes one authentically sourced 3-pin rocker switch for a refrigerator. It is responsible for turning the light on inside the fridge when the door is open. It is commonly replaced because...
Need a new shelf bin for your fridge door? This replacement bin is perfect for storing food items and containers, helping you keep things organized. It measures 15" wide at its widest point, 13" wide ...
This OEM ice maker assembly fits select Whirlpool, Maytag, and KitchenAid refrigerators. It includes the ice mold and control unit, and automatically produces and ejects ice into the bin. Ideal for re...
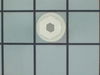
This 18 ml bottle of white appliance touch-up paint is used to cover scratches or marks on your appliance. The white touch-up paint can be used on refrigerators, microwaves, ranges, clothes dryers, an...
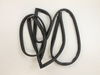
This crisper drawer is designed to maintain optimal humidity levels within the refrigerator, helping preserve the freshness of fruits and vegetables. Engineered for compatibility with specific refrige...
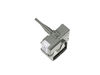
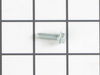
This authentic OEM part is a mounting screw for the door handle on your refrigerator. If the door handle is loose or you are having issues opening or closing the door, a new mounting screw may solve t...
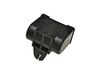
If your refrigerator or freezer is too warm, or making noises, you may need to replace the fan blade. The fan blade attaches to the evaporator motor, which is in the freezer section, to help circulate...
This genuine OEM replacement part is a door shelf for your refrigerator. The part is made of plastic and measures approximately 17-inches long by 5-inches wide. The shelf is used to keep items in plac...
Ask our experts a question about this part and we'll get back to you as soon as possible!
1 question answered by our experts.
< Prev
1
Next >
Sort by:
Search filter:
Clear Filter
Your search term must have 3 or more characters.
Keep searches simple. Use keywords, e.g. "leaking", "pump", "broken" or "fit".
Sorry, we couldn't find any existing answers that matched. Try using some different or simpler keywords, or submit your new question by using the "Ask a Question" button above!
Michael
April 19, 2025
How do I put my fridge into diagnostic mode? If i've already replaced the relay and everything as far as that goes and the motors still won't, the compressor still won't run, is it the compressor that's the problem
For model number WRS555SIHZ06
Hello Michael, thank you for your question. To test a refrigerator compressor, you can check the resistance using a multimeter. You'll need to disconnect the power to the fridge, and measure the resistance between its terminals. If you get a reading (resistance), it indicates a functioning compressor. If you get no reading or an "open" (infinity) reading, the compressor PS16875572 may be faulty and need replacement. We hope this helps.
I knew the chances of all the freon leaking out was unlikely so I looked at the wiring to the compressor and there was a capacitor and a starter/overload so i figured I would start there. I went on line and found the parts at this site and they were less than the minimum service call charge for a service tech so I figured what the heck le
... Read moret's give her a shot so I did give it a shot. I ordered the parts and they were there in less time than a service tech could come out and i installed the parts and guess what for 90.00 in parts and 15 minutes in time I repaired my refrigerator. Thanks guys, It took less time to order the parts than it did to make the repair so thanks, your website rocks and is very well designed so my hat is off to you guys!
I used a flat screwdriver and released the lock tab on the bottom of the light switch, and pried the switch out, being careful to not damage the plastic around the mounting place of the switch, unplugged wiring from old switch, plugged in the new one and pushed the new switch into place. Job finished light switch now working.
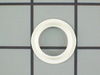
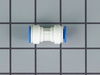
When aI received the hose adapter/connector, I inserted the 2 hose ends only to have water drip from the connection. I used a utility knife to remove an inch from each side, then reinserted the hoses. That made the differnce. Dry as a bone.