



Models
>
GC2223GEKB
GC2223GEKB Maytag Refrigerator
Jump to:
Find Part by Name
Keep searches simple, eg. "belt" or "pump".
Diagrams for GC2223GEKB
Viewing 18 of 18


.gif "SUPPLEMENTAL INFORMATION Diagram and Parts List for Maytag Refrigerator")

Keep searches simple, eg. "belt" or "pump".
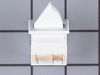
$31.05
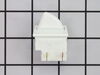
This part includes one authentically sourced 3-pin rocker switch for a refrigerator. It is responsible for turning the light on inside the fridge when the door is open. It is commonly replaced because...
In Stock
Order now and your part arrives by Oct 8
$7.60
This is a multi-use screw and can be used on a variety of appliances. The measurements of the screw are: 8/18 x 3/8. *Please note: the screw is sold individually. Refer to the manual provided by the m...
In Stock
Order now and your part arrives by Oct 8
In Stock
Order now and your part arrives by Oct 8
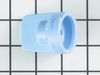
Need to keep your fridge’s water and ice working while the filter is out? This bypass cap lets water flow to the dispenser and ice maker without a filter. It’s easy to install and fits Whirlpool, Mayt...
In Stock
Order now and your part arrives by Oct 8

In Stock
Order now and your part arrives by Oct 8
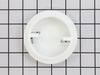
$27.83
This helix end cap is almost four inches in diameter. It is all white in color and is made of plastic. This end cap is used in a refrigerator's icemaker.
In Stock
Order now and your part arrives by Oct 8
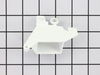
This icemaker water inlet cup is three inches long. It is all white in color and is made of plastic.
In Stock
Order now and your part arrives by Oct 8
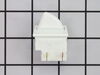
$28.91
This is a light switch for your refrigerator. It activates when the door of your appliance is opened, and it will turn the light inside on and off. You will need to replace this part is if your light ...
In Stock
Order now and your part arrives by Oct 8
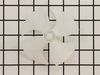
$28.91
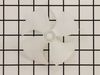
If your refrigerator or freezer is too warm, or making noises, you may need to replace the fan blade. The fan blade attaches to the evaporator motor, which is in the freezer section, to help circulate...
In Stock
Order now and your part arrives by Oct 8
In Stock
Order now and your part arrives by Oct 8
$53.58
This dispenser overlay insert provides a sleek, black finish for the refrigerator’s control panel area, offering both protection and clarity for water and ice selections. It fits over the touch contro...
In Stock
Order now and your part arrives by Oct 8
In Stock
Order now and your part arrives by Oct 8
Common Problems and Symptoms for GC2223GEKB
Viewing 19 of 19Light not working
Fixed by these parts
How to fix it
Leaking
Fixed by these parts

How to fix it
Ice maker not making ice
Fixed by these parts
How to fix it
Ice maker won’t dispense ice
Fixed by these parts

How to fix it
Not dispensing water
Fixed by these parts
How to fix it
Fridge too warm
Fixed by these parts
How to fix it
Fridge too cold
Fixed by these parts
How to fix it
Noisy
Fixed by these parts
How to fix it
Freezer too cold
Fixed by these parts
How to fix it
Freezer section too warm
Fixed by these parts
How to fix it
Ice maker dispenses too much ice
Fixed by these parts
How to fix it
Freezer not defrosting
Fixed by these parts
How to fix it
Too warm
Fixed by these parts
How to fix it
Frost buildup
Fixed by these parts
How to fix it
Fridge and Freezer are too warm
Fixed by these parts
How to fix it
Ice maker dispenses too little ice
Fixed by these parts
How to fix it
Door Sweating
Fixed by these parts
How to fix it
Fridge runs too long
Fixed by these parts
How to fix it
Door won’t open or close
Fixed by these parts
How to fix it



Keep searches simple. Use keywords, e.g. "leaking", "pump", "broken" or "fit".
- Customer:
- David from Chester, CA
- Parts Used:
- WP628356
- Difficulty Level:
- Really Easy
- Total Repair Time:
- Less than 15 mins
- Tools:
- Nutdriver, Screw drivers
The Bearing Cup Assembly was broken and ice would jamb against it during the ice making cycle.
I removed the ice maker from the refrigerator, by removing one screw on the underside bracket and loosening the two screws at the top side, then lifting the ice maker off the loosened screws. I then unplugged the electrical harness that supplies power from the refrigerator to the ice maker. I then disassembled the ice maker by removing
... Read more
the front cover which is snapped in place, then removing two recessed screws at the front. I removed the broken part, I then reassembled the ice maker with the new part. I replaced the two recessed screws at the front and snapped on the cover. Then I reinstalled the ice maker in the refrigator by plugging in the harness, slipping the ice maker over the loosened screws in the refrigerator and replacing the screw that was removed from the underside bracket. Tightening all the screws completed the project.
Read less
Was this instruction helpful to you?
Thank you for voting!
- Customer:
- Wayne from Leesburg, FL
- Parts Used:
- WP627985
- Difficulty Level:
- Really Easy
- Total Repair Time:
- 15 - 30 mins
- Tools:
- Screw drivers, Socket set
No ice in ice trey
The easiest thing to do was pull the ice make off. After taking the 3 screws out of the wall of the freezer, take a screwdriver (flathead) and push on the tab for the electrical plug and wiggle the cord out. Then you can take 3 screws out for the main cover and another 2 screws on the next cover. There's the part, pop it out and replace h
... Read more
olding pins and start the process of putting back together the opposite way you took it apart.
Read less
Was this instruction helpful to you?
Thank you for voting!
- Customer:
- Todd from Lancaster, PA
- Parts Used:
- WP67005959, WPD7749401
- Difficulty Level:
- Really Easy
- Total Repair Time:
- Less than 15 mins
- Tools:
- Socket set
Ice maker would not turn allowing the ice to come out the dispenser. The ice bucket was also cracked from kids (ok and parents) getting frustrated and shaking the ice bucket!
Piece of cake!
Removed the old ice bucket which was cracked and ice would not dispense. The Helix Cap also looked worn which is why I ordered both parts. (Probably if not for the shaking of the ice bucket the Helix cap would have been the only part required. We ended up cracking the ice bucket) Removed the four hex screws from ... Read more the auger system on the old ice bucket with a socket wrench. Removed the old Helix end cap from the auger system and replaced with the new. Literally just slips on the auger. Reinstalled auger system back onto the new ice bucket. Total time not even five minutes.
Working great! Probably saved $ 75.00 - $ 100.00 on a service call. Half of a wrench on skill level needed (One=Low skill level/ Five=High skill level)
Great response & delivery from Parts Select!
Definitely recommend highly.
Todd
Lancaster-PA
Removed the old ice bucket which was cracked and ice would not dispense. The Helix Cap also looked worn which is why I ordered both parts. (Probably if not for the shaking of the ice bucket the Helix cap would have been the only part required. We ended up cracking the ice bucket) Removed the four hex screws from ... Read more the auger system on the old ice bucket with a socket wrench. Removed the old Helix end cap from the auger system and replaced with the new. Literally just slips on the auger. Reinstalled auger system back onto the new ice bucket. Total time not even five minutes.
Working great! Probably saved $ 75.00 - $ 100.00 on a service call. Half of a wrench on skill level needed (One=Low skill level/ Five=High skill level)
Great response & delivery from Parts Select!
Definitely recommend highly.
Todd
Lancaster-PA
Read less
Was this instruction helpful to you?
Thank you for voting!