


Models
>
AZ2727GIHB
AZ2727GIHB Maytag Refrigerator
Jump to:
Find Part by Name
Keep searches simple, eg. "belt" or "pump".
Diagrams for AZ2727GIHB
Viewing 13 of 13


.gif "SUPPLEMENTAL INFORMATION Diagram and Parts List for Maytag Refrigerator")

Manuals & Guides for AZ2727GIHB
Click to downloadKeep searches simple, eg. "belt" or "pump".

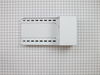
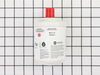
This is the replacement water filter for your refrigerator. It is white in color with a red cap, and is approximately 3 inches wide and six inches tall. The water filter reduces contaminants and impro...
No Longer Available

$31.05
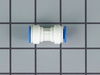
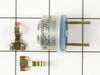
This part includes one authentically sourced 3-pin rocker switch for a refrigerator. It is responsible for turning the light on inside the fridge when the door is open. It is commonly replaced because...
In Stock
Order now and your part arrives by Aug 1

$21.82
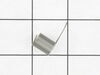
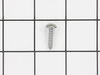
This is a screw and it is made for multiple appliances in your home. This model is called a sheet metal screw because it has sharp points, and the threads are closer together. This screw is designed t...
In Stock
Order now and your part arrives by Aug 1

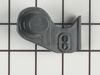
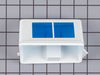
This crisper drawer shelf support is used for many refrigerators.
No Longer Available

$34.27
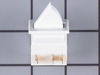
This ice door assembly is a little over three inches in diameter. It is all white in color and it is made entirely of plastic.
Special Order

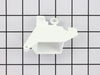
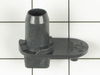
This icemaker water inlet cup is three inches long. It is all white in color and is made of plastic.
In Stock
Order now and your part arrives by Aug 1

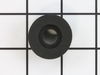
This lower hinge pin is almost two inches long. It is made entirely of plastic and it is all black in color.
No Longer Available

In Stock
Order now and your part arrives by Aug 1

On Order

This limit switch is located in the ice/water dispenser section. The switch pictured here is black, though this type of switch is also available in white.
No Longer Available

$9.79
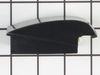
This rack roller is well under an inch in diameter. It is all white in color and it is made entirely of plastic.
Special Order

In Stock
Order now and your part arrives by Aug 1
Common Problems and Symptoms for AZ2727GIHB
Viewing 14 of 14Light not working
Fixed by these parts
How to fix it
Leaking
Fixed by these parts
How to fix it
Ice maker not making ice
Fixed by these parts
How to fix it
Ice maker won’t dispense ice
Fixed by these parts

How to fix it
Not dispensing water
Fixed by these parts

How to fix it
Door won’t open or close
Fixed by these parts
How to fix it
Ice maker dispenses too much ice
Fixed by these parts
How to fix it
Fridge too warm
Fixed by these parts

How to fix it
Door Sweating
Fixed by these parts
How to fix it
Will Not Start
Fixed by these parts
How to fix it
Fridge too cold
Fixed by these parts
How to fix it
Door latch failure
Fixed by these parts
How to fix it
Freezer section too warm
Fixed by these parts
How to fix it
Noisy
Fixed by these parts
How to fix it


Keep searches simple. Use keywords, e.g. "leaking", "pump", "broken" or "fit".
- Customer:
- David from Chester, CA
- Parts Used:
- WP628356
- Difficulty Level:
- Really Easy
- Total Repair Time:
- Less than 15 mins
- Tools:
- Nutdriver, Screw drivers
The Bearing Cup Assembly was broken and ice would jamb against it during the ice making cycle.
I removed the ice maker from the refrigerator, by removing one screw on the underside bracket and loosening the two screws at the top side, then lifting the ice maker off the loosened screws. I then unplugged the electrical harness that supplies power from the refrigerator to the ice maker. I then disassembled the ice maker by removing
... Read more
the front cover which is snapped in place, then removing two recessed screws at the front. I removed the broken part, I then reassembled the ice maker with the new part. I replaced the two recessed screws at the front and snapped on the cover. Then I reinstalled the ice maker in the refrigator by plugging in the harness, slipping the ice maker over the loosened screws in the refrigerator and replacing the screw that was removed from the underside bracket. Tightening all the screws completed the project.
Read less
Was this instruction helpful to you?
Thank you for voting!
- Customer:
- Bruce from Alfred Station, NY
- Parts Used:
- EDR7D1
- Difficulty Level:
- Really Easy
- Total Repair Time:
- Less than 15 mins
Refrigerator Filter needed replacing
Turn counter clockwise, following the remove arrow on the filter, until it stops. Wiggle and pull down on the filter until it comes off. Put date sticker on new filter to remember when it was replaced. Align the lines on the filter and push it up where the old one was and turn it clockwise until it stops, following the install arrow.
... Read more
Close the door and push both the light and lock button together to reset the replace filter light. Run the water through the door for a couple minutes to get all of the air out of the system. Very easy and quick. Most time spent flushing out the air.
Read less
Was this instruction helpful to you?
Thank you for voting!
- Customer:
- Philip from Plantation, FL
- Parts Used:
- WP61005883
- Difficulty Level:
- Really Easy
- Total Repair Time:
- Less than 15 mins
- Tools:
- Screw drivers
Ice dispenser cover flap was broken.
First I unpluged the refrigerator, then I removed the drip shelf (slides out). Then removed the two screws hidden by the drip shelf. Then I removed the control panel by pulling out on the bottom then lifting slightly to to expose the ribbon cable. The circuit boards you see at this point will deliver an electrical shock if the refrigera
... Read more
tor is plugged in. I disconnected the ribbon cable form the control (front) panel. Next I removed three screws that hold the chute assembly in place and worked the chute away from the door. Pay attention to the placement of the water line before you remove the chute. The bad flap fell out at this point but it is easy to fiqure out how to place the new one. When putting the chute back in place make sure the arm holding the flap is aligned in the groove of the solenoid plunger and not just setting on top. (I had to do this twice because the chute would not open the first time I put it back together). About a 30 min job because I took it apart the first time to see what was broken. I only needed the flap, the arm it mounts to an the solenoid were not broken. Easy to do and only cost about $16.00 with shipping for the part.
Read less
Was this instruction helpful to you?
Thank you for voting!