


Models
>
RD22FY-3A
RD22FY-3A Magic Chef Refrigerator
Jump to:
Find Part by Name
Keep searches simple, eg. "belt" or "pump".
Keep searches simple, eg. "belt" or "pump".

$18.54
This is a genuine OEM 40-Watt replacement light bulb that is compatible with various types of appliances. It has a frosted glass bulb with a standard metal socket base, making it easy to screw and uns...
In Stock
Order now and your part arrives by Apr 10

$21.82
This is a screw and it is made for multiple appliances in your home. This model is called a sheet metal screw because it has sharp points, and the threads are closer together. This screw is designed t...
In Stock
Order now and your part arrives by Apr 10

$55.18
This part helps the compressor kick on and off while maintaining a constant temperature to keep things frozen in your freezer.
In Stock
Order now and your part arrives by Apr 10

$7.60
This hose clamp extends from half an inch to an inch in diameter. It is made entirely of metal and is intended for use with Maytag brand washing machines.
In Stock
Order now and your part arrives by Apr 10

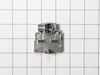
The water inlet valve is a solenoid-operated switch located at the bottom of the refrigerator. When it is energized by electrical power, water is released from the supply line through the water valve ...
In Stock
Order now and your part arrives by Apr 10

$40.71
This is an OEM part sourced directly from the manufacturer. This defrost heater assembly is designed for use with refrigerators. These heaters melt the frost that builds up on the evaporator coils dur...
In Stock
Order now and your part arrives by Apr 10

In Stock
Order now and your part arrives by Apr 10

$27.28
This 48 cube ice cube tray is eleven inches long. It is all white in color and it is made entirely of plastic.
In Stock
Order now and your part arrives by Apr 10

In Stock
Order now and your part arrives by Apr 10

$83.20
This part is both the start relay and the overload. The start relay boosts the compressor, and then shuts off as soon as the motor gets up to speed and the overload provides extra protection against e...
In Stock
Order now and your part arrives by Apr 10

This is an authentic OEM replacement part. This defrost thermostat is commonly used in refrigerators. It features snap on tubing clip, and has two female terminals for connection. The thermostat works...
No Longer Available

$17.44
This appliance light bulb is used for many Maytag brand refrigerators. This 40W light bulb is frosted. Sold individually.
On Order
Questions and Answers
We're sorry, but our Q&A experts are temporarily unavailable.
Please check back later if you still haven't found the answer you need.
Common Problems and Symptoms for RD22FY-3A
Viewing 16 of 16Fridge too warm
Fixed by these parts


How to fix it
Will Not Start
Fixed by these parts
How to fix it
Freezer section too warm
Fixed by these parts
How to fix it
Leaking
Fixed by these parts


How to fix it
Ice maker not making ice
Fixed by these parts
How to fix it
Freezer not defrosting
Fixed by these parts
How to fix it
Fridge and Freezer are too warm
Fixed by these parts
How to fix it
Clicking sound
Fixed by these parts
How to fix it
Noisy
Fixed by these parts
How to fix it
Fridge runs too long
Fixed by these parts
How to fix it
Light not working
Fixed by these parts

How to fix it
Frost buildup
Fixed by these parts
How to fix it
Too warm
Fixed by these parts
How to fix it
Ice maker won’t dispense ice
Fixed by these parts
How to fix it
Door latch failure
Fixed by these parts
How to fix it
Freezer too cold
Fixed by these parts
How to fix it


Keep searches simple. Use keywords, e.g. "leaking", "pump", "broken" or "fit".
- Customer:
- John from Matthews, NC
- Parts Used:
- WP61001846, WP52085-29
- Difficulty Level:
- Easy
- Total Repair Time:
- 1- 2 hours
- Tools:
- Nutdriver, Pliers
The freezer was cold but refrigerator was warm
This is a problem in the defrost cycle. It is one of three items the heater, timer or thermostat.. I removed the screws from the back side of the freezer and romoved the sheet metal from the back which exposes all the elements. Below the evaporaro coils are two small plates which cover the heating elements ( two glass tubes conected to in
... Read more
sulated wire), You may be able to look at it and tell if they are bad. Mine was burnt and obviously gone. If you disconnect from conectors you can check for conitinuity to tell if bad. Simply remove the four screws holding these in place and install new one the same way. quite easy. I did check the thermostat for continuity and relaced it also. It simply plugs into a clip on the back wall and two power connectors. If checking themostat for continuity make sure it is cold otherwise it will be open and you won't get a good read. The timer for this model is under \neather behind the grill on the bottom. simply turn the dial and if the motor stops it is probbably good. It runs 8 hr. and then will shut off for defrost heater to come on. Do this before closing up to tell that your new heater is working. It will get red quickly. Saved a lot of money on this one
Read less
Was this instruction helpful to you?
Thank you for voting!
- Customer:
- Kevin from Boston, MA
- Parts Used:
- 4318047
- Difficulty Level:
- Really Easy
- Total Repair Time:
- Less than 15 mins
- Tools:
- Screw drivers, Wrench (Adjustable)
no water getting to ice maker
The ice maker had been slowly dying and one day just stopped making ice. No water was getting to the trays.
I read that this could be caused by a failure of the valve, even though the continuity test indicated that the solenoid was okay.
I ordered the part Friday afternoon. It was delivered Saturday. I did the repai ... Read more r in 10 minutes.
I pulled the fridge away from the wall.
I unplugged the fridge. I closed the water supply valve.
I unscrewed the two mounting screws using a flat head screwdriver.
I pulled the old valve out from refrigerator.
Using an adjustable wrench I detached the water supply from the valve. I detached the hose leading to the ice maker from the valve.
I pulled the electrical connectors from the connectors on the valve.
I attached the hoses to the new valve, attached the electrical connector, screwed the new valve in its place, opened the water supply, plugged the fridge back in, checked for leaks, and waited for a few hours.
My ice maker is working better than it has in at least two years.
Read less
Was this instruction helpful to you?
Thank you for voting!
- Customer:
- Anna from Lincoln, RI
- Parts Used:
- WPW10189190
- Difficulty Level:
- Easy
- Total Repair Time:
- Less than 15 mins
- Tools:
- Screw drivers
Our Refrigerator and freezer stopped working
I had read on a fix it site that the start device for the compressor on this particular model was known to fail after 3-5 years. When we received the part it looked like something that just plugged into the compressor. My husband unscrewed the panel in the back of the fridge and saw the part on the compressor. He first removed the thre
... Read more
e wires that it was connected to, and the wires were inside a plug so all he had to do was remove the plug from the start device. He then removed the old start device from the compressor. Plugged in the wire plug into the new start device, and pushed in the new start device into the compressor. There was also another black part plugged into the old start device that he plugged inot the new start device that connected to the compressor. Our freezer and refrigerator starting working. Within a couple of hours our freezer had made ice.
Read less
Was this instruction helpful to you?
Thank you for voting!