



Models
>
GR-L277SSSA
GR-L277SSSA LG Refrigerator
Jump to:
Find Part by Name
Keep searches simple, eg. "belt" or "pump".
Keep searches simple, eg. "belt" or "pump".
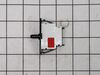
$36.25
This is a genuine replacement switch. It is a push button style switch that is designed for use in your refrigerator. When the door of your appliance is opened the switch is released, and the light co...
Special Order
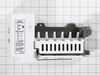
This ice maker assembly kit includes the ice maker, housing, and control device for full functionality. It automatically receives water, freezes it, and dispenses ice into the bin. Designed for easy i...
No Longer Available
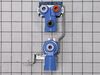
$136.67
This water inlet valve has three solenoid valves and push in fittings. When energized this part releases water from the supply line into the ice mold.
In Stock
Order now and your part arrives by Oct 22
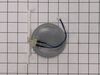
$50.36
This heated ice chute door helps prevent ice buildup and sticking by gently warming the chute opening during dispensing. Designed for smooth, reliable ice delivery, it restores proper operation when i...
In Stock
Order now and your part arrives by Oct 22
In Stock
Order now and your part arrives by Oct 22
Special Order
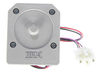
$94.45
This evaporator fan motor is a replacement drive component designed to circulate air across cooling surfaces. It supports even temperature distribution and is commonly replaced when airflow decreases ...
In Stock
Order now and your part arrives by Oct 22
In Stock
Order now and your part arrives by Oct 22
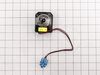
$118.75
The fan motor helps circulate air through the refrigerator to maintain steady cooling, reduce warm spots, and keep temperatures consistent. When it wears out, you may notice weak airflow, unusual nois...
In Stock
Order now and your part arrives by Oct 22
Common Problems and Symptoms for GR-L277SSSA
Viewing 6 of 6Light not working
Fixed by these parts
How to fix it
Ice maker not making ice
Fixed by these parts
How to fix it
Leaking
Fixed by these parts
How to fix it
Ice maker won’t dispense ice
Fixed by these parts
How to fix it
Door won’t open or close
Fixed by these parts
How to fix it
Not dispensing water
Fixed by these parts
How to fix it
Keep searches simple. Use keywords, e.g. "leaking", "pump", "broken" or "fit".
- Customer:
- John from HILLSBORO, OR
- Parts Used:
- AEQ36756901
- Difficulty Level:
- Easy
- Total Repair Time:
- 30 - 60 mins
- Tools:
- Pliers, Screw drivers
Ice maker bail frozen. Chose to replace the entire assembly
Examined old ice maker. It is held by some Philips screws. There are many screws you don't need to unscrew so look carefully. Then disconnected th dual in line connector. There is a little push tab to squeeze to release. Then the ground is connected with a screw. It's a little hard to see but unscrew that. My replacement came with no
... Read more
instructions or screws so try not to drop the screws down in the netherlands of the fridge. The hardest part was maneuvering the icemaker to reattach the power and ground. Even with that pretty straight forward replacement.
Read less
Was this instruction helpful to you?
Thank you for voting!
- Customer:
- Wesley from WILTON, NH
- Parts Used:
- 5007JA3006R
- Difficulty Level:
- Very Easy
- Total Repair Time:
- 15 - 30 mins
- Tools:
- Screw drivers
Ice dispenser door didn't close
I replaced solenoid, flapper heated door, and broken spring. Very easy instructions on "YouTube"
Was this instruction helpful to you?
Thank you for voting!
- Customer:
- Albert from NORTHRIDGE, CA
- Parts Used:
- 5221JA2006D
- Difficulty Level:
- Really Easy
- Total Repair Time:
- 30 - 60 mins
- Tools:
- Screw drivers, Socket set, Wrench set
whater valve whith a defected selenoid and water leaks.
First ,I unplug the refrigerator .
2nd i remove the back cover, clean the dust.
3th disconnect the water line, remove the all valve..
4th unplug all the wires and code ea with a No,remove the water lines
5th replace the valve reconnect the wires and water lines.replace the
back cover at last screw back the w ... Read more ater line.check for water leaks .
i found ease the valve replacement installation.
.Thanks for the video.
2nd i remove the back cover, clean the dust.
3th disconnect the water line, remove the all valve..
4th unplug all the wires and code ea with a No,remove the water lines
5th replace the valve reconnect the wires and water lines.replace the
back cover at last screw back the w ... Read more ater line.check for water leaks .
i found ease the valve replacement installation.
.Thanks for the video.
Read less
Was this instruction helpful to you?
Thank you for voting!