



Models
>
LSC21943ST
LSC21943ST (GR-L227SSPH) LG Refrigerator
Jump to:
Find Part by Name
Keep searches simple, eg. "belt" or "pump".
Diagrams for LSC21943ST
Viewing 14 of 14


Keep searches simple, eg. "belt" or "pump".
$25.10
If the light inside your fridge is not coming on, or if it is staying on continuously, there may be an issue with your door switch. When the door to your fridge is closed, the button on the switch is...
In Stock
Order now and your part arrives by Oct 19

In Stock
Order now and your part arrives by Oct 19
NOTE: As per manufacture, due to the update in design you must also order the funnel frame.
No Longer Available
This ice maker assembly kit includes the ice maker, housing, and control device for full functionality. It automatically receives water, freezes it, and dispenses ice into the bin. Designed for easy i...
No Longer Available
$136.67
This water inlet valve has three solenoid valves and push in fittings. When energized this part releases water from the supply line into the ice mold.
In Stock
Order now and your part arrives by Oct 19
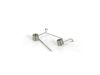
$15.26
This genuine OEM lever spring exerts tension between the ice maker door plunger and the ice maker itself on your refrigerator. If there is little to no tension holding your ice door seal in place, the...
In Stock
Order now and your part arrives by Oct 19
Special Order
Special Order

This genuine LG water filter is used in your refrigerator to help reduce contaminants and chlorine taste that may be in the water supply. The water filter measures approximately 3" in diameter and 6" ...
No Longer Available
In Stock
Order now and your part arrives by Oct 19
In Stock
Order now and your part arrives by Oct 19
Common Problems and Symptoms for LSC21943ST
Viewing 7 of 7Light not working
Fixed by these parts
How to fix it
Leaking
Fixed by these parts

How to fix it
Ice maker not making ice
Fixed by these parts
How to fix it
Not dispensing water
Fixed by these parts
How to fix it
Ice maker won’t dispense ice
Fixed by these parts
How to fix it
Noisy
Fixed by these parts
How to fix it
Door won’t open or close
Fixed by these parts
How to fix it
Keep searches simple. Use keywords, e.g. "leaking", "pump", "broken" or "fit".
- Customer:
- Debbie from Waltham, MA
- Parts Used:
- 6600JB1010A
- Difficulty Level:
- A Bit Difficult
- Total Repair Time:
- 30 - 60 mins
- Tools:
- Pliers, Screw drivers
Remove and replace light switch
Video makes it look easy. Kenmore refrigerator does not have "groove" along the right hand side of switch that allows for pushing down on release. Used a thin screwdriver to get under to push while holding switch edge with pliers. Kept slipping. Tape sides to avoid scratching inside of refrigerator.
Was this instruction helpful to you?
Thank you for voting!
- Customer:
- James from Englewood, FL
- Parts Used:
- 3016JA2002M
- Difficulty Level:
- Easy
- Total Repair Time:
- 15 - 30 mins
- Tools:
- Screw drivers
Sticking Ice dispenser
After checking the prices of new refrigerators, I decided that I had nothing to lose trying to repair the sticking ice/water dispenser. I followed the previous instructions by prying off the panel with a screwdriver working my way around. Some effort is needed, but it will come loose before it breaks. You should remove the funnel first. I
... Read more
f you have an older model, the funnels are fragile and should come out with a gentle back and forth jiggle. I broke mine. After pulling the face off the frig,I noticed that the plastic piece the activates the dispenser was partially out of its cradle in the rubber piece. Apparently pushing too hard on it can dislodge this piece and cause the unit to stick. Check this out before going for a new actuator. It only took a few minutes to clean and reassemble and reinstall. Works perfectly. Received new funnel and it was different than the one I took out. I missed the note that said if you order the funnel, you should also get the bracket to be sure they go back together. Two lessons learned. Don,t be afraid of this repair and don't push too hard on the dispenser.
Read less
Was this instruction helpful to you?
Thank you for voting!
- Customer:
- Kyle from WOODBURY, MN
- Parts Used:
- 5040JA2009B, 4681JB1029A
- Difficulty Level:
- A Bit Difficult
- Total Repair Time:
- 1- 2 hours
- Tools:
- Screw drivers, Wrench (Adjustable)
Evaporator Fan Squeeking
Detected noise as coming from top freezer department, and tips and part diagram clearly pointed to evaporator fan. You go in through the freezer (you have to empty top half of freezer); removing the side rails holding the ice bin, and then the 4 outer screws (only 2 each side - not the middle ones) holding the 'auger' that turns the bin
... Read more
. From there it gets interesting in trying to disconnect the wires. You might consider taking some pictures of the connected wires - perhaps it doesn't matter, but several of them can be hooked up in reverse. After the ice marker is out, remove light and light cover, side rails/mounts that hold hold up ice maker. This leaves a large white cover that pops out (seam at bottom of it has two tabs that you can pop out) holding the fan; and then only a few more wires to disconnect to be able to get at the fan. Mine clearly had a wobble to it confirming the source of the squeak and need to replace. Install was just reverse -- a bit tricky to get some of the wires connected given the tight spaces. Overall, not difficult - but a lot of wires and screws to connect/disconnect. I didn't take any pictures as I disassembled, and found myself having to take some extra time to figure it out as I reassembled. In the end -- a silent and functioning refrigerator Good luck!
Read less
Was this instruction helpful to you?
Thank you for voting!