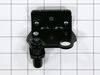
This part includes a single mounting bolt needed to secure the door handle to your refrigerator. This part is commonly replaced because the handle has started to loosen. Try tightening the screw first...
This is an authentic OEM part sourced directly from the manufacturer. The crisper slide rail for your refrigerator allows the crisper drawer to slide in and out, and supports the drawer as it does so....
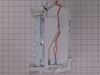
This part is the replacement water line or tube for your refrigerator. It is made of white plastic and is sold individually. This tube supplies water to the ice maker and water dispenser If your refri...
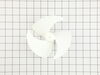
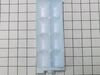
This part is the replacement ice tray for your refrigerator. The tray is made of white plastic and is approximately 9 inches in length, and 3 inches in width. It has the capacity for 8 ice cubes. The ...
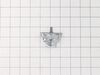
This cooling fan motor helps regulate your refrigerator’s temperature by moving air over the condenser coils to prevent overheating. A faulty motor can lead to poor cooling or unusual noises. Installa...
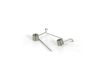
This genuine OEM lever spring exerts tension between the ice maker door plunger and the ice maker itself on your refrigerator. If there is little to no tension holding your ice door seal in place, the...
Ask our experts a question about this part and we'll get back to you as soon as possible!
2 questions answered by our experts.
< Prev
1
Next >
Sort by:
Search filter:
Clear Filter
Your search term must have 3 or more characters.
Keep searches simple. Use keywords, e.g. "leaking", "pump", "broken" or "fit".
Sorry, we couldn't find any existing answers that matched. Try using some different or simpler keywords, or submit your new question by using the "Ask a Question" button above!
Victor
July 24, 2022
The refrigerator is causing breaks to go down, i cannot connect the refrigerator to the power because immediately break short out. Help please
For model number LSC27910TT
Hi Victor,
Thank you for your question. If the refrigerator keeps tripping the breaker, the issue may be with the compressor, the defrost heater, the condenser fan motor, the evaporator fan motor or the thermostat. We have included a link that you may reference on how to check these parts. Once you have determined the part you need, please feel free to call customer service. We are open 7 days a week and anyone will be happy to assist you. We look forward to hearing from you!
How do i install a supco 3-1 hard startkit on this model? It has three wires on the factory start relay. The pink wire or as i understand is the protection interruption wire where does it hook up to on after market relay?
For model number LSC27910TT
Hello Micheal, thank you for reaching out. The starter kit has 3 wires, black, white, and red. The black wire goes to the run terminal of the compressor and the white wire connects to the start terminal of the compressor. The black wire is connected to the middle pin common terminal of the compressor. We hope this information helps!
Was this helpful?
Thank you for voting!
Ask a Question
Ask our experts a question on this part and we'll respond as soon as we can.
Remove water filter and water filter holder. Removed cover on back of frig. Removed clip where water line connects to back of water filter. Took half inch wrench pushed in on water line lock to release line. Repeat at other end. Reverse steps to put on new line. Easy repair.
After checking the prices of new refrigerators, I decided that I had nothing to lose trying to repair the sticking ice/water dispenser. I followed the previous instructions by prying off the panel with a screwdriver working my way around. Some effort is needed, but it will come loose before it breaks. You should remove the funnel first. I
... Read moref you have an older model, the funnels are fragile and should come out with a gentle back and forth jiggle. I broke mine. After pulling the face off the frig,I noticed that the plastic piece the activates the dispenser was partially out of its cradle in the rubber piece. Apparently pushing too hard on it can dislodge this piece and cause the unit to stick. Check this out before going for a new actuator. It only took a few minutes to clean and reassemble and reinstall. Works perfectly. Received new funnel and it was different than the one I took out. I missed the note that said if you order the funnel, you should also get the bracket to be sure they go back together. Two lessons learned. Don,t be afraid of this repair and don't push too hard on the dispenser.
Detected noise as coming from top freezer department, and tips and part diagram clearly pointed to evaporator fan. You go in through the freezer (you have to empty top half of freezer); removing the side rails holding the ice bin, and then the 4 outer screws (only 2 each side - not the middle ones) holding the 'auger' that turns the bin
... Read more. From there it gets interesting in trying to disconnect the wires. You might consider taking some pictures of the connected wires - perhaps it doesn't matter, but several of them can be hooked up in reverse. After the ice marker is out, remove light and light cover, side rails/mounts that hold hold up ice maker. This leaves a large white cover that pops out (seam at bottom of it has two tabs that you can pop out) holding the fan; and then only a few more wires to disconnect to be able to get at the fan. Mine clearly had a wobble to it confirming the source of the squeak and need to replace. Install was just reverse -- a bit tricky to get some of the wires connected given the tight spaces. Overall, not difficult - but a lot of wires and screws to connect/disconnect. I didn't take any pictures as I disassembled, and found myself having to take some extra time to figure it out as I reassembled. In the end -- a silent and functioning refrigerator Good luck!