



Models
>
GR-X23GHSJM
GR-X23GHSJM (ASTCNA0) LG Refrigerator
Jump to:
Find Part by Name
Keep searches simple, eg. "belt" or "pump".
Diagrams for GR-X23GHSJM
Viewing 8 of 8


Keep searches simple, eg. "belt" or "pump".
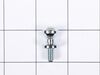
$15.26
This part includes a single mounting bolt needed to secure the door handle to your refrigerator. This part is commonly replaced because the handle has started to loosen. Try tightening the screw first...
In Stock
Order now and your part arrives by Oct 23

In Stock
Order now and your part arrives by Oct 23
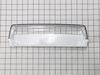
$66.86
Need more space in your fridge door? This clear, gallon-sized bin is a great way to organize drinks, sauces, and jars. It fits on the right-side door of certain refrigerators and installs easily—no to...
In Stock
Order now and your part arrives by Oct 23
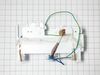
This ice maker kit helps your LG refrigerator get back to making ice reliably. It includes the parts needed to freeze water and automatically release ice cubes. If your fridge isn’t making ice, isn’t ...
In Stock
Order now and your part arrives by Oct 23
In Stock
Order now and your part arrives by Oct 23
In Stock
Order now and your part arrives by Oct 23
$24.00
This fan assembly circulates air through the appliance to support proper temperature control and ventilation. Designed for quiet and efficient airflow, it is replaced when airflow weakens, noise incre...
In Stock
Order now and your part arrives by Oct 23
$209.63
This replacement ice bucket assembly includes the bin and auger used to store and dispense ice in compatible refrigerators. It’s ideal for replacing a broken or worn-out unit and helps restore proper ...
Special Order
In Stock
Order now and your part arrives by Oct 23
In Stock
Order now and your part arrives by Oct 23
In Stock
Order now and your part arrives by Oct 23
In Stock
Order now and your part arrives by Oct 23
Common Problems and Symptoms for GR-X23GHSJM
Viewing 6 of 6Leaking
Fixed by these parts

How to fix it
Ice maker not making ice
Fixed by these parts
How to fix it
Not dispensing water
Fixed by these parts
How to fix it
Noisy
Fixed by these parts
How to fix it
Ice maker won’t dispense ice
Fixed by these parts
How to fix it
Door won’t open or close
Fixed by these parts
How to fix it
Keep searches simple. Use keywords, e.g. "leaking", "pump", "broken" or "fit".
- Customer:
- MARK from CLAREMORE, OK
- Parts Used:
- MCK66542801
- Difficulty Level:
- A Bit Difficult
- Total Repair Time:
- 30 - 60 mins
- Tools:
- Screw drivers
The water dispenser lever came off, due to broken tabs in the door panel.
Before you begin, I'd recommend unplugging the refrigerator. You have to slip the putty knife in around the edge of the dispenser panel and carefully release the tabs all the way around and the entire panel pulls straight out. There are three wiring harnesses to unplug. You'll have to remove several screws and release the tabs around the
... Read more
electronic panel and remove it from the main panel. It's a good idea to take note or even pictures of how the ice and water actuators are positioned on the panel, so you get them situated properly on the new panel. If the ice actuator is not fit correctly on a knob that sticks up it may dispense ice all the time (happened to me). After you transfer the actuators to the new panel and the ice and water dispensing levers, you can re-attach the electronic panel on the left side. make sure all of the wiring harnesses are plugged in and the wires situated out of the way, then re-install the panel by pushing it straight back in. Plug the refrigerator in and test it out.
Read less
Was this instruction helpful to you?
Thank you for voting!
- Customer:
- Tom from EASTON, PA
- Parts Used:
- MJU62070602
- Difficulty Level:
- Easy
- Total Repair Time:
- 30 - 60 mins
- Tools:
- Screw drivers, Wrench (Adjustable)
Water feed line running from water valve to filter housing was leaking
Shut off water supply. Disconnect main supply line. Remove rear lower panel on back of refrigerator. Remove all tubing clamps on back. Disconnect leaking tubing from water supply valve. Remove water filter and unscrew/remove water filter housing. Replace tubing - connect to water filter housing then to water supply valve. Reconnect filter
... Read more
housing and filter. Reinstall lower panel, then main water supply line, then all tubing clamps. Turn water back on and check for leaks after discarding several glasses of water to fill filter. Job complete!
Read less
Was this instruction helpful to you?
Thank you for voting!
- Customer:
- JOHN from LUDINGTON, MI
- Parts Used:
- AEQ73110210
- Difficulty Level:
- Really Easy
- Total Repair Time:
- 15 - 30 mins
- Tools:
- Screw drivers
ICE MAKER JAMED WOULD NOT ROTATE
REMOVED 3 SCREWS AND OUT IT CAME UNPLUG THE HARNES AT THE TOP YOUR NONE
Was this instruction helpful to you?
Thank you for voting!