



Models
>
GR-X23GHMJM
GR-X23GHMJM (AMTCNA1) LG Refrigerator
Jump to:
Find Part by Name
Keep searches simple, eg. "belt" or "pump".
Diagrams for GR-X23GHMJM
Viewing 8 of 8


Keep searches simple, eg. "belt" or "pump".

$25.25
This part includes a single mounting bolt needed to secure the door handle to your refrigerator. This part is commonly replaced because the handle has started to loosen. Try tightening the screw first...
In Stock
Order now and your part arrives by Nov 21

$28.55
Supply the refrigerator dispenser and ice maker through the enclosed path formed by this plastic water line tubing. The line connects plumbing components within the appliance. Leaks can develop at cra...
In Stock
Order now and your part arrives by Nov 21

$83.56
To provide handy storage for condiments, jars, bottles, and other small items, this refrigerator door bin attaches to the inside of the door, keeping everyday foods easy to reach while freeing up spac...
In Stock
Order now and your part arrives by Nov 21

$138.58
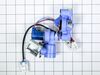
Dispensing water and filling the ice maker require controlled flow through this refrigerator water inlet valve assembly. Electrically operated solenoids open the water passages when requested by the a...
In Stock
Order now and your part arrives by Nov 21

$28.55
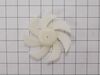
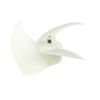
Possible signs of a damaged evaporator fan blade include ticking, buzzing, weak airflow, or uneven cooling. These problems may also be caused by ice buildup or a faulty fan motor, so inspect the area ...
In Stock
Order now and your part arrives by Nov 21

$230.68
This replacement ice bucket assembly includes the bin and auger used to store and dispense ice in compatible refrigerators. It’s ideal for replacing a broken or worn-out unit and helps restore proper ...
Special Order

In Stock
Order now and your part arrives by Nov 21

In Stock
Order now and your part arrives by Nov 21

In Stock
Order now and your part arrives by Nov 21

In Stock
Order now and your part arrives by Nov 21

$91.25
This refrigerator ice chute door motor keeps ice dispensing smoothly. It opens the chute door when you request ice and closes it afterward to help keep cold air inside. Installing a replacement for th...
In Stock
Order now and your part arrives by Nov 21

In Stock
Order now and your part arrives by Nov 21
Common Problems and Symptoms for GR-X23GHMJM
Viewing 5 of 5Leaking
Fixed by these parts

How to fix it
Noisy
Fixed by these parts
How to fix it
Not dispensing water
Fixed by these parts
How to fix it
Door won’t open or close
Fixed by these parts
How to fix it
Ice maker not making ice
Fixed by these parts
How to fix it
Keep searches simple. Use keywords, e.g. "leaking", "pump", "broken" or "fit".
- Customer:
- Tom from EASTON, PA
- Parts Used:
- MJU62070602
- Difficulty Level:
- Easy
- Total Repair Time:
- 30 - 60 mins
- Tools:
- Screw drivers, Wrench (Adjustable)
Water feed line running from water valve to filter housing was leaking
Shut off water supply. Disconnect main supply line. Remove rear lower panel on back of refrigerator. Remove all tubing clamps on back. Disconnect leaking tubing from water supply valve. Remove water filter and unscrew/remove water filter housing. Replace tubing - connect to water filter housing then to water supply valve. Reconnect filter
... Read more
housing and filter. Reinstall lower panel, then main water supply line, then all tubing clamps. Turn water back on and check for leaks after discarding several glasses of water to fill filter. Job complete!
Read less
Was this instruction helpful to you?
Thank you for voting!
- Customer:
- Todd from MARS HILL, NC
- Parts Used:
- MJU62070602
- Difficulty Level:
- Really Easy
- Total Repair Time:
- Less than 15 mins
- Tools:
- Screw drivers
Fridge waterline for ice maker / door water
The heavy work is moving the fridge, then take off the lower plans. Use a bowel or cup for screws and the water line connector spacers so you don't loos them.
undo connections holding water line, including the bottom brakes for the solenoid. Reuse the spring around the lower waterline to prevent external wear on the line.
... Read more r />NOTE: remove the waterline connector spacers and save!
NOTE: you must compress (not pull) the connect to then pull the waterline out of the connectors.
NOTE: You must also remove the water filter and housing inside the fridge but this is easy.
MOTE: Test the line for leaks by turning on the water and then using the door water. The filter will need to refill so it may take a minute before water comes up. This line only have pressure when the door water is used or the ice maker needs to make ice.
After replacing the line, test the line for leaks by using the door water so the solenoid fills the lines
undo connections holding water line, including the bottom brakes for the solenoid. Reuse the spring around the lower waterline to prevent external wear on the line.
... Read more r />NOTE: remove the waterline connector spacers and save!
NOTE: you must compress (not pull) the connect to then pull the waterline out of the connectors.
NOTE: You must also remove the water filter and housing inside the fridge but this is easy.
MOTE: Test the line for leaks by turning on the water and then using the door water. The filter will need to refill so it may take a minute before water comes up. This line only have pressure when the door water is used or the ice maker needs to make ice.
After replacing the line, test the line for leaks by using the door water so the solenoid fills the lines
Read less
Was this instruction helpful to you?
Thank you for voting!
- Customer:
- HARRY from SPARKS, NV
- Parts Used:
- MJU62070602
- Difficulty Level:
- Really Easy
- Total Repair Time:
- 15 - 30 mins
- Tools:
- Screw drivers, Wrench (Adjustable)
Changing out the Ice Maker tube
An easy way to get a refrigerator out from the wall is to use a tow strap or 1/2 to 3/4 in. rope. Throw a loop behind refer while keeping both ends in your hands. Let it settle down to the lower half of unit and pull using both hands. Comes right out.
Remove lower panel. Unscrew water valve from cabinet. Remove all tube holders L ... Read more ay some rags down to catch a little water drainage.
Turn off water supply valve at wall. Unplug Power. Remove filter and filter holder. (one screw).
remove tube from valve by removing plastic C clip. Push plastic ring towards the valve and pull out tube at same time.
With the tube free, remove filter, then mount screw to remove the inside filter holder. When it is out, pull the tube doing the same process as the lower end. Pull tube out and replace with new one putting everything back in reverse order.
Before placing tube holders back on, turn on water to check for leaks.
After turning water back on and plugging in power, push refer back into place.
While I was there, I also replaced the hose from the wall to the refer.
Remove lower panel. Unscrew water valve from cabinet. Remove all tube holders L ... Read more ay some rags down to catch a little water drainage.
Turn off water supply valve at wall. Unplug Power. Remove filter and filter holder. (one screw).
remove tube from valve by removing plastic C clip. Push plastic ring towards the valve and pull out tube at same time.
With the tube free, remove filter, then mount screw to remove the inside filter holder. When it is out, pull the tube doing the same process as the lower end. Pull tube out and replace with new one putting everything back in reverse order.
Before placing tube holders back on, turn on water to check for leaks.
After turning water back on and plugging in power, push refer back into place.
While I was there, I also replaced the hose from the wall to the refer.
Read less
Was this instruction helpful to you?
Thank you for voting!