



Models
>
GMB722DQFH
GMB722DQFH (ASW1LGA) LG Refrigerator
Jump to:
Find Part by Name
Keep searches simple, eg. "belt" or "pump".
Diagrams for GMB722DQFH
Viewing 1 of 1
Keep searches simple, eg. "belt" or "pump".
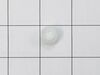
$15.26
This refrigerator door hinge bushing is a durable white plastic component that provides a smooth pivot point for the hinge pin, helping keep the door properly aligned and sealed. It is commonly used t...
In Stock
Order now and your part arrives by Jul 23
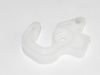
$15.26
This door stopper helps limit door movement to prevent overextension. Designed for durability and precise positioning, it supports controlled operation and long-term reliability.
In Stock
Order now and your part arrives by Jul 23
In Stock
Order now and your part arrives by Jul 23
In Stock
Order now and your part arrives by Jul 23
In Stock
Order now and your part arrives by Jul 23
Special Order
In Stock
Order now and your part arrives by Jul 23
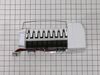
$317.77
If your LG fridge isn’t making ice anymore, this ice maker assembly could be just what you need. It comes with the ice mold and control unit to get things working again. Just make sure to unplug the f...
In Stock
Order now and your part arrives by Jul 23
In Stock
Order now and your part arrives by Jul 23
On Order
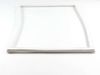
$132.20
This freezer door gasket helps maintain proper cooling by sealing the door and preventing air leaks. It replaces worn or damaged gaskets to restore efficiency and reduce frost buildup. For best result...
In Stock
Order now and your part arrives by Jul 23
Common Problems and Symptoms for GMB722DQFH
Viewing 6 of 6Door won’t open or close
Fixed by these parts
How to fix it
Will Not Start
Fixed by these parts
How to fix it
Fridge too warm
Fixed by these parts
How to fix it
Clicking sound
Fixed by these parts
How to fix it
Leaking
Fixed by these parts
How to fix it
Fridge and Freezer are too warm
Fixed by these parts
How to fix it
Keep searches simple. Use keywords, e.g. "leaking", "pump", "broken" or "fit".
- Customer:
- Jerry from CORSICANA, TX
- Parts Used:
- 4984JJ3003A
- Difficulty Level:
- Really Easy
- Total Repair Time:
- 30 - 60 mins
- Tools:
- Screw drivers, Socket set
old bushing worn and broken
removed the upper freezer door to access screws to remove lower door.
laid bottom door on its side, removed bad bushing, put new bushing in, put bottom door back on refridge, put upper door back on fridge. Door worked easy as when new. good closure of door and story..Happy customer, and wife even happier.....thank you....
laid bottom door on its side, removed bad bushing, put new bushing in, put bottom door back on refridge, put upper door back on fridge. Door worked easy as when new. good closure of door and story..Happy customer, and wife even happier.....thank you....
Was this instruction helpful to you?
Thank you for voting!
- Customer:
- Louis from PHILADELPHIA, PA
- Parts Used:
- 4984JJ3003A
- Difficulty Level:
- Really Easy
- Total Repair Time:
- 30 - 60 mins
- Tools:
- Screw drivers, Socket set, Wrench set
bottom door dropped slightly and bottom hinge area rubbing on steel door support
removed 3 fasteners for top door and placed freezer door aside, then removed 3 more fasteners on bottom refrigerator door and place that aside. replaced bushing on lower door bracket and reversed the above procedure to reinstall doors.
Was this instruction helpful to you?
Thank you for voting!
- Customer:
- Eric from SURPRISE, AZ
- Parts Used:
- 5989JA0002Y
- Difficulty Level:
- Really Easy
- Total Repair Time:
- 30 - 60 mins
The ice maker in freezer P/NO 5988JA0002Y would leak water and make giant ice block
I ordered and replaced the ice maker. To replace:
1. Go behind refrigerator and unplug electrical cord and turn off water supply.
2. In freezer locate electrical plug for ice maker. It has two tabs on the left and right side of it. Lift the tabs and pull the plug to disconnect it.
3. Remove the three screw ... Read more s, 2 on top and 1 on bottom of ice maker You can actually leave the screws in place if you loosen them sufficiently and lift the ice maker off of the screws and washers.
4. Install the new ice maker using the screws and plastic washers to secure it.
5. Plug the electrical connector for ice maker into the receptacle. Note: The plug only goes one way and is keyed with different shaped plugs and holes. The wires on my plug naturally fell upside down so I had to turn the plug 180 degrees to make it fit in the slot.
6. Turn on water and check for leaks.
7. Plug back in refrigerator and you should have ice in less than 12 hours.
1. Go behind refrigerator and unplug electrical cord and turn off water supply.
2. In freezer locate electrical plug for ice maker. It has two tabs on the left and right side of it. Lift the tabs and pull the plug to disconnect it.
3. Remove the three screw ... Read more s, 2 on top and 1 on bottom of ice maker You can actually leave the screws in place if you loosen them sufficiently and lift the ice maker off of the screws and washers.
4. Install the new ice maker using the screws and plastic washers to secure it.
5. Plug the electrical connector for ice maker into the receptacle. Note: The plug only goes one way and is keyed with different shaped plugs and holes. The wires on my plug naturally fell upside down so I had to turn the plug 180 degrees to make it fit in the slot.
6. Turn on water and check for leaks.
7. Plug back in refrigerator and you should have ice in less than 12 hours.
Read less
Was this instruction helpful to you?
Thank you for voting!