
Models > LRFLC2706S

LRFLC2706S (ASTCNA0) LG Refrigerator

Jump to:

Find Part by Name

Keep searches simple, eg. "belt" or "pump".

Diagrams for LRFLC2706S

Viewing 1 of 1
Keep searches simple, eg. "belt" or "pump".
This part includes a single mounting bolt needed to secure the door handle to your refrigerator. This part is commonly replaced because the handle has started to loosen. Try tightening the screw first...
In Stock
Order now and your part arrives by Jun 4
$82.21
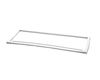
Freezer door gasket is on the inner door panel and creates a seal around the door to prevent warm air from entering the freezer compartment.
In Stock
Order now and your part arrives by Jun 4
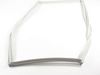
Keep your LG refrigerator running efficiently with this replacement door gasket, also known as a door seal. It helps block warm air from entering the fridge, preserving the cool temperature inside. If...
In Stock
Order now and your part arrives by Jun 4
In Stock
Order now and your part arrives by Jun 4
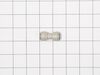
The water tube fitting connects lines that supply water to components such as the ice maker and water dispenser.
In Stock
Order now and your part arrives by Jun 4
Keep your fridge cool and efficient with this replacement door gasket. Made from flexible rubber, it lines the edge of the refrigerator door to seal in cold air and keep warm air out. If your current ...
In Stock
Order now and your part arrives by Jun 4
$32.12
Special Order
Introducing the MOTOR ASSEMBLY,DC from the trusted brand, LG. This genuine OEM item is specifically crafted to work with select LG refrigerator models. Its essential role is to power the condenser fan...
In Stock
Order now and your part arrives by Jun 4
In Stock
Order now and your part arrives by Jun 4
$24.00
Special Order
In Stock
Order now and your part arrives by Jun 4
On Order

Questions and Answers

Be the first to ask our experts a question about this part!

Common Problems and Symptoms for LRFLC2706S

Viewing 8 of 8
Door Sweating
Fixed by these parts
Fixing Fixing
How to fix it
Leaking
Fixed by these parts
Fixing Fixing
How to fix it
Noisy
Fixed by these parts
Fixing Fixing
How to fix it
Ice maker won’t dispense ice
Fixed by these parts
Fixing
How to fix it
Frost buildup
Fixed by these parts
Fixing
How to fix it
Door won’t open or close
Fixed by these parts
Fixing
How to fix it
Freezer section too warm
Fixed by these parts
Fixing
How to fix it
Ice maker dispenses too much ice
Fixed by these parts
Fixing
How to fix it
Keep searches simple. Use keywords, e.g. "leaking", "pump", "broken" or "fit".
Customer:
Vispi from SUGAR LAND, TX
Parts Used:
ADX72930461, ADX72930460
Difficulty Level:
Really Easy
Total Repair Time:
15 - 30 mins
Tools:
Screw drivers
The door gaskets had become hard and curled up - would not seal properly
Watch YouTube videos on this topic if you are uncertain before tackling the job. The right door was easy to replace. Just pull the gasket with your fingers and it will come off easily. Place new gasket over door and use fingers to press it inside the groove few inches at a time. Pay attention to gasket orientation.

The left door is a bit harder because you need to remove the mullion at the door edge using a screw driver. Remove two screws on the center hinge and then slide the mullion up to disengage. Then unplug the wires to remove the mullion. Replace the gasket as described above and replace the mullion reversing the directions shown above.

Could not believe how easy it was!
4 of 4 people found this instruction helpful.
Was this instruction helpful to you?
Thank you for voting!
Customer:
Konnie from SALEM, OR
Parts Used:
ADX72930461, ADX72930460
Difficulty Level:
Easy
Total Repair Time:
Less than 15 mins
Tools:
Screw drivers
Moldy and torn gaskets
Once I U tubed the the removal and replacement of the gaskets it was super easy. The right gasket change was easy without tools. The left gasket required me to remove the mullion first, which is why I used Utube.
4 of 5 people found this instruction helpful.
Was this instruction helpful to you?
Thank you for voting!
Customer:
Megan from Elk Grove, CA
Parts Used:
ADX72930461, ADX72930460
Difficulty Level:
Very Easy
Total Repair Time:
Less than 15 mins
Tools:
Screw drivers
Replaced Old Molded Gasket with new one
For the right side of the refrigerator door, just pulled off the old gasket and replaced it with the new one. Old gasket came off easily. Just had to pull it off. No screws on the right side. Just pushed the new one in place in the groove on the door.

For the left side, needed a Phillip’s screwdriver to remove the flap first. H elps to have a second person hold the door from moving. Once flap was off, pulled the old gasket off and installed the new one just like the right side. Then screwed the flap back on once the gasket was in the groove properly.

Initially after install, it seemed like the magnet on the door was not strong enough but after a couple of days, the magnet seems a lot stronger, sealing the air out. Very happy I replaced it. It was a lot simpler to replace than I thought it would be.
3 of 3 people found this instruction helpful.
Was this instruction helpful to you?
Thank you for voting!