



Models
>
LMX30995ST
LMX30995ST (ASTCNA1) LG Refrigerator
Jump to:
Find Part by Name
Keep searches simple, eg. "belt" or "pump".
Diagrams for LMX30995ST
Viewing 7 of 7


Keep searches simple, eg. "belt" or "pump".
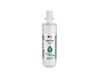
This refrigerator water filter replacement is for 2010 LG refrigerators that have either forward French doors or are the four-door dispensing models. This filter is designed to minimize impurities tha...
In Stock
Order now and your part arrives by Sep 24
$15.26
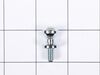
This part includes a single mounting bolt needed to secure the door handle to your refrigerator. This part is commonly replaced because the handle has started to loosen. Try tightening the screw first...
In Stock
Order now and your part arrives by Sep 24
$66.86
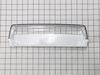
Need more space in your fridge door? This clear, gallon-sized bin is a great way to organize drinks, sauces, and jars. It fits on the right-side door of certain refrigerators and installs easily—no to...
In Stock
Order now and your part arrives by Sep 24
$48.21
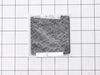
Refrigerator Air Filters are a key component for neutralizing odors and ensuring a fresh stream of air into your refrigerator. Swapping your old filter out for a fresh one isn’t difficult and should t...
Special Order
$24.00
This is a manufacturer-approved refrigerator door closure for your refrigerator. It is made of white plastic and measures approximately 3 inches by 2 inches. If your old closure is damaged, your refri...
On Order
$49.29
This glass shelf provides storage space in your refrigerator above the crisper. Shelves can crack and chip due to frequent use, and should be replaced immediately if cracks start to appear. This shelf...
In Stock
Order now and your part arrives by Sep 24
$103.17
Keep your LG refrigerator running efficiently with this replacement door gasket, also known as a door seal. It helps block warm air from entering the fridge, preserving the cool temperature inside. If...
On Order
In Stock
Order now and your part arrives by Sep 24
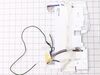
$261.17
NOTE: The Secondary (smaller) wire connector has 3 wires in it. If original ice maker has 6 wire connector see part number AEQ73110205. Please verify connector before ordering.
In Stock
Order now and your part arrives by Sep 24
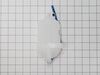
$64.74
The water reservoir holds the water for the water dispenser as the water chills.
In Stock
Order now and your part arrives by Sep 24
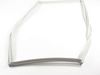
$103.17
Keep your fridge cool and efficient with this replacement door gasket. Made from flexible rubber, it lines the edge of the refrigerator door to seal in cold air and keep warm air out. If your current ...
On Order
Special Order
Common Problems and Symptoms for LMX30995ST
Viewing 9 of 9Leaking
Fixed by these parts

How to fix it
Door won’t open or close
Fixed by these parts
How to fix it
Door Sweating
Fixed by these parts
How to fix it
Not dispensing water
Fixed by these parts
How to fix it
Ice maker won’t dispense ice
Fixed by these parts
How to fix it
Noisy
Fixed by these parts
How to fix it
Fridge and Freezer are too warm
Fixed by these parts

How to fix it
Ice maker not making ice
Fixed by these parts
How to fix it
Ice maker dispenses too much ice
Fixed by these parts
How to fix it
Keep searches simple. Use keywords, e.g. "leaking", "pump", "broken" or "fit".
- Customer:
- MARK from CLAREMORE, OK
- Parts Used:
- MCK66542801
- Difficulty Level:
- A Bit Difficult
- Total Repair Time:
- 30 - 60 mins
- Tools:
- Screw drivers
The water dispenser lever came off, due to broken tabs in the door panel.
Before you begin, I'd recommend unplugging the refrigerator. You have to slip the putty knife in around the edge of the dispenser panel and carefully release the tabs all the way around and the entire panel pulls straight out. There are three wiring harnesses to unplug. You'll have to remove several screws and release the tabs around the
... Read more
electronic panel and remove it from the main panel. It's a good idea to take note or even pictures of how the ice and water actuators are positioned on the panel, so you get them situated properly on the new panel. If the ice actuator is not fit correctly on a knob that sticks up it may dispense ice all the time (happened to me). After you transfer the actuators to the new panel and the ice and water dispensing levers, you can re-attach the electronic panel on the left side. make sure all of the wiring harnesses are plugged in and the wires situated out of the way, then re-install the panel by pushing it straight back in. Plug the refrigerator in and test it out.
Read less
Was this instruction helpful to you?
Thank you for voting!
- Customer:
- Megan from Elk Grove, CA
- Parts Used:
- ADX72930461, ADX72930460
- Difficulty Level:
- Very Easy
- Total Repair Time:
- Less than 15 mins
- Tools:
- Screw drivers
Replaced Old Molded Gasket with new one
For the right side of the refrigerator door, just pulled off the old gasket and replaced it with the new one. Old gasket came off easily. Just had to pull it off. No screws on the right side. Just pushed the new one in place in the groove on the door.
For the left side, needed a Phillip’s screwdriver to remove the flap first. H ... Read more elps to have a second person hold the door from moving. Once flap was off, pulled the old gasket off and installed the new one just like the right side. Then screwed the flap back on once the gasket was in the groove properly.
Initially after install, it seemed like the magnet on the door was not strong enough but after a couple of days, the magnet seems a lot stronger, sealing the air out. Very happy I replaced it. It was a lot simpler to replace than I thought it would be.
For the left side, needed a Phillip’s screwdriver to remove the flap first. H ... Read more elps to have a second person hold the door from moving. Once flap was off, pulled the old gasket off and installed the new one just like the right side. Then screwed the flap back on once the gasket was in the groove properly.
Initially after install, it seemed like the magnet on the door was not strong enough but after a couple of days, the magnet seems a lot stronger, sealing the air out. Very happy I replaced it. It was a lot simpler to replace than I thought it would be.
Read less
Was this instruction helpful to you?
Thank you for voting!
- Customer:
- Konnie from SALEM, OR
- Parts Used:
- ADX72930461, ADX72930460
- Difficulty Level:
- Easy
- Total Repair Time:
- Less than 15 mins
- Tools:
- Screw drivers
Moldy and torn gaskets
Once I U tubed the the removal and replacement of the gaskets it was super easy. The right gasket change was easy without tools. The left gasket required me to remove the mullion first, which is why I used Utube.
Was this instruction helpful to you?
Thank you for voting!