



Models
>
LSC27921SB
LSC27921SB (AWBCLGA) LG Refrigerator
Jump to:
Find Part by Name
Keep searches simple, eg. "belt" or "pump".
Keep searches simple, eg. "belt" or "pump".
$15.26
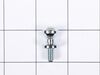
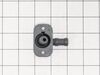
This part includes a single mounting bolt needed to secure the door handle to your refrigerator. This part is commonly replaced because the handle has started to loosen. Try tightening the screw first...
In Stock
Order now and your part arrives by Oct 8
$36.25
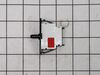
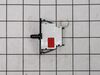
This is a genuine replacement switch. It is a push button style switch that is designed for use in your refrigerator. When the door of your appliance is opened the switch is released, and the light co...
Special Order
$15.26
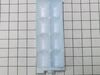
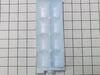
This part is the replacement ice tray for your refrigerator. The tray is made of white plastic and is approximately 9 inches in length, and 3 inches in width. It has the capacity for 8 ice cubes. The ...
Special Order

This is a single water filter that can be accessible inside the refrigerator. Water filters are designed to provide cleaner and betting tasting water, while also protecting refrigerators and ice machi...
In Stock
Order now and your part arrives by Oct 8
$136.67
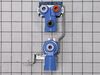
This water inlet valve has three solenoid valves and push in fittings. When energized this part releases water from the supply line into the ice mold.
In Stock
Order now and your part arrives by Oct 8
In Stock
Order now and your part arrives by Oct 8
In Stock
Order now and your part arrives by Oct 8
In Stock
Order now and your part arrives by Oct 8
In Stock
Order now and your part arrives by Oct 8
In Stock
Order now and your part arrives by Oct 8
Common Problems and Symptoms for LSC27921SB
Viewing 7 of 7Leaking
Fixed by these parts
How to fix it
Light not working
Fixed by these parts
How to fix it
Ice maker won’t dispense ice
Fixed by these parts
How to fix it
Door won’t open or close
Fixed by these parts
How to fix it
Not dispensing water
Fixed by these parts
How to fix it
Ice maker dispenses too much ice
Fixed by these parts
How to fix it
Ice maker not making ice
Fixed by these parts
How to fix it
Keep searches simple. Use keywords, e.g. "leaking", "pump", "broken" or "fit".
- Customer:
- George from ATLANTA, GA
- Parts Used:
- 3390JA1150A
- Difficulty Level:
- Easy
- Total Repair Time:
- Less than 15 mins
- Tools:
- Screw drivers
The ice tray had warped and dumped water, which then froze down through the ice bucket and below.
To replace the warped tray, I found the service manual (pg. 124 below) which took some interpreting.
Removed the lever. Then removed the assembly by two screws that are forward to the unit and go upwards.
The insulation, sensor, and sensor cover are simply pulled down and off and the unit separated to removed the tray, and ... Read more then insert the new tray. Proceed in reverse. Takes only a few minutes.
/Users/grf/Desktop/fridge ice tray.pdf
Removed the lever. Then removed the assembly by two screws that are forward to the unit and go upwards.
The insulation, sensor, and sensor cover are simply pulled down and off and the unit separated to removed the tray, and ... Read more then insert the new tray. Proceed in reverse. Takes only a few minutes.
/Users/grf/Desktop/fridge ice tray.pdf
Read less
Was this instruction helpful to you?
Thank you for voting!
- Customer:
- Willard from COMPTON, CA
- Parts Used:
- ADQ72910911
- Difficulty Level:
- Really Easy
- Total Repair Time:
- Less than 15 mins
Water had reached its recommended service life..
Closed valve to water supply line; Removed contents of top shelf. Removed top shelf by sliding it out. Unscrewed old water filter and screwed in new filter. Replaced to shelf and contents in reverse order. Opened water supply line.
Was this instruction helpful to you?
Thank you for voting!
- Customer:
- Albert from NORTHRIDGE, CA
- Parts Used:
- 5221JA2006D
- Difficulty Level:
- Really Easy
- Total Repair Time:
- 30 - 60 mins
- Tools:
- Screw drivers, Socket set, Wrench set
whater valve whith a defected selenoid and water leaks.
First ,I unplug the refrigerator .
2nd i remove the back cover, clean the dust.
3th disconnect the water line, remove the all valve..
4th unplug all the wires and code ea with a No,remove the water lines
5th replace the valve reconnect the wires and water lines.replace the
back cover at last screw back the w ... Read more ater line.check for water leaks .
i found ease the valve replacement installation.
.Thanks for the video.
2nd i remove the back cover, clean the dust.
3th disconnect the water line, remove the all valve..
4th unplug all the wires and code ea with a No,remove the water lines
5th replace the valve reconnect the wires and water lines.replace the
back cover at last screw back the w ... Read more ater line.check for water leaks .
i found ease the valve replacement installation.
.Thanks for the video.
Read less
Was this instruction helpful to you?
Thank you for voting!