



Models
>
72597
72597 (ASBCSE0) LG Refrigerator
Jump to:
Find Part by Name
Keep searches simple, eg. "belt" or "pump".
Diagrams for 72597
Viewing 7 of 7


Keep searches simple, eg. "belt" or "pump".
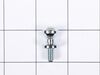
$15.26
This part includes a single mounting bolt needed to secure the door handle to your refrigerator. This part is commonly replaced because the handle has started to loosen. Try tightening the screw first...
In Stock
Order now and your part arrives by Oct 1

In Stock
Order now and your part arrives by Oct 1
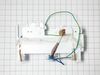
This ice maker kit helps your LG refrigerator get back to making ice reliably. It includes the parts needed to freeze water and automatically release ice cubes. If your fridge isn’t making ice, isn’t ...
In Stock
Order now and your part arrives by Oct 1
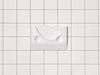
$24.00
This is a manufacturer-approved refrigerator door closure for your refrigerator. It is made of white plastic and measures approximately 3 inches by 2 inches. If your old closure is damaged, your refri...
On Order
In Stock
Order now and your part arrives by Oct 1

In Stock
Order now and your part arrives by Oct 1
On Order
$81.17
If your LG fridge isn’t dispensing ice like it should this motor might be the fix. It opens and closes the ice chute door so ice can come out while keeping warm air out of the freezer. Made for select...
In Stock
Order now and your part arrives by Oct 1
The compressor overload protector attaches to the compressor and shuts off the compressor if the compressor motor draws too much current.
In Stock
Order now and your part arrives by Oct 1
In Stock
Order now and your part arrives by Oct 1
In Stock
Order now and your part arrives by Oct 1
Common Problems and Symptoms for 72597
Viewing 6 of 6Door won’t open or close
Fixed by these parts

How to fix it
Ice maker not making ice
Fixed by these parts
How to fix it
Ice maker won’t dispense ice
Fixed by these parts
How to fix it
Fridge and Freezer are too warm
Fixed by these parts
How to fix it
Ice maker dispenses too much ice
Fixed by these parts
How to fix it
Not dispensing water
Fixed by these parts
How to fix it
Keep searches simple. Use keywords, e.g. "leaking", "pump", "broken" or "fit".
- Customer:
- JOHN from LUDINGTON, MI
- Parts Used:
- AEQ73110210
- Difficulty Level:
- Really Easy
- Total Repair Time:
- 15 - 30 mins
- Tools:
- Screw drivers
ICE MAKER JAMED WOULD NOT ROTATE
REMOVED 3 SCREWS AND OUT IT CAME UNPLUG THE HARNES AT THE TOP YOUR NONE
Was this instruction helpful to you?
Thank you for voting!
- Customer:
- Garthlette from COVINGTON, GA
- Parts Used:
- 6500JB2002X
- Difficulty Level:
- A Bit Difficult
- Total Repair Time:
- 30 - 60 mins
- Tools:
- Screw drivers
Error Code dH F
The refrigerator had the above code and when I check on YouTube, it explained that the defrosting was not working properly. It was taking more than 80 minutes to defrost. I ordered the Temperature Sensor first and it was not the issue. I also ordered the Defrost Temperature fuse or the Thermistor. I had to defrost the refrigerator first
... Read more
by using a portable heater to get it done quickly. (See Youtube on how to get to the Defrosting Unit inside the freezer). The Thermistor was the wrong part. I called the Partselect and explained that the part with the heating element is one piece. (Heating Coil Thermistor or Heating Coil). By replacing that piece solved the Error Code issue. I listened to Youtube for the instructions on how to replace the Heater Coil. So if you see the Error Code dH F, you need to replace the Heating Coil, which comes in
one piece and sits on the bottom of the Defrost Element.
one piece and sits on the bottom of the Defrost Element.
Read less
Was this instruction helpful to you?
Thank you for voting!
- Customer:
- Paul from CLEARFIELD, UT
- Parts Used:
- AEQ73110210
- Difficulty Level:
- Easy
- Total Repair Time:
- 30 - 60 mins
- Tools:
- Screw drivers
Ice Maker Can’t Rotate/Discharge Ice
First, remove power to the refrigerator.
To replace the ice maker you first have to remove the back mounting assembly, which ice maker is attached to.
Only three Phillips head screws need to be removed: 2 on the bottom and 1 on the back of the ice maker mounting assembly. Do not remove the two diagonal Phillips head ... Read more screws holding the dispenser motor on the reverse side of the mounting assembly.
As you pull out the mounting assembly to the front you will see a connector on the top inside, which must be unplugged. A narrow standard screw driver will help the connector lock to release; slide the screwdriver tip under the connector lock clip and it will allow the connector to be unplugged.
Once the ice maker mounting assembly is removed and placed on a flat surface it will be self evident as to how to remove and replace the ice maker. The 1” tape might be needed during the cable re-routing process. However you can reuse the original tape required to be removed during the ice maker remove and replace process, if possible.
Reinstall the ice maker mounting assembly in the reverse order it was removed.
Apply power to the refrigerator.
Cycle the ice maker to Off and then back to On. It may take an hour or two before the ice maker produces ice because the temperature inside the ice maker must reach “0” degrees Fahrenheit before it will begin making ice.
Pull the ice maker
To replace the ice maker you first have to remove the back mounting assembly, which ice maker is attached to.
Only three Phillips head screws need to be removed: 2 on the bottom and 1 on the back of the ice maker mounting assembly. Do not remove the two diagonal Phillips head ... Read more screws holding the dispenser motor on the reverse side of the mounting assembly.
As you pull out the mounting assembly to the front you will see a connector on the top inside, which must be unplugged. A narrow standard screw driver will help the connector lock to release; slide the screwdriver tip under the connector lock clip and it will allow the connector to be unplugged.
Once the ice maker mounting assembly is removed and placed on a flat surface it will be self evident as to how to remove and replace the ice maker. The 1” tape might be needed during the cable re-routing process. However you can reuse the original tape required to be removed during the ice maker remove and replace process, if possible.
Reinstall the ice maker mounting assembly in the reverse order it was removed.
Apply power to the refrigerator.
Cycle the ice maker to Off and then back to On. It may take an hour or two before the ice maker produces ice because the temperature inside the ice maker must reach “0” degrees Fahrenheit before it will begin making ice.
Pull the ice maker
Read less
Was this instruction helpful to you?
Thank you for voting!