



Models
>
LSXS26366D
LSXS26366D (ASBCNA3) LG Refrigerator
Jump to:
Find Part by Name
Keep searches simple, eg. "belt" or "pump".
Diagrams for LSXS26366D
Viewing 5 of 5


Keep searches simple, eg. "belt" or "pump".

The Water filter reduces contaminants such a s lead, iron, and chlorine from drinking water. Replace every 6 months or 200 gallons for best performance.
In Stock
Order now and your part arrives by Jul 19
In Stock
Order now and your part arrives by Jul 19
In Stock
Order now and your part arrives by Jul 19
In Stock
Order now and your part arrives by Jul 19
In Stock
Order now and your part arrives by Jul 19

$81.17
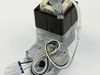
If your LG fridge isn?t dispensing ice like it should, this motor might be the fix. It opens and closes the ice chute door so ice can come out while keeping warm air out of the freezer. Made for selec...
In Stock
Order now and your part arrives by Jul 19
On Order
In Stock
Order now and your part arrives by Jul 19
Special Order
Special Order
In Stock
Order now and your part arrives by Jul 19
$82.29
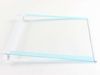
This glass shelf assembly is designed to provide sturdy, reliable storage inside your LG refrigerator. Featuring a clear glass surface with supportive plastic trim, it offers a precise fit for organiz...
Special Order
Common Problems and Symptoms for LSXS26366D
Viewing 3 of 3Door won’t open or close
Fixed by these parts
How to fix it
Ice maker not making ice
Fixed by these parts
How to fix it
Leaking
Fixed by these parts
How to fix it
Keep searches simple. Use keywords, e.g. "leaking", "pump", "broken" or "fit".
- Customer:
- Thomas from HUNTSVILLE, TX
- Parts Used:
- AEQ73130002
- Difficulty Level:
- Really Easy
- Total Repair Time:
- 15 - 30 mins
- Tools:
- Screw drivers
Refrigerator Ice maker quit producing ice.
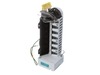
This repair was easy. The ice maker assembly is basically a plug and play unit that requires first removing the ice bucket as described inside the freezer door. Next, remove several screws the support the unit, then gently lifting the ice maker assembly out, just far enough to access the 2 electrical plugs that operate the unit. Caref
... Read more
ully unplug the old unit and remove it. Next, plug the new unit and then reverse the disassembly process. I could have done this in 10 minutes had I not been careful not to break anything. No special tools are required.
Read less
Was this instruction helpful to you?
Thank you for voting!
- Customer:
- Herb from YUMA, AZ
- Parts Used:
- ADP74753302
- Difficulty Level:
- Very Easy
- Total Repair Time:
- 30 - 60 mins
- Tools:
- Screw drivers, Wrench (Adjustable)
Noise coming from refrigerator
Opened the back and noticed a fan blade off making the motor unbalanced. Ordered a new fan and motor and went to (you tube ) that explained the whole procedure. Couldn’t get any easier.
Was this instruction helpful to you?
Thank you for voting!
- Customer:
- Ralph from VALLEY SPGS, CA
- Parts Used:
- ADQ73613401
- Difficulty Level:
- Very Easy
- Total Repair Time:
- Less than 15 mins
Change filter light came on
Took out the old and replaced the new filter
Was this instruction helpful to you?
Thank you for voting!