



Models
>
LRFC21755TT
LRFC21755TT (ATICLGA) LG Refrigerator
Jump to:
Find Part by Name
Keep searches simple, eg. "belt" or "pump".
Diagrams for LRFC21755TT
Viewing 5 of 5


Keep searches simple, eg. "belt" or "pump".

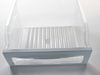
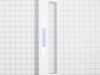
This is the front of a refrigerator crisper drawer. It features the humidity control and a clear plastic window, surrounded by white plastic. It is often replaced because it has cracked or is no longe...
No Longer Available
$25.10
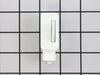
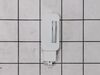
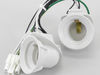
If the light inside your fridge is not coming on, or if it is staying on continuously, there may be an issue with your door switch. When the door to your fridge is closed, the button on the switch is...
In Stock
Order now and your part arrives by Nov 16

In Stock
Order now and your part arrives by Nov 16

This tray cover, also known as the front drawer cover, fits on the front of the bottom drawer in your refrigerator. It is made of plastic and is white and clear in color. The cover creates a seal in y...
No Longer Available

In Stock
Order now and your part arrives by Nov 16

In Stock
Order now and your part arrives by Nov 16



Common Problems and Symptoms for LRFC21755TT
Viewing 12 of 12Light not working
Fixed by these parts
How to fix it
Door won’t open or close
Fixed by these parts
How to fix it
Leaking
Fixed by these parts

How to fix it
Ice maker not making ice
Fixed by these parts
How to fix it
Frost buildup
Fixed by these parts
How to fix it
Will Not Start
Fixed by these parts
How to fix it
Fridge too warm
Fixed by these parts
How to fix it
Freezer not defrosting
Fixed by these parts
How to fix it
Clicking sound
Fixed by these parts
How to fix it
Noisy
Fixed by these parts
How to fix it
Freezer section too warm
Fixed by these parts
How to fix it
Fridge and Freezer are too warm
Fixed by these parts
How to fix it
Keep searches simple. Use keywords, e.g. "leaking", "pump", "broken" or "fit".
- Customer:
- Debbie from Waltham, MA
- Parts Used:
- 6600JB1010A
- Difficulty Level:
- A Bit Difficult
- Total Repair Time:
- 30 - 60 mins
- Tools:
- Pliers, Screw drivers
Remove and replace light switch
Video makes it look easy. Kenmore refrigerator does not have "groove" along the right hand side of switch that allows for pushing down on release. Used a thin screwdriver to get under to push while holding switch edge with pliers. Kept slipping. Tape sides to avoid scratching inside of refrigerator.
Was this instruction helpful to you?
Thank you for voting!
- Customer:
- Scott from JUPITER, FL
- Parts Used:
- 6615JB2005H
- Difficulty Level:
- Easy
- Total Repair Time:
- 1- 2 hours
- Tools:
- Pliers, Screw drivers
Replace Thermistor in back of freezer
Turn off power, remove upper and lower drawers (may need to open upper refrigerator doors to remove large freezer bin,) remove drawer supports (upper and lower), remove rear freezer panel (trick is to loosen 4 screws on fan bumpout to get the panel to come free from the freezer side wall), test thermistor with multimeter (should have cont
... Read more
inuity or near zero resistance across 2 orange fuse wires) before cutting zip ties, cut zip ties holding Thermistor in place, remove old Thermistor, install new Thermistor, install new zip ties, replace rear freezer panel, install upper and lower drawer supports, install drawers, turn on power, should be fixed if error code doesn't return after 6 hours.
Read less
Was this instruction helpful to you?
Thank you for voting!
- Customer:
- Garthlette from COVINGTON, GA
- Parts Used:
- 6500JB2002X
- Difficulty Level:
- A Bit Difficult
- Total Repair Time:
- 30 - 60 mins
- Tools:
- Screw drivers
Error Code dH F
The refrigerator had the above code and when I check on YouTube, it explained that the defrosting was not working properly. It was taking more than 80 minutes to defrost. I ordered the Temperature Sensor first and it was not the issue. I also ordered the Defrost Temperature fuse or the Thermistor. I had to defrost the refrigerator first
... Read more
by using a portable heater to get it done quickly. (See Youtube on how to get to the Defrosting Unit inside the freezer). The Thermistor was the wrong part. I called the Partselect and explained that the part with the heating element is one piece. (Heating Coil Thermistor or Heating Coil). By replacing that piece solved the Error Code issue. I listened to Youtube for the instructions on how to replace the Heater Coil. So if you see the Error Code dH F, you need to replace the Heating Coil, which comes in
one piece and sits on the bottom of the Defrost Element.
one piece and sits on the bottom of the Defrost Element.
Read less
Was this instruction helpful to you?
Thank you for voting!