



Models
>
LFD22860TT
LFD22860TT (00) LG Refrigerator
Jump to:
Find Part by Name
Keep searches simple, eg. "belt" or "pump".
Diagrams for LFD22860TT
Viewing 6 of 6


Keep searches simple, eg. "belt" or "pump".
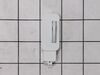
$25.10
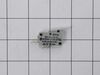
If the light inside your fridge is not coming on, or if it is staying on continuously, there may be an issue with your door switch. When the door to your fridge is closed, the button on the switch is...
In Stock
Order now and your part arrives by Oct 29
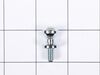
$15.26
This part includes a single mounting bolt needed to secure the door handle to your refrigerator. This part is commonly replaced because the handle has started to loosen. Try tightening the screw first...
In Stock
Order now and your part arrives by Oct 29

In Stock
Order now and your part arrives by Oct 29
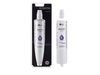
Enjoy cleaner, better-tasting water and ice with this refrigerator water filter. It uses activated carbon to reduce things like chlorine, lead, and other impurities—though it doesn’t remove fluoride. ...
In Stock
Order now and your part arrives by Oct 29
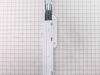
This guide rail, also known as a drawer slide rail, is a genuine OEM replacement part for the freezer section of your refrigerator. This slide rail supports the storage basket in your freezer, allowin...
No Longer Available
In Stock
Order now and your part arrives by Oct 29
Special Order
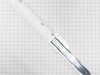
If your freezer drawer isn’t sliding like it used to, this left-side drawer slide might be the fix. It’s made of white plastic, about 15 inches long, and built to support the drawer so it moves smooth...
No Longer Available
In Stock
Order now and your part arrives by Oct 29
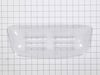
This lamp cover is also commonly referred to as a light lens. This is a genuine replacement part. It is used in a refrigerator to cover the light bulb. It is made of clear plastic. It measures 14 inch...
No Longer Available
Special Order
In Stock
Order now and your part arrives by Oct 29
Common Problems and Symptoms for LFD22860TT
Viewing 12 of 12Light not working
Fixed by these parts
How to fix it
Leaking
Fixed by these parts

How to fix it
Door won’t open or close
Fixed by these parts
How to fix it
Fridge too warm
Fixed by these parts
How to fix it
Ice maker won’t dispense ice
Fixed by these parts
How to fix it
Not dispensing water
Fixed by these parts
How to fix it
Will Not Start
Fixed by these parts
How to fix it
Clicking sound
Fixed by these parts
How to fix it
Ice maker not making ice
Fixed by these parts
How to fix it
Ice maker dispenses too much ice
Fixed by these parts
How to fix it
Freezer not defrosting
Fixed by these parts
How to fix it
Fridge and Freezer are too warm
Fixed by these parts
How to fix it

Keep searches simple. Use keywords, e.g. "leaking", "pump", "broken" or "fit".
- Customer:
- Debbie from Waltham, MA
- Parts Used:
- 6600JB1010A
- Difficulty Level:
- A Bit Difficult
- Total Repair Time:
- 30 - 60 mins
- Tools:
- Pliers, Screw drivers
Remove and replace light switch
Video makes it look easy. Kenmore refrigerator does not have "groove" along the right hand side of switch that allows for pushing down on release. Used a thin screwdriver to get under to push while holding switch edge with pliers. Kept slipping. Tape sides to avoid scratching inside of refrigerator.
Was this instruction helpful to you?
Thank you for voting!
- Customer:
- Tom from EASTON, PA
- Parts Used:
- MJU62070602
- Difficulty Level:
- Easy
- Total Repair Time:
- 30 - 60 mins
- Tools:
- Screw drivers, Wrench (Adjustable)
Water feed line running from water valve to filter housing was leaking
Shut off water supply. Disconnect main supply line. Remove rear lower panel on back of refrigerator. Remove all tubing clamps on back. Disconnect leaking tubing from water supply valve. Remove water filter and unscrew/remove water filter housing. Replace tubing - connect to water filter housing then to water supply valve. Reconnect filter
... Read more
housing and filter. Reinstall lower panel, then main water supply line, then all tubing clamps. Turn water back on and check for leaks after discarding several glasses of water to fill filter. Job complete!
Read less
Was this instruction helpful to you?
Thank you for voting!
- Customer:
- michael from JAMAICA, NY
- Parts Used:
- 4681JB1029H
- Difficulty Level:
- Really Easy
- Total Repair Time:
- 30 - 60 mins
- Tools:
- Screw drivers
Freezer wil not get cold enough
As per utube
Was this instruction helpful to you?
Thank you for voting!