


Models
>
GR-L218USGH
GR-L218USGH LG Refrigerator
Jump to:
Find Part by Name
Keep searches simple, eg. "belt" or "pump".
Keep searches simple, eg. "belt" or "pump".

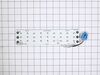
$25.10
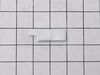
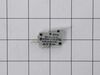
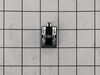
If the light inside your fridge is not coming on, or if it is staying on continuously, there may be an issue with your door switch. When the door to your fridge is closed, the button on the switch is...
In Stock
Order now and your part arrives by Jul 20

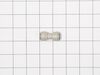
$15.26
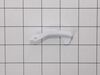
This part includes a single mounting bolt needed to secure the door handle to your refrigerator. This part is commonly replaced because the handle has started to loosen. Try tightening the screw first...
In Stock
Order now and your part arrives by Jul 20

In Stock
Order now and your part arrives by Jul 20

Enjoy cleaner, better-tasting water and ice with this refrigerator water filter. It uses activated carbon to reduce things like chlorine, lead, and other impurities—though it doesn’t remove fluoride. ...
In Stock
Order now and your part arrives by Jul 20

In Stock
Order now and your part arrives by Jul 20

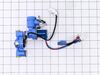
$126.83
This includes the primary and secondary valves along with the wire harness.
In Stock
Order now and your part arrives by Jul 20

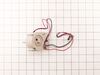
$269.07
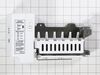
This ice maker assembly kit includes the ice maker, housing, and control device for full functionality. It automatically receives water, freezes it, and dispenses ice into the bin. Designed for easy i...
In Stock
Order now and your part arrives by Jul 20

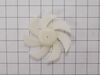
$112.72
This 13-volt evaporator fan motor helps circulate air over the refrigerator coils. These coils will then convert the heat into cool air, which is then circulated from the freezer section to the fresh ...
In Stock
Order now and your part arrives by Jul 20


In Stock
Order now and your part arrives by Jul 20

Common Problems and Symptoms for GR-L218USGH
Viewing 14 of 14Leaking
Fixed by these parts

How to fix it
Light not working
Fixed by these parts
How to fix it
Door won’t open or close
Fixed by these parts
How to fix it
Ice maker not making ice
Fixed by these parts
How to fix it
Not dispensing water
Fixed by these parts
How to fix it
Noisy
Fixed by these parts
How to fix it
Ice maker won’t dispense ice
Fixed by these parts

How to fix it
Fridge too warm
Fixed by these parts
How to fix it
Will Not Start
Fixed by these parts
How to fix it
Frost buildup
Fixed by these parts
How to fix it
Freezer not defrosting
Fixed by these parts

How to fix it
Clicking sound
Fixed by these parts
How to fix it
Ice maker dispenses too much ice
Fixed by these parts
How to fix it
Fridge and Freezer are too warm
Fixed by these parts
How to fix it


Keep searches simple. Use keywords, e.g. "leaking", "pump", "broken" or "fit".
- Customer:
- Richard from JACKSONVILLE, FL
- Parts Used:
- AJU72992601
- Difficulty Level:
- Really Easy
- Total Repair Time:
- 15 - 30 mins
- Tools:
- Screw drivers
replace leaking water inlet valve assembly
1. Shut off water to refrigerator. 2. Removed bottom sheet metal cover (6 screws). 3. Removed leaking water inlet valve assembly from refrigerator (1 screw). 4. Remove water inlet tube (loosen nut) and tube back to refrigerator (pull from water valve after remove cotter pin washer). 5. Detach two electrical wire harnesses. 6. Install new
... Read more
water inlet valve assembly to refrigerator (1 screw). 7. Replace both water tubes to water inlet assembly. 8. Re-attach both wiring harnesses. 9. Turn water to refrigerator on. 10. Check for leaks. 11. Re-attach bottom sheet cover (6 screws).
Read less
Was this instruction helpful to you?
Thank you for voting!
- Customer:
- Debbie from Waltham, MA
- Parts Used:
- 6600JB1010A
- Difficulty Level:
- A Bit Difficult
- Total Repair Time:
- 30 - 60 mins
- Tools:
- Pliers, Screw drivers
Remove and replace light switch
Video makes it look easy. Kenmore refrigerator does not have "groove" along the right hand side of switch that allows for pushing down on release. Used a thin screwdriver to get under to push while holding switch edge with pliers. Kept slipping. Tape sides to avoid scratching inside of refrigerator.
Was this instruction helpful to you?
Thank you for voting!
- Customer:
- Scott from JUPITER, FL
- Parts Used:
- 6615JB2005H
- Difficulty Level:
- Easy
- Total Repair Time:
- 1- 2 hours
- Tools:
- Pliers, Screw drivers
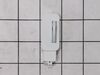
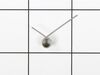
Replace Thermistor in back of freezer
Turn off power, remove upper and lower drawers (may need to open upper refrigerator doors to remove large freezer bin,) remove drawer supports (upper and lower), remove rear freezer panel (trick is to loosen 4 screws on fan bumpout to get the panel to come free from the freezer side wall), test thermistor with multimeter (should have cont
... Read more
inuity or near zero resistance across 2 orange fuse wires) before cutting zip ties, cut zip ties holding Thermistor in place, remove old Thermistor, install new Thermistor, install new zip ties, replace rear freezer panel, install upper and lower drawer supports, install drawers, turn on power, should be fixed if error code doesn't return after 6 hours.
Read less
Was this instruction helpful to you?
Thank you for voting!