


Models
>
71089
71089 LG Refrigerator
Jump to:
Find Part by Name
Keep searches simple, eg. "belt" or "pump".
Keep searches simple, eg. "belt" or "pump".

In Stock
Order now and your part arrives by Jul 30

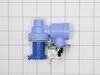
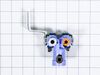
If your fridge isn?t making ice or the water dispenser isn?t working right, this water inlet valve could be the fix. It controls how water flows to both the ice maker and dispenser, helping everything...
In Stock
Order now and your part arrives by Jul 30

This ice bin is for refrigerators.
Ice bin stores ice cubes in the freezer section of the refrigerator.
Follow the instructions in the owner's manual when installing this part.
No Longer Available


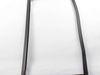
This door gasket is used to make an air-tight seal for the cabinet when the door is closed.
No Longer Available

This door gasket is used to make an air-tight seal for the cabinet when the door is closed.
No Longer Available

$24.00
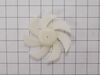
This fan assembly circulates air through the appliance to support proper temperature control and ventilation. Designed for quiet and efficient airflow, it is replaced when airflow weakens, noise incre...
In Stock
Order now and your part arrives by Jul 30

In Stock
Order now and your part arrives by Jul 30

On Order

$112.72
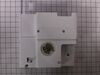
Designed to control water flow to the ice maker and dispenser, this inlet valve helps maintain proper operation and water delivery. It’s a direct replacement for faulty valves causing leaks, noise, or...
In Stock
Order now and your part arrives by Jul 30

In Stock
Order now and your part arrives by Jul 30

In Stock
Order now and your part arrives by Jul 30
Common Problems and Symptoms for 71089
Viewing 6 of 6Leaking
Fixed by these parts

How to fix it
Not dispensing water
Fixed by these parts
How to fix it
Noisy
Fixed by these parts
How to fix it
Door won’t open or close
Fixed by these parts
How to fix it
Ice maker won’t dispense ice
Fixed by these parts
How to fix it
Ice maker not making ice
Fixed by these parts
How to fix it
Keep searches simple. Use keywords, e.g. "leaking", "pump", "broken" or "fit".
- Customer:
- Tom from EASTON, PA
- Parts Used:
- MJU62070602
- Difficulty Level:
- Easy
- Total Repair Time:
- 30 - 60 mins
- Tools:
- Screw drivers, Wrench (Adjustable)
Water feed line running from water valve to filter housing was leaking
Shut off water supply. Disconnect main supply line. Remove rear lower panel on back of refrigerator. Remove all tubing clamps on back. Disconnect leaking tubing from water supply valve. Remove water filter and unscrew/remove water filter housing. Replace tubing - connect to water filter housing then to water supply valve. Reconnect filter
... Read more
housing and filter. Reinstall lower panel, then main water supply line, then all tubing clamps. Turn water back on and check for leaks after discarding several glasses of water to fill filter. Job complete!
Read less
Was this instruction helpful to you?
Thank you for voting!
- Customer:
- Nancy from NEW ALBANY, IN
- Parts Used:
- MJX41178908
- Difficulty Level:
- Very Easy
- Total Repair Time:
- Less than 15 mins
- Tools:
- Pliers, Screw drivers, Wrench (Adjustable)
Our refrigerator was not dispencing water or ice.
Turned of water to refrigerator and unplugged refrigerator. Removed the water line from refrigerator. Removed back panel. Removed mounting screw from the water valve, Unhooked wire harness from valve and removed the water line on back of valve. Reconnected wiring harness to new valve, reconnected water line on back of valve. Replaced the
... Read more
back panel to refrigerator and put the water line back on the new valve. Turned on water valve and checked for leaks. It's now dispensing water and ice.
Read less
Was this instruction helpful to you?
Thank you for voting!
- Customer:
- Todd from MARS HILL, NC
- Parts Used:
- MJU62070602
- Difficulty Level:
- Really Easy
- Total Repair Time:
- Less than 15 mins
- Tools:
- Screw drivers
Fridge waterline for ice maker / door water
The heavy work is moving the fridge, then take off the lower plans. Use a bowel or cup for screws and the water line connector spacers so you don't loos them.
undo connections holding water line, including the bottom brakes for the solenoid. Reuse the spring around the lower waterline to prevent external wear on the line.
... Read more r />NOTE: remove the waterline connector spacers and save!
NOTE: you must compress (not pull) the connect to then pull the waterline out of the connectors.
NOTE: You must also remove the water filter and housing inside the fridge but this is easy.
MOTE: Test the line for leaks by turning on the water and then using the door water. The filter will need to refill so it may take a minute before water comes up. This line only have pressure when the door water is used or the ice maker needs to make ice.
After replacing the line, test the line for leaks by using the door water so the solenoid fills the lines
Read less
Was this instruction helpful to you?
Thank you for voting!