


Models
>
KBLC36MHT01
KBLC36MHT01 KitchenAid Refrigerator
Jump to:
Find Part by Name
Keep searches simple, eg. "belt" or "pump".
Diagrams for KBLC36MHT01
Viewing 11 of 11


Keep searches simple, eg. "belt" or "pump".

$129.81
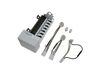
The ice maker works by filling with water from the inlet valve, freezing it into cubes, and then dispensing the cubes into the storage bucket. It will then refill with water and repeat this process un...
In Stock
Order now and your part arrives by Jul 31

$72.17
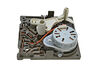
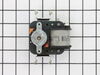
This part is used to help tell the icemaker what to do - it turns the timing cams and the ejector blades. Motor is not sold separately.
In Stock
Order now and your part arrives by Jul 31

$35.34
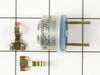
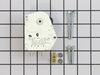
The defrost timer works on a predetermined schedule, to alternate between the cooling cycle and the defrost heater in your freezer. When the heating circuit is activated, it melts any ice that has for...
In Stock
Order now and your part arrives by Jul 31

In Stock
Order now and your part arrives by Jul 31

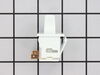
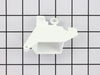
This icemaker water inlet cup is three inches long. It is all white in color and is made of plastic.
In Stock
Order now and your part arrives by Jul 31

$28.91
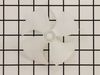
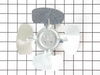
If your refrigerator or freezer is too warm, or making noises, you may need to replace the fan blade. The fan blade attaches to the evaporator motor, which is in the freezer section, to help circulate...
In Stock
Order now and your part arrives by Jul 31

In Stock
Order now and your part arrives by Jul 31

$179.65
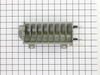
This ice cube mold and heater assembly has a flake resistant surface. It is used with modular style icemakers on some refrigerators.
In Stock
Order now and your part arrives by Jul 31

In Stock
Order now and your part arrives by Jul 31

$61.55
This part is also known as the cycling thermostat and this bi-metal device controls the activation of the icemaker ejection cycle.
In Stock
Order now and your part arrives by Jul 31

In Stock
Order now and your part arrives by Jul 31

$11.98
This is a compression nut for your refrigerator/freezer. The compression nut is used with the plastic water line for the icemaker assembly. It is the connection between the water supply line and the o...
Special Order
Common Problems and Symptoms for KBLC36MHT01
Viewing 19 of 19Ice maker not making ice
Fixed by these parts
How to fix it
Light not working
Fixed by these parts

How to fix it
Leaking
Fixed by these parts
How to fix it
Fridge too warm
Fixed by these parts

How to fix it
Ice maker won’t dispense ice
Fixed by these parts
How to fix it
Freezer not defrosting
Fixed by these parts
How to fix it
Will Not Start
Fixed by these parts
How to fix it
Noisy
Fixed by these parts
How to fix it
Freezer section too warm
Fixed by these parts
How to fix it
Fridge and Freezer are too warm
Fixed by these parts
How to fix it
Fridge runs too long
Fixed by these parts
How to fix it
Ice maker dispenses too much ice
Fixed by these parts
How to fix it
Too warm
Fixed by these parts
How to fix it
Frost buildup
Fixed by these parts
How to fix it
Ice maker dispenses too little ice
Fixed by these parts
How to fix it
Freezer too cold
Fixed by these parts
How to fix it
Won’t start
Fixed by these parts
How to fix it
Fridge too cold
Fixed by these parts
How to fix it
Door latch failure
Fixed by these parts

How to fix it


Keep searches simple. Use keywords, e.g. "leaking", "pump", "broken" or "fit".
- Customer:
- Max from Green Castle, IN
- Parts Used:
- 4317943
- Difficulty Level:
- Really Easy
- Total Repair Time:
- 15 - 30 mins
- Tools:
- Nutdriver, Screw drivers
Ice Maker quit working, I could manually cycle unit but then the water would overflow when unit was re-filling.
I backed out the 2 top screws about a quarter inch and then removed bottem screw with a quater inch nut driver. I then lifted Ice Maker clear of the two top screws and lowered it enough to unclip the power connection with a small screwdriver. The new Ice Maker was wired correctley for my refrigeator so all I had to do wea reconnect the
... Read more
power connection and mount new Ice Maker on the two top screws and install the bottem screw. It took e while for the new Ice Maker to start it's cycle but after it did, it worked GREAT. Part Select service was OUTSTANDING, ordered part one day and received the next. THANKS!!!!
Read less
Was this instruction helpful to you?
Thank you for voting!
- Customer:
- Daniel from Suwanee, GA
- Parts Used:
- W10190935
- Difficulty Level:
- Easy
- Total Repair Time:
- 15 - 30 mins
- Tools:
- Screw drivers, Socket set
No ice
removed flap door in front of icemaker...removed 3 screws with bolt heads...removed one additional screw with bolt head and ice unit slid out. I removed motor unit (pops out no screws). Replaced and had ice within 3 hours.
Was this instruction helpful to you?
Thank you for voting!
- Customer:
- Chris from Duluth, GA
- Parts Used:
- 4317943
- Difficulty Level:
- Really Easy
- Total Repair Time:
- Less than 15 mins
- Tools:
- Socket set
No Ice in the Ice Maker
I am NOT a handyman, and my family laughed at me when I said I was going to fix the ice maker all by myself. I ordered a replacement ice maker. When it arrived, I opened the box and read the instructions. It seemed easy. I removed the old ice maker, with a socket set. I then took off the shut off lever from the old one and placed it
... Read more
on the new one, since the new one didn't come with it. I then put the new one in place. All the parts fit perfectly. The ice machine was making ice within an hour. My family was amazed... and I got the last laugh!
Read less
Was this instruction helpful to you?
Thank you for voting!