


Models
>
K2TLEFFWMS01
K2TLEFFWMS01 KitchenAid Refrigerator
Jump to:
Find Part by Name
Keep searches simple, eg. "belt" or "pump".
Diagrams for K2TLEFFWMS01
Viewing 7 of 7


Manuals & Guides for K2TLEFFWMS01
Click to downloadManual
Owner's Manuals
(0.87MB)
Manual
Owner's Manuals
(1.22MB)
Manual
Owner's Manuals
(5.71MB)
Specs
Product Specifications Sheet
(0.08MB)
Keep searches simple, eg. "belt" or "pump".

$18.54
This is a genuine OEM 40-Watt replacement light bulb that is compatible with various types of appliances. It has a frosted glass bulb with a standard metal socket base, making it easy to screw and uns...
In Stock
Order now and your part arrives by Mar 29

$111.47
Replacing a broken crisper drawer in your refrigerator is a simple repair that does not require any tools. Simply remove any items from the damaged drawer, and remove the drawer from the fridge. The w...
In Stock
Order now and your part arrives by Mar 29

In Stock
Order now and your part arrives by Mar 29

$46.07
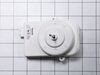
The capacitor, also known as a run capacitor, is a component in your fridge that allows the compressor to cycle on and off to maintain a constant temperature. If your fridge and freezer are too warm i...
In Stock
Order now and your part arrives by Mar 29

$130.11
This replacement meat drawer is designed to fit select refrigerator models and provides a dedicated space for storing meats and other perishables. It features a durable construction and smooth-glide d...
In Stock
Order now and your part arrives by Mar 29

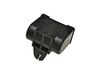
This evaporator fan motor is located in the back of the freezer, and circulates air over the refrigerator coils. These coils will convert the heat into cool air, which is then circulated.
NOTE: ...
In Stock
Order now and your part arrives by Mar 29

In Stock
Order now and your part arrives by Mar 29

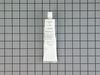
$11.98
This 18 ml bottle of white appliance touch-up paint is used to cover scratches or marks on your appliance. The white touch-up paint can be used on refrigerators, microwaves, ranges, clothes dryers, an...
In Stock
Order now and your part arrives by Mar 29

In Stock
Order now and your part arrives by Mar 29

In Stock
Order now and your part arrives by Mar 29

$71.11
This part may differ in color, but is functionally the same. It's no longer available in clear. Sold individually.
In Stock
Order now and your part arrives by Mar 29

$64.74
This is a genuine replacement light bulb for a refrigerator. The inside of your refrigerator should illuminate when you open the door. If your fridge does not illuminate, you may need to replace this ...
In Stock
Order now and your part arrives by Mar 29
Questions and Answers
We're sorry, but our Q&A experts are temporarily unavailable.
Please check back later if you still haven't found the answer you need.
Common Problems and Symptoms for K2TLEFFWMS01
Viewing 15 of 15Light not working
Fixed by these parts

How to fix it
Fridge too warm
Fixed by these parts


How to fix it
Will Not Start
Fixed by these parts
How to fix it
Fridge and Freezer are too warm
Fixed by these parts
How to fix it
Door won’t open or close
Fixed by these parts

How to fix it
Freezer section too warm
Fixed by these parts
How to fix it
Noisy
Fixed by these parts

How to fix it
Clicking sound
Fixed by these parts

How to fix it
Too warm
Fixed by these parts
How to fix it
Freezer not defrosting
Fixed by these parts


How to fix it
Leaking
Fixed by these parts


How to fix it
Fridge runs too long
Fixed by these parts
How to fix it
Door latch failure
Fixed by these parts

How to fix it
Won’t start
Fixed by these parts
How to fix it
Ice maker not making ice
Fixed by these parts
How to fix it


Keep searches simple. Use keywords, e.g. "leaking", "pump", "broken" or "fit".
- Customer:
- garth from forest lake, MN
- Parts Used:
- WPW10662129
- Difficulty Level:
- Really Easy
- Total Repair Time:
- 15 - 30 mins
- Tools:
- Nutdriver, Screw drivers
My refrigerator stopped cooling and the freezer section stopped freezing
I knew the chances of all the freon leaking out was unlikely so I looked at the wiring to the compressor and there was a capacitor and a starter/overload so i figured I would start there. I went on line and found the parts at this site and they were less than the minimum service call charge for a service tech so I figured what the heck le
... Read more
t's give her a shot so I did give it a shot. I ordered the parts and they were there in less time than a service tech could come out and i installed the parts and guess what for 90.00 in parts and 15 minutes in time I repaired my refrigerator. Thanks guys, It took less time to order the parts than it did to make the repair so thanks, your website rocks and is very well designed so my hat is off to you guys!
Read less
Was this instruction helpful to you?
Thank you for voting!
- Customer:
- Brian from Smock, PA
- Parts Used:
- WPW10189703
- Difficulty Level:
- Easy
- Total Repair Time:
- 30 - 60 mins
- Tools:
- Nutdriver, Screw drivers
Fridge was warm. No air circulating at all. Food was spoiling Fridge was just over 1 year old
First I removed the two screws that secure the guard in bottom back of the freezer and removed it . Next I removed the two screws that secure the guard on the back wall of the freezer and removed it. There are three wires connected to the motor, I unplugged those and removed the two screws that secure the motor and removed it. I swapped t
... Read more
he grommets, blade and support bracket from the old motor. I put it back together in reverse steps and its working great. My mother-in-law can,t stop thanking me ! I saved her at least $400 to buy a new fridge. Thank You, Brian Miner
Read less
Was this instruction helpful to you?
Thank you for voting!
- Customer:
- Duane from Albany, OR
- Parts Used:
- WP2200859
- Difficulty Level:
- Easy
- Total Repair Time:
- 15 - 30 mins
- Tools:
- Nutdriver
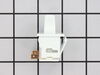
Temperature unstable
Open the door. Removed two screws holding the cover of the thermostat. There is a clip which holds the thermostat in place. Remove the clip. Take out the thermostat. Remove the thermocouple (the long grey metal with the coil at the end) which is also held in place by a clip. Replace with the new thermostat and thermocouple and clip i
... Read more
nto place. Replace the screws to the cover. Close the door.
Read less
Was this instruction helpful to you?
Thank you for voting!