


Models
>
KBRA20EMBT00
KBRA20EMBT00 KitchenAid Refrigerator
Jump to:
Find Part by Name
Keep searches simple, eg. "belt" or "pump".
Diagrams for KBRA20EMBT00
Viewing 9 of 9


 Diagram and Parts List for KitchenAid Refrigerator")


Manuals & Guides for KBRA20EMBT00
Click to downloadKeep searches simple, eg. "belt" or "pump".

$88.39
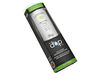
This package contains one individual water filter that is NSF-certified, and OEM approved. To ensure that the filter is successfully removing contaminants, it will need to be replaced at least every 6...
In Stock
Order now and your part arrives by Jul 20

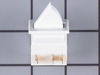
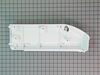
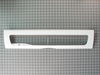
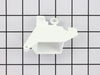
This genuine OEM part is a door cover for your refrigerator pantry drawer. It helps to maintain the proper temperature and humidity in the drawer by providing a seal when closed. Other names for this ...
In Stock
Order now and your part arrives by Jul 20

$72.17
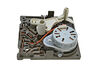
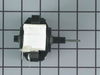
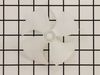
This part is used to help tell the icemaker what to do - it turns the timing cams and the ejector blades. Motor is not sold separately.
In Stock
Order now and your part arrives by Jul 20

$113.72
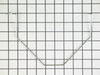
The crisper drawer is used to help prolong the life of your produce, by sealing itself off from the rest of the fridge to create a high humidity environment. If your drawer has become cracked or damag...
In Stock
Order now and your part arrives by Jul 20

$50.36
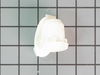
This genuine OEM part is an end cap used to support the pantry drawer in your refrigerator. This end cap is for the right side as if you were standing facing towards the appliance. The end cap mounts ...
In Stock
Order now and your part arrives by Jul 20

$55.18
This pantry end cap is a genuine OEM replacement part for your refrigerator. Also known as a drawer support, it is used to hold the rails and shelving for your pantry and crisper drawers. This specifi...
In Stock
Order now and your part arrives by Jul 20

In Stock
Order now and your part arrives by Jul 20

$31.05
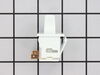
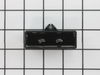
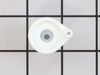
This part includes one authentically sourced 3-pin rocker switch for a refrigerator. It is responsible for turning the light on inside the fridge when the door is open. It is commonly replaced because...
In Stock
Order now and your part arrives by Jul 20

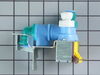
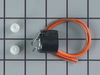
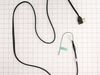
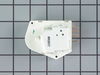
This part, when activated, releases water from the supply line into the ice mold. This water inlet valve is for refrigerators.
Water inlet valve supplies water to the refrigerator ice maker and wat...
In Stock
Order now and your part arrives by Jul 20

$55.18
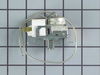
This part helps the compressor kick on and off while maintaining a constant temperature to keep things frozen in your freezer.
In Stock
Order now and your part arrives by Jul 20

$24.15
This 18 ml bottle of white appliance touch-up paint is used to cover scratches or marks on your appliance. The white touch-up paint can be used on refrigerators, microwaves, ranges, clothes dryers, an...
In Stock
Order now and your part arrives by Jul 20

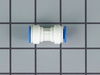
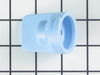
Need to keep your fridge’s water and ice working while the filter is out? This bypass cap lets water flow to the dispenser and ice maker without a filter. It’s easy to install and fits Whirlpool, Mayt...
In Stock
Order now and your part arrives by Jul 20
Common Problems and Symptoms for KBRA20EMBT00
Viewing 24 of 24Ice maker not making ice
Fixed by these parts
How to fix it
Light not working
Fixed by these parts
How to fix it
Leaking
Fixed by these parts

How to fix it
Not dispensing water
Fixed by these parts
How to fix it
Fridge too warm
Fixed by these parts
How to fix it
Door won’t open or close
Fixed by these parts
How to fix it
Will Not Start
Fixed by these parts
How to fix it
Freezer section too warm
Fixed by these parts
How to fix it
Noisy
Fixed by these parts
How to fix it
Ice maker won’t dispense ice
Fixed by these parts
How to fix it
Freezer not defrosting
Fixed by these parts
How to fix it
Frost buildup
Fixed by these parts

How to fix it
Fridge and Freezer are too warm
Fixed by these parts
How to fix it
Fridge too cold
Fixed by these parts
How to fix it
Clicking sound
Fixed by these parts
How to fix it
Ice maker dispenses too little ice
Fixed by these parts
How to fix it
Ice maker dispenses too much ice
Fixed by these parts
How to fix it
Freezer too cold
Fixed by these parts
How to fix it
Too warm
Fixed by these parts
How to fix it
Door latch failure
Fixed by these parts
How to fix it
Touchpad does not respond
Fixed by these parts
How to fix it
Won’t start
Fixed by these parts
How to fix it
Door Sweating
Fixed by these parts
How to fix it
Fridge runs too long
Fixed by these parts
How to fix it


Keep searches simple. Use keywords, e.g. "leaking", "pump", "broken" or "fit".
- Customer:
- Douglas from Byron, NY
- Parts Used:
- EDR4RXD1
- Difficulty Level:
- Really Easy
- Total Repair Time:
- Less than 15 mins
light on to order water filter
Pressed in the end of the filter cover, lowered it down part way. Twisted the old filter 1/4 turn and removed it. Set in the sink to drain. Inserted new filter and twisted it to lock. closed cover. Done. Total time @ 1 Minute.
Was this instruction helpful to you?
Thank you for voting!
- Customer:
- Daniel from Suwanee, GA
- Parts Used:
- W10190935
- Difficulty Level:
- Easy
- Total Repair Time:
- 15 - 30 mins
- Tools:
- Screw drivers, Socket set
No ice
removed flap door in front of icemaker...removed 3 screws with bolt heads...removed one additional screw with bolt head and ice unit slid out. I removed motor unit (pops out no screws). Replaced and had ice within 3 hours.
Was this instruction helpful to you?
Thank you for voting!
- Customer:
- Jake from Novato, CA
- Parts Used:
- EDR4RXD1
- Difficulty Level:
- Easy
- Total Repair Time:
- Less than 15 mins
Removing the existing filter by rotating as directed and then dislodging from 'docking' station proved difficult. Turns out, the old filter is under a bit of vacuum pressure and getting the unit to separate or release was a challenge.
I removed the drop-down outer housing by gently prying the sides of the two pivot pins at the rear. This gave me move 'room' to grip and slightly rotate then pull the old filter forward and away from the tight suction connection. I was concerned that I would be too forceful for the plastic assemblies and would break something; deliberate
... Read more
motions and a steady thought process on the problem helped disengage the darned old filter!
Read less
Was this instruction helpful to you?
Thank you for voting!