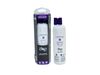
Transform your daily hydration routine with the EDR1RXD1 water filter. It delivers pure, refreshing water for your family, enhancing the taste of your drinks and meals. Quick to install and long-lasti...
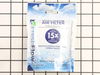
Your refrigerator air filter should be replaced at least every 6 months to ensure its working as it should. This part is responsible for reducing common food odors and bacteria in the air, improving u...
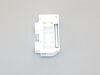
The gallon door bin attaches to the inside of the refrigerator door and is typically used to hold jars and bottles within easy reach. These bins are clear, as the white version has been discontinued b...
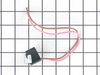
The bi-metal defrost thermostat is attached to the evaporator, and its purpose is to protect the evaporator from overheating when the defrost cycle is running. If there is frost building up in your fr...
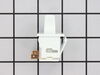
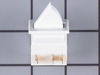
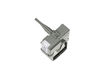
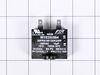
This part includes one authentically sourced 3-pin rocker switch for a refrigerator. It is responsible for turning the light on inside the fridge when the door is open. It is commonly replaced because...
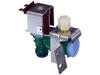
This OEM ice maker assembly fits select Whirlpool, Maytag, and KitchenAid refrigerators. It includes the ice mold and control unit, and automatically produces and ejects ice into the bin. Ideal for re...
This 18 ml bottle of white appliance touch-up paint is used to cover scratches or marks on your appliance. The white touch-up paint can be used on refrigerators, microwaves, ranges, clothes dryers, an...
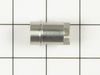
This authentic OEM part is a mounting screw for the door handle on your refrigerator. If the door handle is loose or you are having issues opening or closing the door, a new mounting screw may solve t...
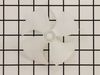
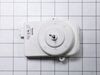
If your refrigerator or freezer is too warm, or making noises, you may need to replace the fan blade. The fan blade attaches to the evaporator motor, which is in the freezer section, to help circulate...
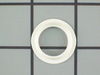
This part is a replacement refrigerator drive shaft seal for your refrigerator. The drive shaft seal protects the auger motor from water and condensation that may leak down the drive shaft from the ic...
In Stock
Order now and your part arrives by Aug 4
Questions and Answers
Ask our experts a question about this part and we'll get back to you as soon as possible!
4 questions answered by our experts.
< Prev
1
Next >
Sort by:
Search filter:
Clear Filter
Your search term must have 3 or more characters.
Keep searches simple. Use keywords, e.g. "leaking", "pump", "broken" or "fit".
Sorry, we couldn't find any existing answers that matched. Try using some different or simpler keywords, or submit your new question by using the "Ask a Question" button above!
Richard
September 19, 2022
How do i replace the wiring harness at the base of the freezer door? Do i take the door apart? Do i have to replace the whole door?
For model number 10651133213
Hello Richard, thanks for the great question. It seems that your lower wiring harness can be accessed by removing the kickplate grille and the black wire harness loom too, sometimes there can be broken wires underneath it. Hope this helps!
3 people found this helpful.
Was this helpful?
Thank you for voting!
Rebecca
March 30, 2025
What are this models dimensions
For model number 10651133213
Hello Rebecca, Thank you for your inquiry. We show this model is approximately 69 inches high by 36 inches wide by 34 inches deep. We hope this answers your great question.
Was this helpful?
Thank you for voting!
Hannah
May 19, 2022
My fridge is not cooling or freezing. The air blowing in the freezer is cool but not cold enough to freeze. The compressor in the back is cold to the touch. The fan next to it is also not running. Not sure what the problem could be?
For model number 10651133213
Hello Hannah, thank you for your question. We recommend testing the Bi-Metal Defrost Thermostat FIX11750673. Place each of the multimeter's leads on a thermostat wire. When your thermostat is cold, it should produce a reading of zero on your multimeter. If it is warm (anywhere from forty to ninety degrees Fahrenheit), then this test should produce a reading of infinity. Next, check the Compressor Start Relay FIX11750123. And if the Fan is still not starting, replace the Condenser Fan Motor FIX11739140. We have videos for you to access. If you need help placing an order, customer service is open 7 days a week. Please feel free to give us a call. We look forward to hearing from you.
Refrigerator side is freezing food where can i find the thermostat on this model or what should i check to see what the problem could be
For model number 10651133213
Hello Ashley, Thank you for your inquiry. We have researched the model number that you have provided and it shows it has a defrost thermostat, and also a temperature sensor/thermistor. We would recommend checking the following parts to fix your issue: the thermistor, the defrost thermostat, the air diffuser/air damper, and the evaporator fan motor. You can test the parts with a multimeter. We hope this helps and if you need help placing an order, customer service is open 7 days a week. Please feel free to give us a call. We look forward to hearing from you!
WARNING: REPLACING THIS PART REQUIRES CUTTING AND SPLICING ELECTRICAL WIRES. RISK OF ELECTRICAL SHOCK OR FIRE. DO NOT ATTEMPT THIS REPAIR IF YOU ARE NOT EXPERIENCED WITH ELECTRICAL WIRING.
Part Info: The bi-metal strip is clipped onto the evaporator coils and is designed to regulate the defrost coil temperature. If it is n
... Read moreot functioning properly you may notice ice buildup preventing air flow (and preventing proper refrigeration), or more rarely the freezer side may get too warm during the defrost cycle.
1: UNPLUG THE FRIDGE! If there is ice buildup, wait until the ice has melted. A box fan blowing at the ice will help melt it more quickly.
2: Remove the panel covering the evaporator coils. It's located inside the fridge, on the freezer side.
3: Un-clip the bi-metal strip from the evaporator coils.
4: Unplug the wires from the evaporator fan, defrost coil and bi-metal strip, then disconnect the main connector that is plugged into the rear wall.
5: Clip both wires to the old ( bad ) bi-metal strip. Cut close to the casing of the bi-metal strip so there are long wires to splice onto.
6: Strip 1/4 to 1/2 inches of insulation off of the ends of the wires ( depending on the size of the wire-nuts you use). Twist the bare wires slightly to prevent fraying.
7: Do the same for the ends of the wires on the (new) bi-metal strip.
8: Take the ends of the wires belonging to the (new) bi-metal strip and the wires coming from the main plug. Take the like-colored wires, and twist the bare metal ends together.
9: Twist on wire nuts, for both sets of wires. Make sure they are snug, with no bare wire showing.
10: Tape over the wire nuts with electrical tape. Tape over the wires nuts in a spiral fashion, completely covering the nut and both wires that are now spliced together. This will prevent accidental shorting.
11: Plug the main plug back into the rear wall of the fridge. Also re-connect the connectors to the evaporator fan and defrost coil. Make sure the clips on the connectors are snug to ensure a good connection.
12: Clip the new bi-metal strip onto the coils, in the same spot as before. ( Usually just after the small incoming copper tubing that connects to the coils, known as the expansion valve. That is usually the coldest spot on the coils during operation).
13: Replace the panel that covers the coils.
14: Plug the fridge back in... Now you fridge should defrost correctly. If it does not, your defrost coil could be burned out, or the control board could be faulty.
I used a flat-head screwdriver to pop out the old light rocker switch. Then, I unplugged the wires, plugged them into the new light rocker switch, and then popped the new switch into the hole. That's it! Lights began working again.
I used a flat screwdriver and released the lock tab on the bottom of the light switch, and pried the switch out, being careful to not damage the plastic around the mounting place of the switch, unplugged wiring from old switch, plugged in the new one and pushed the new switch into place. Job finished light switch now working.


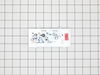
 Diagram and Parts List for Kenmore Refrigerator")