


Models
>
25370312212
25370312212 Kenmore Refrigerator
Jump to:
Find Part by Name
Keep searches simple, eg. "belt" or "pump".
Diagrams for 25370312212
Viewing 11 of 11


Keep searches simple, eg. "belt" or "pump".

$17.47
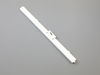
This screw is used to secure the handle to your refrigerator and comes in a pack of four. This genuinely sourced part can be loosened and tightened with a Phillips-head or square-head screwdriver. Wit...
In Stock
Order now and your part arrives by Jul 26

$98.95
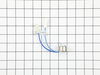
If your fridge isn’t making ice or is leaking, this replacement ice maker can help. It includes everything needed to freeze and dispense ice automatically. It’s easy to install and works with many bra...
In Stock
Order now and your part arrives by Jul 26

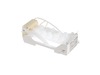
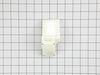
This is an adjustable foot for your freezer, refrigerator, and dryer. This part supports your unit by screwing into one of the bottom four corners, and adjusting the height of your machine. If your ap...
In Stock
Order now and your part arrives by Jul 26

$43.95
This flipper hinge, also known as a center mullion hinge, ensures a tight seal between refrigerator doors when closed. It helps regulate internal temperature, improves energy efficiency, and supports ...
In Stock
Order now and your part arrives by Jul 26

In Stock
Order now and your part arrives by Jul 26

In Stock
Order now and your part arrives by Jul 26

$44.35
This refrigerator front roller assembly is designed to support the appliance and allow it to move smoothly for cleaning, maintenance, or repositioning. Built from durable metal and heavy-duty plastic,...
In Stock
Order now and your part arrives by Jul 26

$54.22
This refrigerator drawer support rail provides stable support for the crisper drawer, helping it stay properly aligned and slide smoothly during use. Made from durable plastic, it is designed to withs...
In Stock
Order now and your part arrives by Jul 26

On Order

$39.38
This genuine OEM crisper pan roller support is designed to mount on the interior side wall of your refrigerator, helping guide and support the crisper drawer for smooth, stable operation. It holds the...
In Stock
Order now and your part arrives by Jul 26

$73.23
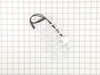
This defrost thermostat protects the evaporator coils by shutting off the defrost heater once a safe temperature is reached. It helps prevent overheating and ensures proper defrosting, reducing frost ...
In Stock
Order now and your part arrives by Jul 26

Common Problems and Symptoms for 25370312212
Viewing 7 of 7Ice maker not making ice
Fixed by these parts
How to fix it
Door won’t open or close
Fixed by these parts
How to fix it
Fridge too warm
Fixed by these parts
How to fix it
Ice maker won’t dispense ice
Fixed by these parts
How to fix it
Leaking
Fixed by these parts

How to fix it
Freezer not defrosting
Fixed by these parts
How to fix it
Fridge and Freezer are too warm
Fixed by these parts
How to fix it


Keep searches simple. Use keywords, e.g. "leaking", "pump", "broken" or "fit".
- Customer:
- Richard from N CALDWELL, NJ
- Parts Used:
- 243297613
- Difficulty Level:
- Really Easy
- Total Repair Time:
- Less than 15 mins
- Tools:
- Nutdriver, Screw drivers
Ice maker was not working
Simple three steps... 1) There's an front section to the ice-maker to take off. One Phillips screw is on the side, one screw is underneath near the inside of the refrigerator wall. Just unscrew and store. 2) There's a small plastic unit just inside the ice maker to take out. It's held in by a small nut that requires about a 4" extension
... Read more
to reach. (You may be able to unscrew the nut with small needle-nose pliers). Just unscrew and take out the unit - the unit functions just to keep the ice maker wiring in place. 3) The wiring looks a mess, but there's just one wiring connector to the ice maker assembly. Unsnap it. The ice maker is not screwed in, it just slides in -- reach in and pull the assembly straight out; when it stops, lower it a bit and it will come free. Reverse the instructions to install the new unit.
Read less
Was this instruction helpful to you?
Thank you for voting!
- Customer:
- Debbie from Mount Juliet, TN
- Parts Used:
- 5303918899
- Difficulty Level:
- Easy
- Total Repair Time:
- 15 - 30 mins
- Tools:
- Screw drivers
Freezer Cold, but Refrigerator not Cold
We replaced the damper, but it didn't fix the problem. We then purchased and replaced the thermistor. (We had previously replaced the defrost thermostat). The refrigerator side is now cooling better, but not enough. The damper doesn't seem to be opening. So we have now unplugged the damper and left the opening between the refrigerato
... Read more
r propped open and the refrigerator side is now cool enough. (We had previously tried keeping the damper open before we replaced the thermistor and the refrigerator didn't cool off. So the thermistor did fix something, but the damper doesn't seem to have been the problem).
Read less
Was this instruction helpful to you?
Thank you for voting!
- Customer:
- David from VISALIA, CA
- Parts Used:
- 243297613
- Difficulty Level:
- A Bit Difficult
- Total Repair Time:
- 30 - 60 mins
- Tools:
- Screw drivers
It just stopped making ice.
First: I could not watch any videos. Big downer. Read the reviews and read a post about “three screws”.
Opened the freezer and emptied everything in it.
Remove the bin.
Two screws are on the left side. They go into the side wall.
Here’s where things get weird. The plastic “box” holds the “ice making assembly”. That box ... Read more is attached by FOUR slots. You will need to remove the wire rack below the frame. There’s a plastic spacer on the left side with a slot on it. You can pull it of with your fingers when you rotate it. Slide the rack to the left and pull down the rack from the RIGHT side holes. You have move the box toward you about a inch, then it drops down.
Now, there is a electrical connection from the box to the rear of the refrigerator wall. You need a small screwdriver to lift the tab on the TOP of the connector to release it. Once that is done, slide the box forward and put it in the sink.
While all this is happening, the freezer is thawing out.
Once you remove the box, you will get error codes on the digital display. This is a good thing.
There are two “square head’” screws that you have to remove to separate the TWO parts that make the box. Slide the outer trim towards you.
The icemaker assembly slides into four slots. You put the new wires in the same place as the one you removed.
Put everything back together the opposite of the removal.
Now for the secret.
All that food you removed? Put it back in until you can slide the box into place.
Then you plug the connector in. The box should be sitting on the food.
THIS IS THE SECRET.
The ice maker has two options. Cubed or Crushed.
There are two components that make them happen. On the left side there is a slot with a gray lever the moves up an down. There is an piece of aluminum on the right side the drives the screw in the box.
Rotate the screw drive to 45 degrees.
THIS IS THE SECRET.
On the left side of the box is a rod that is spring loaded and has a bent end.
It’s about “timing”.
Find a piece of “kite string”. I used the string from the yellow energy tag that came with the fridge.
The box is sitting on the frozen food. The wire in the back is connected.
Loop the string around the lever AND PULL UP.
Slide the whole thing into place using the slots.
When it’s in place, let go of the string.
Put the two screws back in.
FINAL.
You have to PRESS AND HOLD the IceMaker button to reset. You’ll get ice cubes in a couple of hours. Through the first 24 hrs away.
You’re welcom.
Read less
Was this instruction helpful to you?
Thank you for voting!