


Models
>
25368822012
25368822012 Kenmore Refrigerator
Jump to:
Find Part by Name
Keep searches simple, eg. "belt" or "pump".
Diagrams for 25368822012
Viewing 6 of 6


Keep searches simple, eg. "belt" or "pump".

$58.25
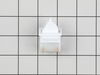
This is a white plastic door shelf bin for your refrigerator. It is attached to the inside bottom of the refrigerator door shelf where it helps to contain items such as jars and condiments. This part ...
In Stock
Order now and your part arrives by Jul 31

$53.53
This glass shelf sits above the crisper drawers in your refrigerator. This part is just the glass, there are no brackets or additional mounting hardware (these can be purchased separately if needed). ...
In Stock
Order now and your part arrives by Jul 31

$17.47
This screw is used to secure the handle to your refrigerator and comes in a pack of four. This genuinely sourced part can be loosened and tightened with a Phillips-head or square-head screwdriver. Wit...
In Stock
Order now and your part arrives by Jul 31

$51.53
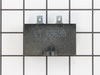
The run capacitor is attached to the compressor in your refrigerator and is used to maintain a constant temperature in your freezer. It does this by cycling the compressor on and off. This run capacit...
In Stock
Order now and your part arrives by Jul 31

$150.05
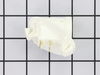
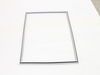
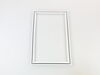
If your fridge door isn’t sealing properly or looks cracked or moldy, this replacement gasket can help. It’s white, rectangular, and has a clear center so you can see inside. It measures about 28.5 in...
In Stock
Order now and your part arrives by Jul 31

$26.35
This small, Phillips-head screw works with your refrigerator/freezer. It screws in to the freezer door and connects to the door handle. This part is made of stainless steel and is sold individually. T...
In Stock
Order now and your part arrives by Jul 31

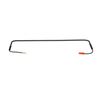
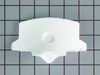
$77.21
Sold individually. This shelf is for refrigerators.
Follow the directions in the owner's manual to install refrigerator shelf in your refrigerator. Wear work gloves to protect your hands.
In Stock
Order now and your part arrives by Jul 31

$13.97
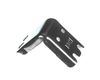
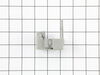
This is a replacement hinge bearing for your refrigerator. The hinge bearing is found on the door hinge, and reduces friction when the door opens and closes. If the bearing is damaged, you may not be ...
In Stock
Order now and your part arrives by Jul 31

In Stock
Order now and your part arrives by Jul 31

$21.02
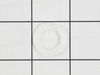
Improve door function and alignment with this hinge nylon washer, designed to support the door as it pivots on the hinge pin. Made from durable nylon, it helps reduce friction and noise while ensuring...
In Stock
Order now and your part arrives by Jul 31

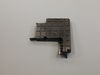
$31.85
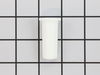
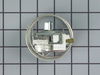
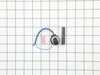
The light socket on your refrigerator houses the light bulb and connects it to the power source. If you notice that your refrigerator light does not come on when you open the door, you may need to rep...
In Stock
Order now and your part arrives by Jul 31

$36.86
Brighten up your fridge with this easy-to-replace LED light bulb. Whether your current bulb is flickering or has gone dim, this 3.5W replacement brings back clear, reliable lighting to both the refrig...
In Stock
Order now and your part arrives by Jul 31
Common Problems and Symptoms for 25368822012
Viewing 16 of 16Door won’t open or close
Fixed by these parts
How to fix it
Light not working
Fixed by these parts
How to fix it
Fridge too warm
Fixed by these parts
How to fix it
Will Not Start
Fixed by these parts
How to fix it
Won’t start
Fixed by these parts
How to fix it
Fridge and Freezer are too warm
Fixed by these parts
How to fix it
Too warm
Fixed by these parts
How to fix it
Freezer section too warm
Fixed by these parts
How to fix it
Freezer not defrosting
Fixed by these parts
How to fix it
Door Sweating
Fixed by these parts
How to fix it
Fridge too cold
Fixed by these parts
How to fix it
Leaking
Fixed by these parts
How to fix it
Frost buildup
Fixed by these parts
How to fix it
Clicking sound
Fixed by these parts
How to fix it
Fridge runs too long
Fixed by these parts
How to fix it
Noisy
Fixed by these parts
How to fix it


Keep searches simple. Use keywords, e.g. "leaking", "pump", "broken" or "fit".
- Customer:
- Bruce from Alton, IL
- Parts Used:
- 241537103
- Difficulty Level:
- Really Easy
- Total Repair Time:
- Less than 15 mins
- Tools:
- Pliers, Screw drivers
Refrigerator would not run but interior light was on.
I unplugged the refrigerator, then opened the door and removed four screws holding the plastic electrical panel to the interior top of the main refrigerator compartment and noticed the cold control was corroded badly, apparently from moisture in the panel. I ordered a new one from partselect.com. When it arrived the next day, I then pul
... Read more
led off the control knob, unclipped the cold control, unplugged the three wires to the control, then removed the styrofoam insulation blocks holding the thermocouple wire and then removed the thermocouple wire to complete the removal. I then reversed the process to install the new thermostat and control. That is repositioned the thermocouple wire, put the insulation blocks back to hold the wire, then replugged the three electrical wires, clipped the control back and pushed the control knob back on and finally screwed the panel back to the top of the main compartment and plugged the refrigerator electrical cord back in to provide current to the refrigerator. It immediately started up and ran fine. Total time - about 8 minutes.
Read less
Was this instruction helpful to you?
Thank you for voting!
- Customer:
- William from Alexandria, VA
- Parts Used:
- 218906802
- Difficulty Level:
- Really Easy
- Total Repair Time:
- Less than 15 mins
- Tools:
- Screw drivers
Light socket melted around bulb
After unsuccessfully trying to change the blown light bulb I discovered that the plastic light socket had gotten so hot that it melted and permanently fused with the blown bulb. After my new socket arrived in the mail I just popped the temp control assembly out with a screw driver and removed the old socket and placed the new one in.
... Read more
Whole operation to 5 minutes.
Read less
Was this instruction helpful to you?
Thank you for voting!
- Customer:
- Phillip from Cary, NC
- Parts Used:
- 240338101
- Difficulty Level:
- Really Easy
- Total Repair Time:
- Less than 15 mins
The door shelf/bin broke and fell off
I simply snapped in the new part. It took a few seconds. I would like to say that I found the part using the model number of the fridge. When I went to look at the description it said the part was 26 inches. The one I had was only 24 3/4 inches. I called you guys and was told that this was the correct part and to ignore the measuement.
... Read more
r />You were Right! the part fitted perfectly.
Read less
Was this instruction helpful to you?
Thank you for voting!