


Models
>
25344703000
25344703000 Kenmore Refrigerator
Jump to:
Find Part by Name
Keep searches simple, eg. "belt" or "pump".
Manuals & Guides for 25344703000
Click to downloadKeep searches simple, eg. "belt" or "pump".

$43.72
This manufacturer-approved Refrigerator Door Shelf Bin is made of white plastic and is easy to install. It is used to hold heavier items in the fridge, and you'll be able to visually see if the part i...
On Order

$53.53
This glass shelf sits above the crisper drawers in your refrigerator. This part is just the glass, there are no brackets or additional mounting hardware (these can be purchased separately if needed). ...
In Stock
Order now and your part arrives by Jul 30

$32.79
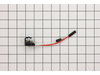
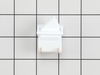
If you have frost building up in your freezer, or the temperature in your fridge is running too warm, there may be an issue with the defrost thermostat. This thermostat sits on the top of the evaporat...
In Stock
Order now and your part arrives by Jul 30

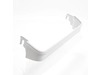
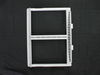
This is a genuine OEM replacement crisper drawer cover for your refrigerator. It measures approximately 27 inches by 20 inches and does not include the glass insert for the self. You can reuse the gla...
In Stock
Order now and your part arrives by Jul 30

$49.45
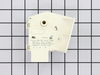
If your refrigerator is not maintaining a consistent temperature, or there is frost building up, you may need to replace the defrost timer. The 120V defrost timer is a genuine OEM part that acts like ...
In Stock
Order now and your part arrives by Jul 30

$109.64
This is the replacement meat pan for your refrigerator. It is made of clear plastic and is approximately 18 inches long and 13 inches wide. The meat pan slides into the bottom of the refrigerator shel...
In Stock
Order now and your part arrives by Jul 30

$25.25
Sold individually.
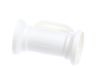
This is a genuine part. The handle mounting shoulder screw (no.10 ab) is made for use with many refrigerators. The metal screw helps to fasten the handle assembly to the outer do...
In Stock
Order now and your part arrives by Jul 30

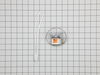
$63.75
Ensure proper lighting inside your refrigerator with this 3.8W LED bulb, designed for use in various models. It provides clear, energy-efficient illumination to help you easily see stored items. If yo...
In Stock
Order now and your part arrives by Jul 30

$71.59
This is a replacement door bin for your refrigerator. It is made of clear plastic and is approximately 13 inches wide at its longest point, 5 inches deep, and 4 inches tall. The door bin holds items t...
In Stock
Order now and your part arrives by Jul 30

In Stock
Order now and your part arrives by Jul 30
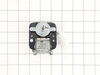
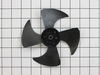
 – Part Number: 297309000")
$61.68
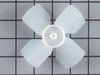
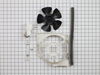
The 115-volt evaporator fan motor is in the back of the freezer section and circulates air over the coils. These coils will convert the heat into cool air, which is then circulated. If your freezer is...
In Stock
Order now and your part arrives by Jul 30

In Stock
Order now and your part arrives by Jul 30
Common Problems and Symptoms for 25344703000
Viewing 18 of 18Too warm
Fixed by these parts
How to fix it
Noisy
Fixed by these parts
How to fix it
Frost buildup
Fixed by these parts
How to fix it
Fridge too warm
Fixed by these parts
How to fix it
Won’t start
Fixed by these parts
How to fix it
Doesn’t stop running
Fixed by these parts
How to fix it
Light not working
Fixed by these parts
How to fix it
Freezer section too warm
Fixed by these parts
How to fix it
Freezer not defrosting
Fixed by these parts
How to fix it
Door won’t open or close
Fixed by these parts
How to fix it
Will Not Start
Fixed by these parts
How to fix it
Fridge runs too long
Fixed by these parts
How to fix it
Leaking
Fixed by these parts
How to fix it
Door Sweating
Fixed by these parts
How to fix it
Fridge and Freezer are too warm
Fixed by these parts
How to fix it
Freezer too cold
Fixed by these parts
How to fix it
Clicking sound
Fixed by these parts
How to fix it
Too cold
Fixed by these parts
How to fix it


")


Keep searches simple. Use keywords, e.g. "leaking", "pump", "broken" or "fit".
- Customer:
- Milton from Camp Hill, PA
- Parts Used:
- 240524102
- Difficulty Level:
- Really Easy
- Total Repair Time:
- 15 - 30 mins
- Tools:
- Wrench (Adjustable)
Broke a blade off of the fan
When cleaning the coils on your refrigerator always remember rule number 1, unplug it first. I was cleaning the coils and hit the fan blade while it was moving with a brush, thus breaking off one of the fan blades. I ordered a new fan and installed it in about 15 minutes. Very easy repair.
Was this instruction helpful to you?
Thank you for voting!
- Customer:
- Ernesto from Porter, TX
- Parts Used:
- 240350608
- Difficulty Level:
- Really Easy
- Total Repair Time:
- Less than 15 mins
The Crisper Drawer Glass Shelf slid out of the frame while being cleaned and shattered.
The repair didn't require any tools at all. Just simply slide the new glass shelf carefully into the the frame and while holding it horizontally slide the frame back into the rails. This took less than a minute to accomplish. Very satisfied with the results.
Was this instruction helpful to you?
Thank you for voting!
- Customer:
- Wayne from Forest Hill, MD
- Parts Used:
- 5304518034
- Difficulty Level:
- Easy
- Total Repair Time:
- Less than 15 mins
- Tools:
- Screw drivers
Temp alarm sounding and food on top shelves partially thawed
After silencing the alarm, it seemed to be running as normal without any unusual noises, but food was starting to thaw from the top shelf on down and condensation was dripping from the roof. We were able to place most of the food in 2 large ice chests and then the rest in the freezer compartments of 2 fridges we have in the house. I the
... Read more
n turned down the temp dial to the coldest setting and let it run for an hour or so; no change.
After researching on the internet, it sounded like our symptoms could be pointing to a defrost timer issue. I pulled the freezer away from the wall, located the timer and used a large screwdriver to slowly advance it. While doing this, at one point I could hear the compressor kick in. I pushed the quick freeze button and let it run for a while. When I checked it in a few hours, the alarm light had gone out and water that I had placed inside was frozen. We took a chance and put the food we placed in the ice chests back in the freezer. Everything was fine several hours later.
I ordered a new defrost timer, it arrived in a couple of days, and replaced the old one with it in a matter of minutes by disconnecting the wire harness from the old timer, removing the 2 screws holding it onto the bracket, screwing the new timer to the bracket, reconnecting the wires harness, and done. It's been a week or so and no problems.
Read less
Was this instruction helpful to you?
Thank you for voting!