


Models
>
10644424601
10644424601 Kenmore Refrigerator
Jump to:
Find Part by Name
Keep searches simple, eg. "belt" or "pump".
Manuals & Guides for 10644424601
Click to downloadKeep searches simple, eg. "belt" or "pump".

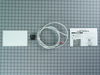
It is recommended to replace your refrigerator water filter every 6 months or 200 gallons of water. This will ensure consistently good-tasting water that is free of pollutants. This NSF-certified filt...
In Stock
Order now and your part arrives by Jul 27

$129.72
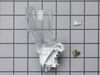
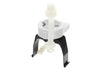
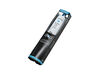
If your fridge has stopped making or dispensing ice, you may need to replace the ice maker assembly. Regular wear and tear can cause this part to fail over time, especially if used frequently. To repl...
In Stock
Order now and your part arrives by Jul 27

$36.42
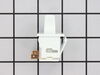
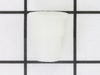
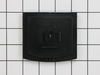
If the cap for your water filter has become damaged, this is an authentic OEM replacement part that is black in color. The cap is used to remove the old filter and insert the new one. Be sure to first...
In Stock
Order now and your part arrives by Jul 27

In Stock
Order now and your part arrives by Jul 27

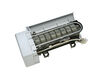
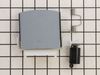
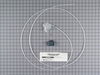
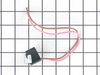
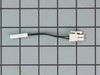
The bi-metal defrost thermostat is attached to the evaporator, and its purpose is to protect the evaporator from overheating when the defrost cycle is running. If there is frost building up in your fr...
In Stock
Order now and your part arrives by Jul 27

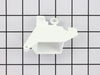
This grille is located on the bottom of the ice/water dispenser to catch the overflow. (Black)
In Stock
Order now and your part arrives by Jul 27

$13.95
This 25-watt light bulb is a genuine OEM replacement part for a variety of appliances. The 120-volt incandescent bulb has a screw-in base and is used to light up the appliance when the door is opened....
In Stock
Order now and your part arrives by Jul 27

This kit includes the ice door, support, spring and delay. The heater ribbon is no longer attached - the heater is no longer needed.
No Longer Available

$85.67
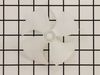
This fan motor is used in frost-free refrigerators with a condenser coil. When the compressor runs, so does this fan, circulating air through the refrigerator grille, to cool the compressor and conden...
In Stock
Order now and your part arrives by Jul 27

$293.68
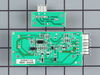
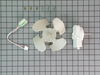
This OEM set includes the emitter and receiver boards that control your refrigerator’s ice maker. They detect when the ice bin is full and signal the system to stop or start making ice. A common fix f...
In Stock
Order now and your part arrives by Jul 27

$144.35
This part is also known as a shelf frame. This drawer cover is for refrigerators.
Drawer cover has rail brackets under the cover that hold the drawer and allow the drawer to slide in and out on th...
In Stock
Order now and your part arrives by Jul 27

$143.76
If you need to replace the glass shelf in your refrigerator, this is a genuine OEM replacement part. Please note that this is strictly the glass shelf insert. The plastic shelf frame is not included b...
In Stock
Order now and your part arrives by Jul 27
Common Problems and Symptoms for 10644424601
Viewing 23 of 23Ice maker not making ice
Fixed by these parts

How to fix it
Light not working
Fixed by these parts
How to fix it
Ice maker won’t dispense ice
Fixed by these parts
How to fix it
Leaking
Fixed by these parts
How to fix it
Noisy
Fixed by these parts
How to fix it
Fridge too warm
Fixed by these parts
How to fix it
Freezer not defrosting
Fixed by these parts
How to fix it
Door won’t open or close
Fixed by these parts
How to fix it
Not dispensing water
Fixed by these parts
How to fix it
Freezer section too warm
Fixed by these parts
How to fix it
Door Sweating
Fixed by these parts
How to fix it
Fridge and Freezer are too warm
Fixed by these parts
How to fix it
Frost buildup
Fixed by these parts
How to fix it
Fridge too cold
Fixed by these parts
How to fix it
Freezer too cold
Fixed by these parts
How to fix it
Ice maker dispenses too much ice
Fixed by these parts
How to fix it
Will Not Start
Fixed by these parts

How to fix it
Too warm
Fixed by these parts
How to fix it
Fridge runs too long
Fixed by these parts
How to fix it
Clicking sound
Fixed by these parts
How to fix it
Ice maker dispenses too little ice
Fixed by these parts
How to fix it
Won’t start
Fixed by these parts
How to fix it
Door latch failure
Fixed by these parts
How to fix it


Keep searches simple. Use keywords, e.g. "leaking", "pump", "broken" or "fit".
- Customer:
- Kate from Jacksonville, FL
- Parts Used:
- EDR3RXD1
- Difficulty Level:
- Very Difficult
- Total Repair Time:
- 30 - 60 mins
there were directions
We didn't know where the product went and it was very difficult to install.
Was this instruction helpful to you?
Thank you for voting!
- Customer:
- Phil from Auberry, CA
- Parts Used:
- 2198597
- Difficulty Level:
- A Bit Difficult
- Total Repair Time:
- 15 - 30 mins
- Tools:
- Nutdriver, Screw drivers
Ice maker stopped functioning
Remove the icemaker service door... gently pry the door pins from the hinge sockets. Remove the 3 screws from the under side of the icemaker with a nut driver (1/4"). Gently remove the icemaker . It's a tight fit between the top of the compartment and the icemaker lower support tray. Next, disconnect the electrical connector at the ri
... Read more
ght side. You're done! Reverse procedure for installing. Good luck. Remember, your working with cold plastic...take your time and don't force too much.
Read less
Was this instruction helpful to you?
Thank you for voting!
- Customer:
- Leroy from Perkiomenville, PA
- Parts Used:
- EDR3RXD1
- Difficulty Level:
- Really Easy
- Total Repair Time:
- Less than 15 mins
six months the light turns red. time to replace filter
First I shut the water off to the refrigerator.then i pushed the big button in the middle of the grille below the refrigerator door. pulled out the old filter, took the front cap off the old filter put it on the new filter. took the two red caps off the new filter. pushed the filter in till it locked in place. all done! Turned the back on
... Read more
.
Read less
Was this instruction helpful to you?
Thank you for voting!