


Models
>
25344762705
25344762705 Kenmore Refrigerator
Jump to:
Find Part by Name
Keep searches simple, eg. "belt" or "pump".
Manuals & Guides for 25344762705
Click to downloadKeep searches simple, eg. "belt" or "pump".

$49.45
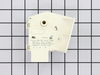
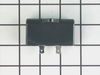
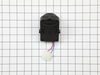
If your refrigerator is not maintaining a consistent temperature, or there is frost building up, you may need to replace the defrost timer. The 120V defrost timer is a genuine OEM part that acts like ...
In Stock
Order now and your part arrives by Jul 30

$25.25
Sold individually.
This is a genuine part. The handle mounting shoulder screw (no.10 ab) is made for use with many refrigerators. The metal screw helps to fasten the handle assembly to the outer do...
In Stock
Order now and your part arrives by Jul 30

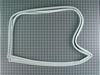
$142.90
This door gasket helps keep your freezer cold by sealing the edge of the door. If your freezer isn’t staying cold or the seal looks worn, replacing it can help. It’s easy to install and fits around th...
In Stock
Order now and your part arrives by Jul 30

$63.75
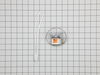
Ensure proper lighting inside your refrigerator with this 3.8W LED bulb, designed for use in various models. It provides clear, energy-efficient illumination to help you easily see stored items. If yo...
In Stock
Order now and your part arrives by Jul 30

$71.59
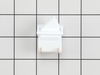
This is a replacement door bin for your refrigerator. It is made of clear plastic and is approximately 13 inches wide at its longest point, 5 inches deep, and 4 inches tall. The door bin holds items t...
In Stock
Order now and your part arrives by Jul 30
 – Part Number: 297309000")
$61.68
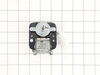
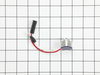
The 115-volt evaporator fan motor is in the back of the freezer section and circulates air over the coils. These coils will convert the heat into cool air, which is then circulated. If your freezer is...
In Stock
Order now and your part arrives by Jul 30

This is an adjustable foot for your freezer, refrigerator, and dryer. This part supports your unit by screwing into one of the bottom four corners, and adjusting the height of your machine. If your ap...
In Stock
Order now and your part arrives by Jul 30

In Stock
Order now and your part arrives by Jul 30

In Stock
Order now and your part arrives by Jul 30

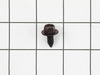
This genuine OEM hinge mounting screw is designed for use in Frigidaire and Electrolux refrigerators, providing a secure and reliable way to fasten door hinges to the cabinet. Built with a durable hex...
In Stock
Order now and your part arrives by Jul 30

$78.13
This dairy door, also known as a dairy bin cover, is a genuine OEM replacement part for your refrigerator. The dairy cover is a plastic part that serves as a covering to a shelf on your fridge door, t...
In Stock
Order now and your part arrives by Jul 30

$31.27
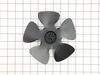
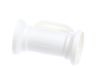
This is a genuine condenser fan blade, which works with refrigerators, freezers and wines and beverage coolers.
In Stock
Order now and your part arrives by Jul 30
Common Problems and Symptoms for 25344762705
Viewing 15 of 15Frost buildup
Fixed by these parts
How to fix it
Too warm
Fixed by these parts
How to fix it
Fridge too warm
Fixed by these parts
How to fix it
Noisy
Fixed by these parts
How to fix it
Won’t start
Fixed by these parts
How to fix it
Light not working
Fixed by these parts
How to fix it
Will Not Start
Fixed by these parts

How to fix it
Doesn’t stop running
Fixed by these parts
How to fix it
Door Sweating
Fixed by these parts
How to fix it
Fridge and Freezer are too warm
Fixed by these parts
How to fix it
Fridge too cold
Fixed by these parts
How to fix it
Clicking sound
Fixed by these parts
How to fix it
Door won’t open or close
Fixed by these parts
How to fix it
Leaking
Fixed by these parts
How to fix it
Freezer section too warm
Fixed by these parts
How to fix it
")


Keep searches simple. Use keywords, e.g. "leaking", "pump", "broken" or "fit".
- Customer:
- Louise from Ocala, FL
- Parts Used:
- 5304507200
- Difficulty Level:
- Easy
- Total Repair Time:
- 1- 2 hours
Ice and frost were forming in a frost free freezer
The old gasket was obviously gapping, partially from age and partially from damage during a move. To make the repair, I loosened the screws that are under the gasket and hold it in, but did not remove them. Once all were loose, I removed the old gasket, then starting at the top, ran a thin bead of food grade RTV under the portion of the
... Read more
door that captures the gasket. I put the sealant on that edge only, then carefully worked one of the short edges of the gasket under the plastic and tightened all but the corner screws. I then ran the RTV down the inside of the hinge side of the door and repeated the process, this time tightening the top screw and the hinge side screw at the top, but leaving the bottom most screw loose. I repeated the process on the opening side of the door. The bottom was the hardest because the gasket seemed just a little long and it was hard to get the RTV up and behind the door portion, but after a couple tried I got a good bead of sealant then slid the gasket under the door capture and tightened all the remaining screws. After closing the door, it was obvious that there were places were it did not seal well. I used some cardboard strips, cut from the box the gasket came in, to place inside the freezer, between the hard plastic of the door and the inside of the gasket where it laps over the screws. This helped a lot, but there were still a couple small areas, so I used more cardboard, from the outside, between the main portion of the gasket and the rim of the gasket. This eliminated all the gaps. I let this sit overnight and this morning removed all the cardboard for a great sealing freezer.
Read less
Was this instruction helpful to you?
Thank you for voting!
- Customer:
- Wayne from Forest Hill, MD
- Parts Used:
- 5304518034
- Difficulty Level:
- Easy
- Total Repair Time:
- Less than 15 mins
- Tools:
- Screw drivers
Temp alarm sounding and food on top shelves partially thawed
After silencing the alarm, it seemed to be running as normal without any unusual noises, but food was starting to thaw from the top shelf on down and condensation was dripping from the roof. We were able to place most of the food in 2 large ice chests and then the rest in the freezer compartments of 2 fridges we have in the house. I the
... Read more
n turned down the temp dial to the coldest setting and let it run for an hour or so; no change.
After researching on the internet, it sounded like our symptoms could be pointing to a defrost timer issue. I pulled the freezer away from the wall, located the timer and used a large screwdriver to slowly advance it. While doing this, at one point I could hear the compressor kick in. I pushed the quick freeze button and let it run for a while. When I checked it in a few hours, the alarm light had gone out and water that I had placed inside was frozen. We took a chance and put the food we placed in the ice chests back in the freezer. Everything was fine several hours later.
I ordered a new defrost timer, it arrived in a couple of days, and replaced the old one with it in a matter of minutes by disconnecting the wire harness from the old timer, removing the 2 screws holding it onto the bracket, screwing the new timer to the bracket, reconnecting the wires harness, and done. It's been a week or so and no problems.
Read less
Was this instruction helpful to you?
Thank you for voting!
- Customer:
- Paul from Springfield, MO
- Parts Used:
- 5304492453
- Difficulty Level:
- A Bit Difficult
- Total Repair Time:
- 30 - 60 mins
- Tools:
- Screw drivers
refrigerator would cool down when controler was turned off then on but would not maintain temperature resulting in unit getting too warm and jeapordizing food.
Unplugged unit from power source. Emptied the vegetable crisper and the removed crisper including the permanently fixed mounts on either lower wall of the unit which are retained with screws. Removed temperature control knob. Then removed interior back panel that covers cooling panel and controller. Carefully work panel loose as it is ver
... Read more
y thin and bendable metal. Note gaskets at each end of the panel and save for re-install. After working panel loose carefully find controller and pinch the mounting bracket of the controller which allows it to release from the panel. Now you may set panel out of the way and continue disassembling the controller. It has a thermal wire that is mounted to the back of the fridge wall with a screw clam. Note position and shape then remove. Remove ground and power connections noting position of each. Take new controller and attach ground and power connection. Bend thermal wire using thumb as a shaper to exacting shape of the old one and position in clamp and secure with screw. Note old controller had a Styrofoam cover and return this cover after attaching new controller to the cover panel. After this, reposition the cover panel and retain with screws but don't tighten screws all the way as you need to be able to shift panel while replacing gaskets at the ends. Place the end gaskets where they originally were and work both in until they seat. Tighten screws on the panel. Replace crisper and plug in. Good luck it fixed mine and the unit works great.
Read less
Was this instruction helpful to you?
Thank you for voting!