


Models
>
10650446903
10650446903 Kenmore Refrigerator
Jump to:
Find Part by Name
Keep searches simple, eg. "belt" or "pump".
Manuals & Guides for 10650446903
Click to downloadKeep searches simple, eg. "belt" or "pump".

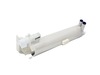
It is recommended to replace your refrigerator water filter every 6 months or 200 gallons of water. This will ensure consistently good-tasting water that is free of pollutants. This NSF-certified filt...
In Stock
Order now and your part arrives by Jul 23

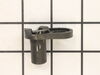
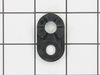
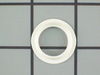
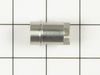
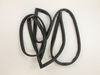
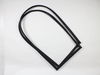
The lower door closing cam raises the door to keep it from touching the refrigerator liner when the door is closed. It fits both the left and right side of the refrigerator door. The most common reaso...
In Stock
Order now and your part arrives by Jul 23

$9.79
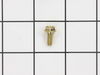
This is a refrigerator or freezer lower door closing cam. This part includes the door cam only, but you will need a new mounting screw to complete this repair, and it is sold separately. Door cams are...
In Stock
Order now and your part arrives by Jul 23

$36.42
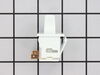
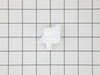
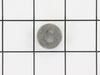
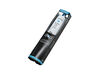
If the cap for your water filter has become damaged, this is an authentic OEM replacement part that is black in color. The cap is used to remove the old filter and insert the new one. Be sure to first...
In Stock
Order now and your part arrives by Jul 23

In Stock
Order now and your part arrives by Jul 23

$46.07
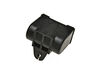
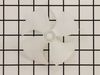
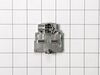
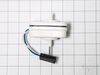
The capacitor, also known as a run capacitor, is a component in your fridge that allows the compressor to cycle on and off to maintain a constant temperature. If your fridge and freezer are too warm i...
In Stock
Order now and your part arrives by Jul 23

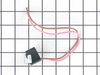
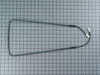
The bi-metal defrost thermostat is attached to the evaporator, and its purpose is to protect the evaporator from overheating when the defrost cycle is running. If there is frost building up in your fr...
In Stock
Order now and your part arrives by Jul 23

$13.95
This 25-watt light bulb is a genuine OEM replacement part for a variety of appliances. The 120-volt incandescent bulb has a screw-in base and is used to light up the appliance when the door is opened....
In Stock
Order now and your part arrives by Jul 23

$53.58
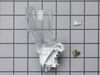
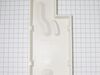
This is a white plastic refrigerator door bin, also sometimes referred to as a cantilever shelf. It connects to the inside of the door. It helps to contain items in an organized fashion and provides e...
In Stock
Order now and your part arrives by Jul 23

In Stock
Order now and your part arrives by Jul 23

$24.15
This 18 ml bottle of white appliance touch-up paint is used to cover scratches or marks on your appliance. The white touch-up paint can be used on refrigerators, microwaves, ranges, clothes dryers, an...
In Stock
Order now and your part arrives by Jul 23
 – Part Number: WP2260518W")
In Stock
Order now and your part arrives by Jul 23
Common Problems and Symptoms for 10650446903
Viewing 22 of 22Door won’t open or close
Fixed by these parts
How to fix it
Light not working
Fixed by these parts
How to fix it
Fridge too warm
Fixed by these parts
How to fix it
Clicking sound
Fixed by these parts
How to fix it
Noisy
Fixed by these parts
How to fix it
Ice maker won’t dispense ice
Fixed by these parts
How to fix it
Freezer section too warm
Fixed by these parts
How to fix it
Fridge and Freezer are too warm
Fixed by these parts
How to fix it
Will Not Start
Fixed by these parts
How to fix it
Leaking
Fixed by these parts
How to fix it
Ice maker not making ice
Fixed by these parts

How to fix it
Freezer not defrosting
Fixed by these parts
How to fix it
Not dispensing water
Fixed by these parts

How to fix it
Too warm
Fixed by these parts
How to fix it
Door Sweating
Fixed by these parts
How to fix it
Frost buildup
Fixed by these parts

How to fix it
Fridge too cold
Fixed by these parts
How to fix it
Freezer too cold
Fixed by these parts
How to fix it
Fridge runs too long
Fixed by these parts
How to fix it
Ice maker dispenses too little ice
Fixed by these parts
How to fix it
Won’t start
Fixed by these parts
How to fix it
Door latch failure
Fixed by these parts
How to fix it


Keep searches simple. Use keywords, e.g. "leaking", "pump", "broken" or "fit".
- Customer:
- Kate from Jacksonville, FL
- Parts Used:
- EDR3RXD1
- Difficulty Level:
- Very Difficult
- Total Repair Time:
- 30 - 60 mins
there were directions
We didn't know where the product went and it was very difficult to install.
Was this instruction helpful to you?
Thank you for voting!
- Customer:
- Norbert from Sugar Land, TX
- Parts Used:
- WP2182179, WPW10329686
- Difficulty Level:
- Really Easy
- Total Repair Time:
- 15 - 30 mins
- Tools:
- Nutdriver, Pliers, Screw drivers
Refigerator door was not closing all the way if not pushed shut.
Remove the top hinge cover. Removed the top hinge support. Lifted the door from the bottom support. Old door cams were worn completly flat. Replaced the lower door cam and closing cam use a little vasalene for lubricant on the cam surfaces. Placed the door back on the lower hinge support. Replaced the top hinge support. Door is cl
... Read more
osing great now.
Thanks for the quick part deliver.
Thanks for the quick part deliver.
Read less
Was this instruction helpful to you?
Thank you for voting!
- Customer:
- garth from forest lake, MN
- Parts Used:
- WPW10662129
- Difficulty Level:
- Really Easy
- Total Repair Time:
- 15 - 30 mins
- Tools:
- Nutdriver, Screw drivers
My refrigerator stopped cooling and the freezer section stopped freezing
I knew the chances of all the freon leaking out was unlikely so I looked at the wiring to the compressor and there was a capacitor and a starter/overload so i figured I would start there. I went on line and found the parts at this site and they were less than the minimum service call charge for a service tech so I figured what the heck le
... Read more
t's give her a shot so I did give it a shot. I ordered the parts and they were there in less time than a service tech could come out and i installed the parts and guess what for 90.00 in parts and 15 minutes in time I repaired my refrigerator. Thanks guys, It took less time to order the parts than it did to make the repair so thanks, your website rocks and is very well designed so my hat is off to you guys!
Read less
Was this instruction helpful to you?
Thank you for voting!