


Models
>
25348027890
25348027890 Kenmore Refrigerator
Jump to:
Find Part by Name
Keep searches simple, eg. "belt" or "pump".
Keep searches simple, eg. "belt" or "pump".

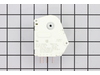
This part includes one refrigerator door shelf end cap, which is compatible with either the left or right side. This durable white plastic part is sourced directly from the original manufacturer and i...
In Stock
Order now and your part arrives by Jul 31

$41.55
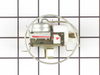
If your freezer will not defrost, or your fridge and freezer are too warm, there may be an issue with the defrost timer. This device helps to melt ice that builds up on the evaporator coils. It does t...
In Stock
Order now and your part arrives by Jul 31

If your door shelf retainer bar is not staying in place you may need to replace the end cap. The end cap helps secure the bar in place on the refrigerator door. This end cap can be used for the left o...
In Stock
Order now and your part arrives by Jul 31

$32.79
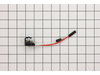
If you have frost building up in your freezer, or the temperature in your fridge is running too warm, there may be an issue with the defrost thermostat. This thermostat sits on the top of the evaporat...
In Stock
Order now and your part arrives by Jul 31

$27.45
This 40-watt light bulb has a standard screw-in base and is used in many different appliances. If your current bulb is burnt out or broken you will need to replace it. This light bulb is a genuine OEM...
In Stock
Order now and your part arrives by Jul 31

In Stock
Order now and your part arrives by Jul 31

In Stock
Order now and your part arrives by Jul 31

$130.53
The front for this part is sold separately or you can use your existing part.
Special Order

In Stock
Order now and your part arrives by Jul 31

In Stock
Order now and your part arrives by Jul 31


$25.10
This 18 ml bottle of white appliance touch up paint is a little over two inches tall. It can be used for refrigerators, microwaves, ranges, clothes dryers, and freezers.
In Stock
Order now and your part arrives by Jul 31
Common Problems and Symptoms for 25348027890
Viewing 17 of 17Fridge too warm
Fixed by these parts
How to fix it
Too warm
Fixed by these parts
How to fix it
Freezer not defrosting
Fixed by these parts
How to fix it
Freezer section too warm
Fixed by these parts
How to fix it
Frost buildup
Fixed by these parts
How to fix it
Noisy
Fixed by these parts
How to fix it
Doesn’t stop running
Fixed by these parts
How to fix it
Will Not Start
Fixed by these parts
How to fix it
Leaking
Fixed by these parts

How to fix it
Fridge runs too long
Fixed by these parts
How to fix it
Fridge and Freezer are too warm
Fixed by these parts
How to fix it
Freezer too cold
Fixed by these parts
How to fix it
Light not working
Fixed by these parts

How to fix it
Fridge too cold
Fixed by these parts
How to fix it
Won’t start
Fixed by these parts
How to fix it
Door won’t open or close
Fixed by these parts
How to fix it
Too cold
Fixed by these parts
How to fix it


Keep searches simple. Use keywords, e.g. "leaking", "pump", "broken" or "fit".
freezer would not defrost
My freezer would freeze up and not allow cold air to refrigerator side. First I took off bottom face plate, located the timer on left side bottom, removed the two screws and unpluged the timer. Replaced the timer with new one. Second I removed all food from freezer. Took of back of freezer wall with nut driver. Located the thermostat whic
... Read more
h was very easy to remove. Just one clip holding thermostat. Unplugged the two wires from the old thermostat and plugged in new wires. Thanks to Partselect.com, the parts were an exact match. Very easy to do. Saved my tons of money. Freezer and refer works like new.
Read less
Was this instruction helpful to you?
Thank you for voting!
Freezer coil frosting up solid. Refrigerator warming
First - I asked a person familiar in ref/freezer repair for assistance. This was the hardest issue - trying to find someone to offer "free" advise. He stated that when this problem occurs it is usually one of two things: 1) The defrost timer (underneath Refrigerator - Attached w/2 screws and plug-n connector) not functioning or 2) The de
... Read more
frost sensor (clipped-on to the coolant line (2-press-on wires) above the main coolant coil in in rear of freezer section behind panel secured w/5 1/4" hex-head screws) not properly sensing need for defrosting. The Tech. also stated that the defrost/heat coil, which surrounds the large coolant coil in the back of the freezer hardly ever goes bad unless it is the glass/clear type coil which often crack. (Mine was the black filament type element like found in an electric oven). I check the element with an ohm meter - 27 ohms of resistance which indicated it was okay). I replaced both defrost timer & defrost sensor at the same time and that fixed the problem. Parts ordered were an exact match to originals (dispite model number changes/upgrades) and everything went very well. NOTE: It is good to have the part numbers off of each original item and know what they are called before placing your order. All fixed for less than $50.00. A service call alone would be more than this. Took about 2 hours to do, due to having to defost the iced-up freezer coil w/a hair blower. Don't use sharp objects to chip away ice, let the blower do the work - Patience and a couple of towels to absorb water is important here. Hope this helps the other do-it-yourselfers.
Read less
Was this instruction helpful to you?
Thank you for voting!
- Customer:
- Tad from Lancaster, OH
- Parts Used:
- 215846602
- Difficulty Level:
- Easy
- Total Repair Time:
- 15 - 30 mins
- Tools:
- Screw drivers
Side-by-side .. freezer working, fridge not cooling
My freezer was frozen but my refrigerated side was not cooling, the temp was actually around 60-degrees. After inspecting i noticed no air was flowing through the vent from freezer side to fridge side. I removed everything from freezer and took the back wall panel off inside freezer section and immedietely noticed alot of ice on coils etc
... Read more
. After researching i found the defrost timer was not working and thus allowing frost and ice to build up on coils and block air flow. My defrost timer was located on the front bottom left behind kick panel, using a phillips screwdriver i removed 2 screws and then disconnected wire harness to the defrost timer. Then i inserted new defrost timer and connected wire harness and then put the 2 screws back in. My fridge is now working great and the ice build-up is gone and i am getting good air flow .. temps on fridge side are now between 32-34degrees. This was an easy project and saved me alot of money doing myself
Read less
Was this instruction helpful to you?
Thank you for voting!