


Models
>
10654909300
10654909300 Kenmore Refrigerator
Jump to:
Find Part by Name
Keep searches simple, eg. "belt" or "pump".
Keep searches simple, eg. "belt" or "pump".

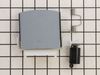
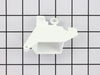
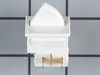
The lower door closing cam raises the door to keep it from touching the refrigerator liner when the door is closed. It fits both the left and right side of the refrigerator door. The most common reaso...
In Stock
Order now and your part arrives by Jul 30

$129.72
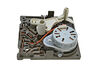
If your fridge has stopped making or dispensing ice, you may need to replace the ice maker assembly. Regular wear and tear can cause this part to fail over time, especially if used frequently. To repl...
In Stock
Order now and your part arrives by Jul 30

$72.17
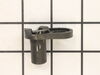
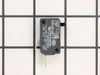
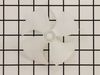
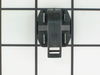
This part is used to help tell the icemaker what to do - it turns the timing cams and the ejector blades. Motor is not sold separately.
In Stock
Order now and your part arrives by Jul 30

$17.44
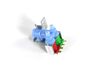
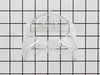
When the ice dispenser in your fridge is activated, the ice guide helps to ensure the ice flows into your glass. This is a genuine OEM replacement ice guide that is made of clear plastic. If your ice ...
In Stock
Order now and your part arrives by Jul 30

This kit includes the ice door, support, spring and delay. The heater ribbon is no longer attached - the heater is no longer needed.
No Longer Available

$19.63
This 10-watt clear bulb provides dependable lighting inside dryers and refrigerators, helping you see the interior clearly when the door is open. Compatible with a variety of appliance models, it inst...
In Stock
Order now and your part arrives by Jul 30

$21.82
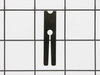
This is a screw and it is made for multiple appliances in your home. This model is called a sheet metal screw because it has sharp points, and the threads are closer together. This screw is designed t...
In Stock
Order now and your part arrives by Jul 30

In Stock
Order now and your part arrives by Jul 30

This black plastic cap holds the refrigerator water filter in place and covers its end. It installs easily by turning clockwise to lock and counterclockwise to remove. Compatible with select models, i...
In Stock
Order now and your part arrives by Jul 30

$24.15
This 18 ml bottle of white appliance touch-up paint is used to cover scratches or marks on your appliance. The white touch-up paint can be used on refrigerators, microwaves, ranges, clothes dryers, an...
In Stock
Order now and your part arrives by Jul 30

$52.50
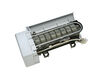
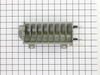
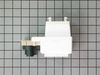
This dual water inlet valve regulates the flow of water to both the ice maker and water dispensing system in a refrigerator, ensuring consistent and reliable operation. Operating on standard household...
In Stock
Order now and your part arrives by Jul 30

This icemaker water inlet cup is three inches long. It is all white in color and is made of plastic.
In Stock
Order now and your part arrives by Jul 30
Common Problems and Symptoms for 10654909300
Viewing 20 of 20Ice maker not making ice
Fixed by these parts
How to fix it
Door won’t open or close
Fixed by these parts
How to fix it
Ice maker won’t dispense ice
Fixed by these parts
How to fix it
Leaking
Fixed by these parts
How to fix it
Not dispensing water
Fixed by these parts
How to fix it
Fridge too warm
Fixed by these parts
How to fix it
Clicking sound
Fixed by these parts
How to fix it
Noisy
Fixed by these parts
How to fix it
Door Sweating
Fixed by these parts
How to fix it
Ice maker dispenses too much ice
Fixed by these parts
How to fix it
Fridge too cold
Fixed by these parts
How to fix it
Freezer section too warm
Fixed by these parts
How to fix it
Light not working
Fixed by these parts
How to fix it
Freezer not defrosting
Fixed by these parts
How to fix it
Frost buildup
Fixed by these parts
How to fix it
Won’t start
Fixed by these parts
How to fix it
Will Not Start
Fixed by these parts
How to fix it
Ice maker dispenses too little ice
Fixed by these parts
How to fix it
Too warm
Fixed by these parts
How to fix it
Freezer too cold
Fixed by these parts
How to fix it


Keep searches simple. Use keywords, e.g. "leaking", "pump", "broken" or "fit".
- Customer:
- Daniel from Suwanee, GA
- Parts Used:
- W10190935
- Difficulty Level:
- Easy
- Total Repair Time:
- 15 - 30 mins
- Tools:
- Screw drivers, Socket set
No ice
removed flap door in front of icemaker...removed 3 screws with bolt heads...removed one additional screw with bolt head and ice unit slid out. I removed motor unit (pops out no screws). Replaced and had ice within 3 hours.
Was this instruction helpful to you?
Thank you for voting!
- Customer:
- Phil from Auberry, CA
- Parts Used:
- 2198597
- Difficulty Level:
- A Bit Difficult
- Total Repair Time:
- 15 - 30 mins
- Tools:
- Nutdriver, Screw drivers
Ice maker stopped functioning
Remove the icemaker service door... gently pry the door pins from the hinge sockets. Remove the 3 screws from the under side of the icemaker with a nut driver (1/4"). Gently remove the icemaker . It's a tight fit between the top of the compartment and the icemaker lower support tray. Next, disconnect the electrical connector at the ri
... Read more
ght side. You're done! Reverse procedure for installing. Good luck. Remember, your working with cold plastic...take your time and don't force too much.
Read less
Was this instruction helpful to you?
Thank you for voting!
- Customer:
- Tracy from Jacksonville, FL
- Parts Used:
- WP2180224
- Difficulty Level:
- Really Easy
- Total Repair Time:
- Less than 15 mins
External Ice Guide Broke a Tooth and Fell Off
We waited two years to do this because we didn't want to hassle with a repair man to come out and charge us arm+leg for something so simple. Finally we searched and found the part on line. It came two days FASTER than promised. Kudos to Part Select.
Snapping it on was a breeze, although you do have to apply more pressure than feels ... Read more comfortable with plastic clips. We can know get ice out of the external door system again.
Snapping it on was a breeze, although you do have to apply more pressure than feels ... Read more comfortable with plastic clips. We can know get ice out of the external door system again.
Read less
Was this instruction helpful to you?
Thank you for voting!