


Models
>
1068670670
1068670670 Kenmore Refrigerator
Jump to:
Find Part by Name
Keep searches simple, eg. "belt" or "pump".
Keep searches simple, eg. "belt" or "pump".

In Stock
Order now and your part arrives by Apr 2

This condenser fan motor is used with frost-free refrigerators with a condenser coil. When the compressor runs, so does this fan, circulating air through the refrigerator grille, cooling the compresso...
In Stock
Order now and your part arrives by Apr 2

In Stock
Order now and your part arrives by Apr 2

$24.00
This door shelf end cap set contains two white end caps and adhesive tape.
In Stock
Order now and your part arrives by Apr 2


$71.11
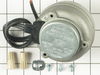
The evaporator is found in the back of the freezer. This kit comes with two mounting grommets, two sleeves (not to be used on porcelain models), two #8 mounting screws, and a push-on fan blade.
NOT...
In Stock
Order now and your part arrives by Apr 2

$13.07
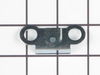
This hinge bracket, also known as a door stop, is attached to the bottom of the door and is used to limit how far the door swings out to protect the refrigerator itself, and any surrounding cabinets f...
In Stock
Order now and your part arrives by Apr 2

In Stock
Order now and your part arrives by Apr 2

In Stock
Order now and your part arrives by Apr 2

In Stock
Order now and your part arrives by Apr 2

$79.61
This is the replacement evaporator drip tray for your refrigerator. It is made of white plastic and is approximately 19 inches by 9 inches. The evaporator drip tray sits below the evaporator to collec...
In Stock
Order now and your part arrives by Apr 2

$9.79
This fourteen cube ice cube tray is eleven inches long. It is all white in color and is made entirely of plastic.
In Stock
Order now and your part arrives by Apr 2
Questions and Answers
We're sorry, but our Q&A experts are temporarily unavailable.
Please check back later if you still haven't found the answer you need.
Common Problems and Symptoms for 1068670670
Viewing 16 of 16Light not working
Fixed by these parts


How to fix it
Leaking
Fixed by these parts


How to fix it
Noisy
Fixed by these parts


How to fix it
Fridge too warm
Fixed by these parts

How to fix it
Freezer section too warm
Fixed by these parts

How to fix it
Door won’t open or close
Fixed by these parts

How to fix it
Ice maker not making ice
Fixed by these parts
How to fix it
Will Not Start
Fixed by these parts

How to fix it
Fridge and Freezer are too warm
Fixed by these parts
How to fix it
Fridge runs too long
Fixed by these parts
How to fix it
Door Sweating
Fixed by these parts


How to fix it
Not dispensing water
Fixed by these parts
How to fix it
Ice maker won’t dispense ice
Fixed by these parts
How to fix it
Clicking sound
Fixed by these parts
How to fix it
Too warm
Fixed by these parts
How to fix it
Fridge too cold
Fixed by these parts

How to fix it


Keep searches simple. Use keywords, e.g. "leaking", "pump", "broken" or "fit".
- Customer:
- Tom from Franklin, WI
- Parts Used:
- 833697
- Difficulty Level:
- A Bit Difficult
- Total Repair Time:
- 15 - 30 mins
- Tools:
- Nutdriver, Pliers
Sometimes the condenser fan would start causing the refrigerator to overheat.
Unplug the appliance.
Removed the screws holding the back panel.
Removed the fan blade.
removed 3 screws holding the condenser fan.
Remove the 3 metal brackets attached to the fan.
(First note which studs the brackets are attached to. Attach the 3 metal brackets to the new fan. (New screws were supplied)
Cut ... Read more and strip the wire about two inches from the fan.
Cut and strip the new wire. I cut the new wire in half (about 6 inches.) Connect the two wires, twist and used 2 wire nuts. Tie wrap the wire to the wire harness. Mount the new fan (three screws)
Screw the back panel back on.
Mount the new
Read less
Was this instruction helpful to you?
Thank you for voting!
- Customer:
- Charles from Orland Hills, IL
- Parts Used:
- WP2196157
- Difficulty Level:
- Really Easy
- Total Repair Time:
- Less than 15 mins
- Tools:
- Nutdriver
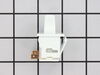
Broken elbow on icemaker water fill tube.
Removed 2 screws holding water fill tube to rear of refrigerator and pulled out, matched old part with new to make sure of proper match. Guide new fill tube thru hole, making sure it is aligned with slot in ice cube tray on inside of freezer. Install new plastic line from water pump outlet to water fill tube, check for leaks, job done.
Was this instruction helpful to you?
Thank you for voting!
- Customer:
- Michael from Churchville, NY
- Parts Used:
- 482731
- Difficulty Level:
- Easy
- Total Repair Time:
- 15 - 30 mins
- Tools:
- Nutdriver, Screw drivers
Unit very noisy and freezer too warm
First I removed the racks in the freezer. The rack supports on the sides lift off without tools. The evaporator cover is at the back of the freezer. 4 phillips head screws. The cover lifts up then forward to expose the evaporator, evaporator fan and duct. The duct is held by 3 hex head screws. The evaporator fan is attached to the duct wi
... Read more
th a wiring pigtail to a plug. Unplug the fan and remove the duct. The fan is held by 2 hexhead screws. The new fan is put in place and assembly is simply the reverse of disassembly. The unit is quiet and cools properly now. The new part fit perfectly.
Read less
Was this instruction helpful to you?
Thank you for voting!