



Models
>
1069532512
1069532512 Kenmore Refrigerator
Jump to:
Find Part by Name
Keep searches simple, eg. "belt" or "pump".
Keep searches simple, eg. "belt" or "pump".
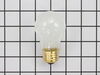
$19.75
This is a genuine OEM 40-Watt replacement light bulb that is compatible with various types of appliances. It has a frosted glass bulb with a standard metal socket base, making it easy to screw and uns...
In Stock
Order now and your part arrives by Sep 28
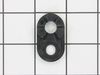
$9.79
This is a refrigerator or freezer lower door closing cam. This part includes the door cam only, but you will need a new mounting screw to complete this repair, and it is sold separately. Door cams are...
In Stock
Order now and your part arrives by Sep 28
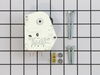
$35.34
The defrost timer works on a predetermined schedule, to alternate between the cooling cycle and the defrost heater in your freezer. When the heating circuit is activated, it melts any ice that has for...
In Stock
Order now and your part arrives by Sep 28
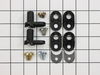
$22.91
This door closing cam kit is intended for use with the bottom of refrigerator and freezer door hinges. The cam helps with the closing of the doors and to keep them slightly in position when opened.
In Stock
Order now and your part arrives by Sep 28
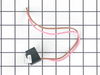
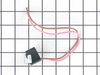
The bi-metal defrost thermostat is attached to the evaporator, and its purpose is to protect the evaporator from overheating when the defrost cycle is running. If there is frost building up in your fr...
In Stock
Order now and your part arrives by Sep 28
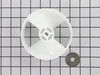
In Stock
Order now and your part arrives by Sep 28
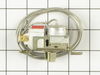
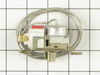
This genuine OEM part is a thermostat assembly for your fridge. This part acts as a sensor to detect temperature changes in the evaporator. When the defrost cycle is running and the ice has melted, th...
In Stock
Order now and your part arrives by Sep 28
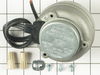
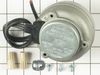
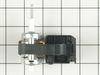
This condenser fan motor is used with frost-free refrigerators with a condenser coil. When the compressor runs, so does this fan, circulating air through the refrigerator grille, cooling the compresso...
In Stock
Order now and your part arrives by Sep 28
$26.19
This kit contains two options - One that is a push and turn and the other that is a screw in.
In Stock
Order now and your part arrives by Sep 28
In Stock
Order now and your part arrives by Sep 28
$21.82
This is a screw and it is made for multiple appliances in your home. This model is called a sheet metal screw because it has sharp points, and the threads are closer together. This screw is designed t...
In Stock
Order now and your part arrives by Sep 28
In Stock
Order now and your part arrives by Sep 28
Common Problems and Symptoms for 1069532512
Viewing 21 of 21Door won’t open or close
Fixed by these parts
How to fix it
Fridge too warm
Fixed by these parts
How to fix it
Freezer section too warm
Fixed by these parts
How to fix it
Noisy
Fixed by these parts
How to fix it
Freezer not defrosting
Fixed by these parts
How to fix it
Will Not Start
Fixed by these parts
How to fix it
Ice maker won’t dispense ice
Fixed by these parts
How to fix it
Not dispensing water
Fixed by these parts
How to fix it
Fridge and Freezer are too warm
Fixed by these parts
How to fix it
Light not working
Fixed by these parts
How to fix it
Leaking
Fixed by these parts
How to fix it
Fridge too cold
Fixed by these parts
How to fix it
Fridge runs too long
Fixed by these parts
How to fix it
Clicking sound
Fixed by these parts
How to fix it
Freezer too cold
Fixed by these parts
How to fix it
Door Sweating
Fixed by these parts
How to fix it
Too warm
Fixed by these parts
How to fix it
Frost buildup
Fixed by these parts
How to fix it
Ice maker not making ice
Fixed by these parts
How to fix it
Ice maker dispenses too little ice
Fixed by these parts
How to fix it
Won’t start
Fixed by these parts
How to fix it




Keep searches simple. Use keywords, e.g. "leaking", "pump", "broken" or "fit".
- Customer:
- Steve earney from Brooks, GA
- Parts Used:
- WP2198202
- Difficulty Level:
- Really Easy
- Total Repair Time:
- 30 - 60 mins
- Tools:
- Nutdriver, Pliers, Screw drivers
inconsistent compressor and condensor fan operation
Compressor start relay would cycle several times before compressor would come on. Replaced start relay and defrost timer assy. Operated more consistently however not completely reliable. Ice would begin to melt. Noticed that if you would cycle the temperature control the compressor would start again and operate for several hours then n
... Read more
ot cycle again. Jumpered temp control and operation was continuous and reliable. Replaced cold control thermostat. Operation now normal. Suspect high resistance in switch caused start relay and timer contacts to arc. Small amount of carbon noticed under temp control...
Read less
Was this instruction helpful to you?
Thank you for voting!
- Customer:
- john from seaford, VA
- Parts Used:
- 4388736
- Difficulty Level:
- Easy
- Total Repair Time:
- 15 - 30 mins
- Tools:
- Nutdriver, Pliers, Screw drivers, Socket set
Plastic bits dispensed from Ice Dispenser in Door
Removed Ice bin from Fridge
Removed all bolts on bin with nut driver...about six
Removed housing...be careful with spring on crusher/cube control rod
Removed C clamp on end of auger with small slotted screw driver and needle nose pliers.
Removed plastic nut on end of auger shaft
Remov ... Read more ed Ice crusher jaws and laid them out in the correct order
Removed Ice propeller and installed new part
Put back together in opposite order
Easy
Removed all bolts on bin with nut driver...about six
Removed housing...be careful with spring on crusher/cube control rod
Removed C clamp on end of auger with small slotted screw driver and needle nose pliers.
Removed plastic nut on end of auger shaft
Remov ... Read more ed Ice crusher jaws and laid them out in the correct order
Removed Ice propeller and installed new part
Put back together in opposite order
Easy
Read less
Was this instruction helpful to you?
Thank you for voting!
- Customer:
- Tom from Franklin, WI
- Parts Used:
- 833697
- Difficulty Level:
- A Bit Difficult
- Total Repair Time:
- 15 - 30 mins
- Tools:
- Nutdriver, Pliers
Sometimes the condenser fan would start causing the refrigerator to overheat.
Unplug the appliance.
Removed the screws holding the back panel.
Removed the fan blade.
removed 3 screws holding the condenser fan.
Remove the 3 metal brackets attached to the fan.
(First note which studs the brackets are attached to. Attach the 3 metal brackets to the new fan. (New screws were supplied)
Cut ... Read more and strip the wire about two inches from the fan.
Cut and strip the new wire. I cut the new wire in half (about 6 inches.) Connect the two wires, twist and used 2 wire nuts. Tie wrap the wire to the wire harness. Mount the new fan (three screws)
Screw the back panel back on.
Mount the new
Removed the screws holding the back panel.
Removed the fan blade.
removed 3 screws holding the condenser fan.
Remove the 3 metal brackets attached to the fan.
(First note which studs the brackets are attached to. Attach the 3 metal brackets to the new fan. (New screws were supplied)
Cut ... Read more and strip the wire about two inches from the fan.
Cut and strip the new wire. I cut the new wire in half (about 6 inches.) Connect the two wires, twist and used 2 wire nuts. Tie wrap the wire to the wire harness. Mount the new fan (three screws)
Screw the back panel back on.
Mount the new
Read less
Was this instruction helpful to you?
Thank you for voting!